GETTING STARTED

ADOBE ILLUSTRATOR

Download our ADOBE ILLUSTRATOR BRUSHES + RESOURCES to Follow Along with our Tutorials or use them with Your Own Vector Artwork.

TUTORIALS: Our Adobe Illustrator Tutorials will focus on the core areas of your workflow: building, editing, and coloring. LEARNING TARGET (1): Understand the Building Tools and Options. LEARNING TARGET (2): Understand Line Variation along with Live and Expanded Editing Tools. LEARNING TARGET (3): Understand Color, Values, and Gradients using Advanced Coloring Techniques.
BEGINNER GUIDES: Many of our tutorials will follow an easy process for creating artwork in Adobe Illustrator. If you are new to Adobe Illustrator, start with Beginner Guides or Primary Building Tools.  Learning Target: Understand the Primary Building Tools and Options in Adobe Illustrator.
DOWNLOAD RESOURCES: In our Beginner Tutorials and YouTube Playlists, I will be using Resource Images, Brush Libraries, and Color Swatches to create my Artwork. LEARNING TARGET: Download Resource Images, Brush Libraries, and Color Swatches for your own Artwork and Designs. 
ILLUSTRATOR TUTORIALS: Focus on the Sequence of Events as it relates to building a Workflow. I recommend establishing an "Initial Workflow" based on ease of use. Learning Target: Apply the Building Tools, Editing Options, and Advanced Coloring Techniques in Adobe Illustrator.
ILLUSTRATOR TUTORIALS: Tutorials and Playlists will focus on Building Tools, Applying Brushes, Editing Options, and Advanced Coloring Techniques in Adobe Illustrator. Learning Target: Apply the Building, Editing, and Coloring Tools in Adobe Illustrator.
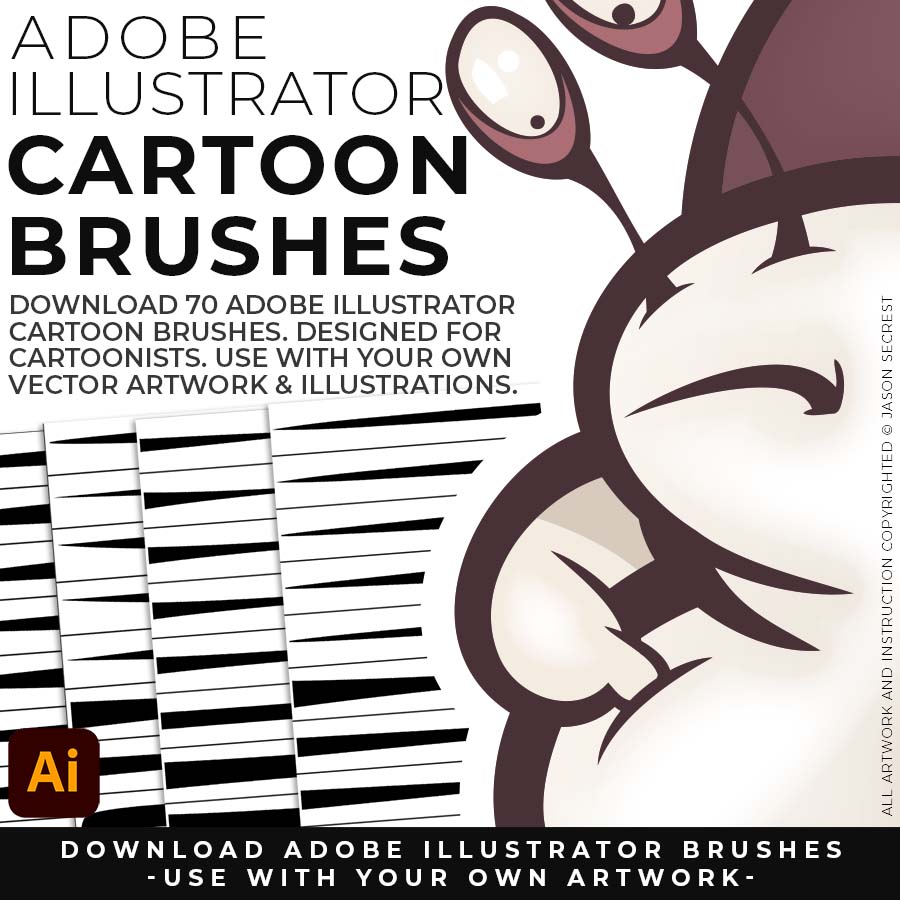
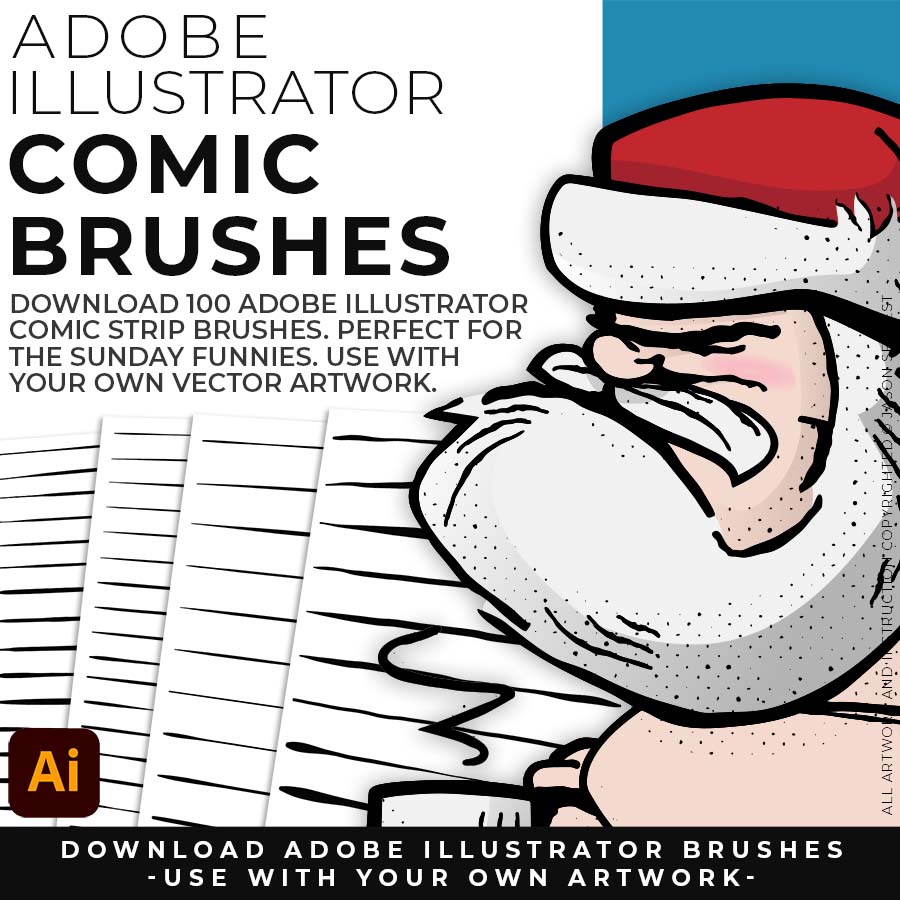
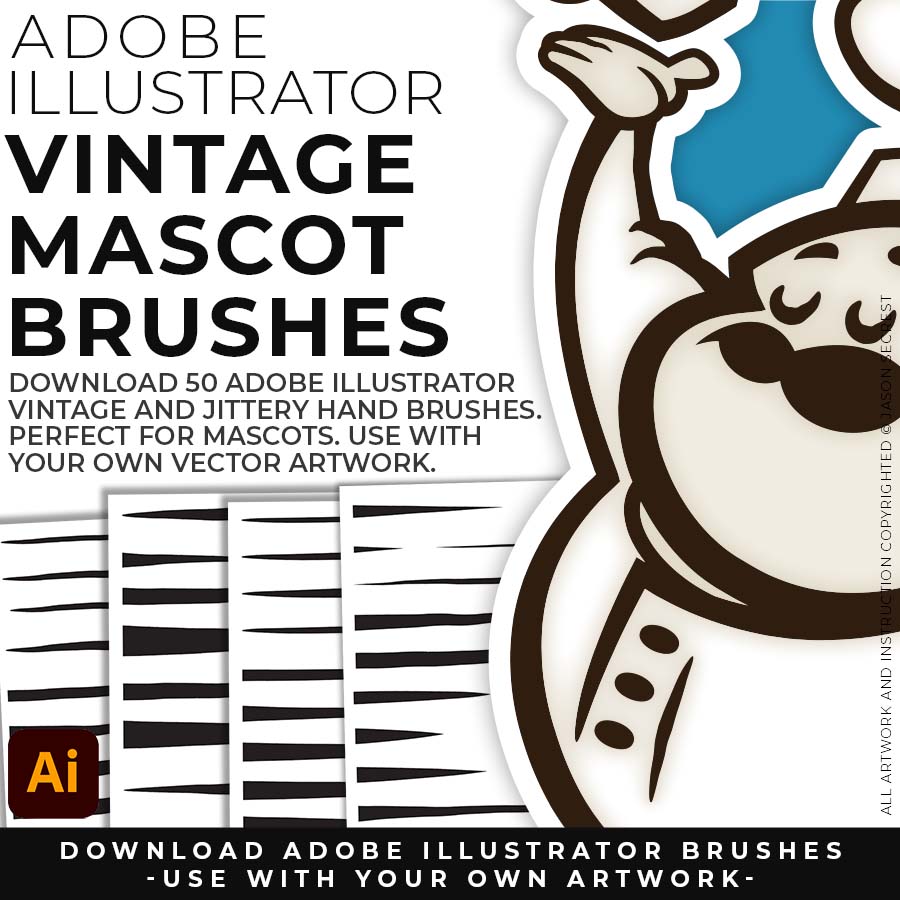
DOWNLOAD BRUSHES. Many of you are jumping over from YouTube looking to download our Adobe Illustrator Brush Libraries. Digital Downloads will come to you through our friends at Teachable. Brush Libraries include our 70 Cartoon, 100 Comic Strip, and 50 Vintage Mascot Brushes.
DIGITAL DOWNLOADS. Many of you are jumping over from YouTube looking to download our Adobe Illustrator Brushes and Resource Folders. Digital Downloads will come through our friends at Teachable. Download Adobe Illustrator Brush Libraries, T-Shirt Textures, or Resource Bundles.
RESOURCE GUIDES. Digital Downloads will come as a Zipped Folder. Once you have Downloaded and Extracted the Resource Folders, they are ready to be used in Adobe Illustrator. Follow along with our Resource Guides and Tutorials to learn how to Apply Brushes + Halftones + Textures.
BEGINNER: In our Beginner Guides and Tutorials, you will see me give Prompts and Learning Targets. These directions will simplify the process of learning Adobe Illustrator. LEARNING TARGET: Understand the Primary Building Tools and Options in Adobe Illustrator.
ADVANCED: As I am creating my artwork, pay attention to the Sequence of Events, Resources, and Tool Options as it relates to building a "Workflow." LEARNING TARGET: Apply Building, Variation, Editing, and Advanced Color Techniques to your own Artwork.
Image

PRIMARY BUILDING: Understand and Apply the different Building Tools in Adobe Illustrator.  VIEW BUILDING TUTORIALS

    Image

    VARIATION + EDITING: Understand and Apply Live and Expanded Editing Tools in Adobe Illustrator. VIEW EDITING TUTORIALS

      Image

      ADVANCED COLORING: Understand and Apply Live Paint and Advanced Coloring Techniques in Adobe Illustrator. VIEW COLOR TUTORIALS

        Image

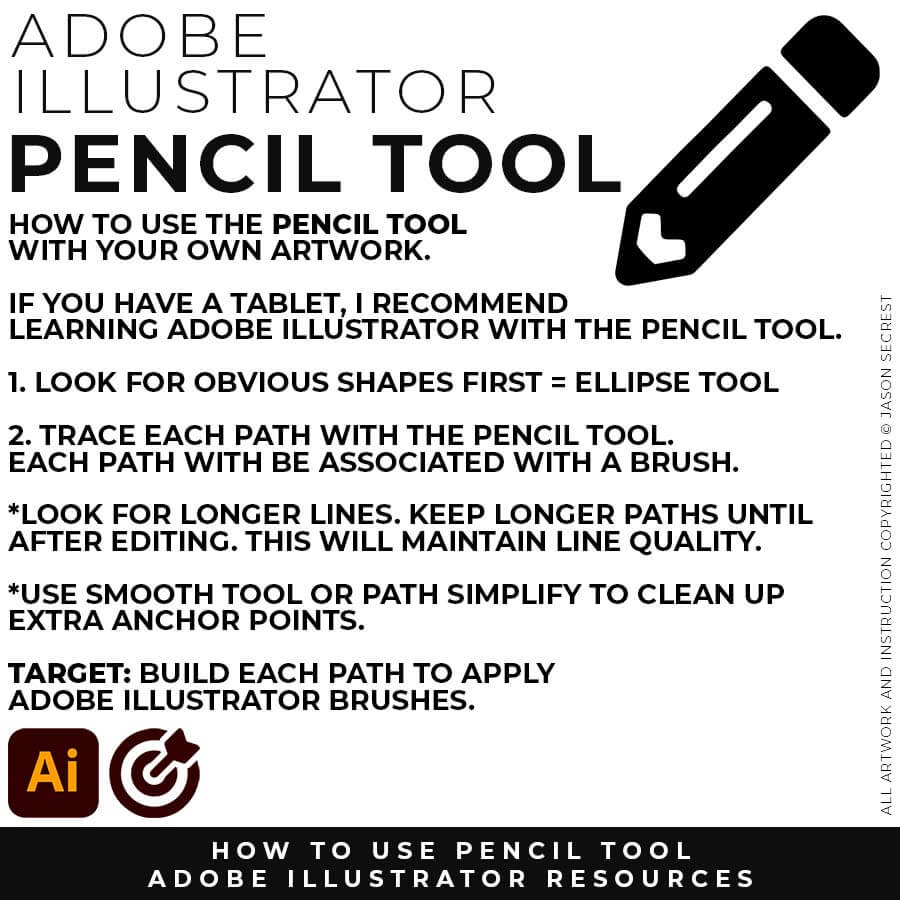
        (PENCIL TOOL): Many of you are looking to use your Tablet with Adobe Illustrator. I am going to recommend breaking down your current tablet workflow into multiple steps. I do see a lot of mistakes when people try to combine too many steps all at once with their new tablets. 

          Image

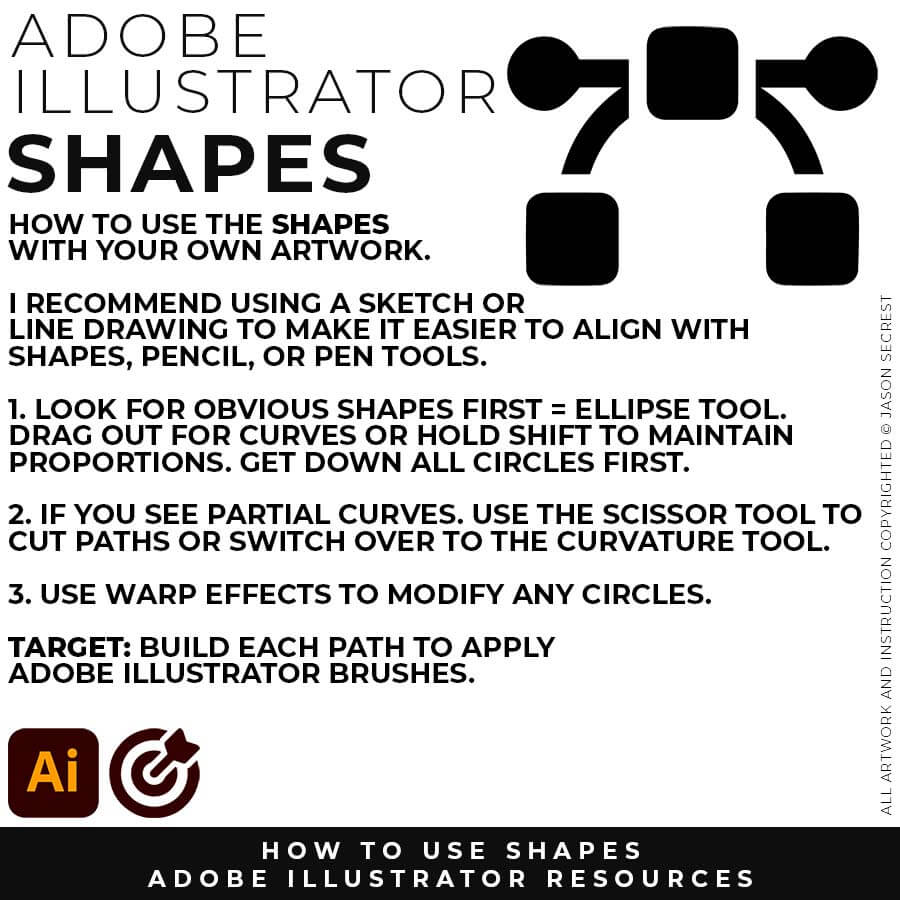
          (ELLIPSE TOOL): A good place to start if you are new to Adobe Illustrator is our Beginner Guide (Shapes). We will be going through Building with Shapes, Align Panel, Pathfinder, and Basic Color Fills. There are Beginner Guides for the Pen Tool and Tablet if you are new to the website or Adobe Illustrator. 

            Image

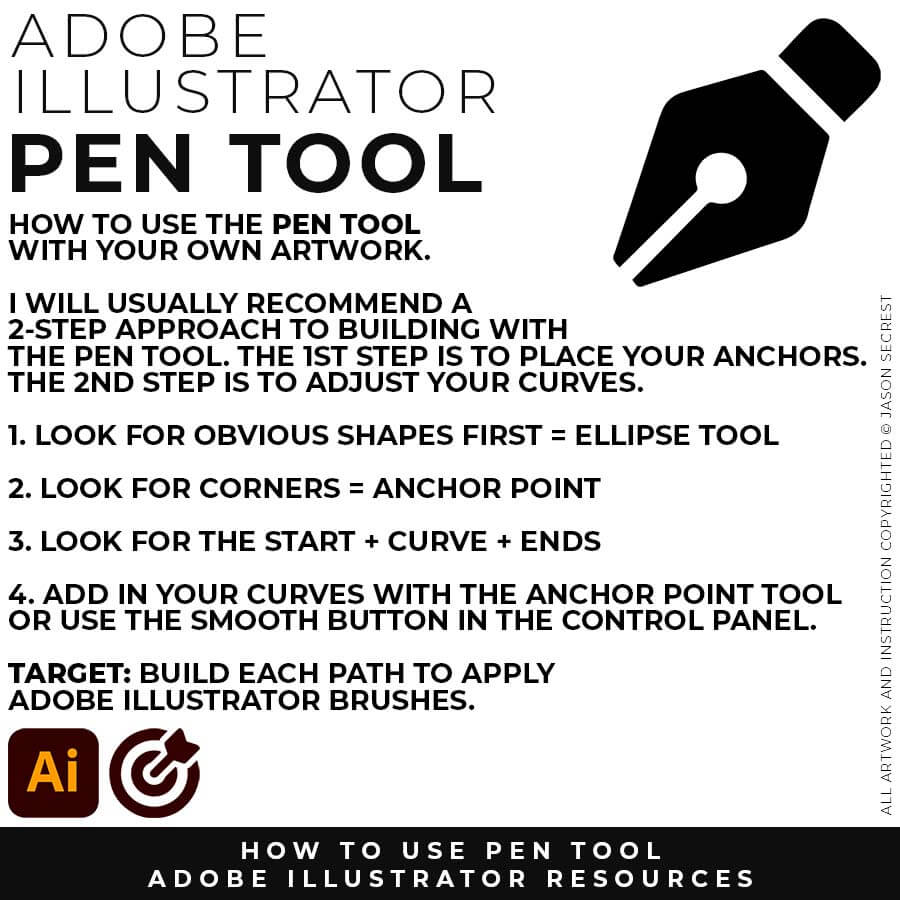
            (PEN TOOL): If you are frustrated with the Pen Tool, a simple tip is to break down the process into 2 Steps. The first step is to just apply Anchor Points to the start-curve-end of a line or path. The second step is to adjust the Curves with the Anchor Point Tool or Smooth Curve Button in the Control Panel. 

              Image
              STOCK PHOTOS:  Bookmark each Website for Free Stock Photos. In this example, I am creating my Ice Cream Logo. For your own artwork, type the Subject Matter into the Search Bar. I recommend finding different photo references for your own designs and characters. Download Free Stock Photos for your own Designs, Drawings, and Sketches. UNSPLASH / PEXELS / PIXABAY
              WELCOME. Welcome to our website if you are a visitor or a new subscriber. My name is Jason and I am an Illustrator and Teacher (BFA). (Nerd Alert) My Master's Degree is in Education, specifically in Curriculum and Instruction. We have (100+) Tutorials, Challenges, and Guides for you to Learn Adobe Illustrator.
              DOWNLOADS: Many of you are jumping over from YouTube looking to download our Adobe Illustrator Cartoon, Comic Strip, and Mascot Brushes. Digital Downloads will come to you through our friends at Teachable. Learning Target: Download and Extract Brush Libraries and save to your "User Defined" for quick access.
              GETTING STARTED: Our Getting Started Guides will walk you through the process of creating templates and gathering resources for your own artwork. LEARNING TARGET: Download Photo References, Brush Libraries, and Color Swatches for your own Artwork and Designs. 
              BEGINNER GUIDES: Many of our tutorials will follow an easy process for creating artwork in Adobe Illustrator. If you are new to Adobe Illustrator, start with Beginner Tutorials or Primary Building Tools.  LEARNING TARGET: Understand the Primary Building Tools and Options in Adobe Illustrator.
              ILLUSTRATOR TUTORIALS: Focus on the Sequence of Events as it relates to building a Workflow. I recommend establishing an "Initial Workflow" based on ease of use. Learning Target: Apply the Building Tools, Editing Options, and Advanced Coloring Techniques in Adobe Illustrator.
              Image
              SKETCH: For those of you looking to use a Sketch or Drawing, I will recommend a Clean Line Drawing. If you are new to Adobe Illustrator, align your Basic Design Elements (Shapes + Lines) with the Primary Building Tools. 
              Image
              PHOTO: For those of you using a Photo Reference, it's important to make sure the details are still visible after creating a template layer or adjusting the opacity. Find a Template Layer Setting where you can still see the Photo and Paths.
              Image
              TRACE: For those of you looking to use a Photo Reference, I will still recommend doing a simple Trace. A Clean Line Drawing will give you a “Traceable Path” to align with the Building Tools in Adobe Illustrator.
              Image
              New Artboards: I recommend establishing a "Building Artboard" that you can use for your own artwork. A habit that I would like you to break is treating Adobe Illustrator like Photoshop. The initial Artboard Size can be changed at any point without ruining your own artwork. Pick the size you will use most frequently to establish a routine while learning. Example: 1080px by 1080px - RGB - 300 PPI. LEARNING TARGET: Establish a "Standardized Approach" that includes Artboard Size, Resource Type, and Template Layers that will relate to your own artwork.
              Image
              Template Layer: Have your Resource Layer Selected. (It will usually be your only layer). In your Layers Panel, select the Menu in the Upper-Right Hand Corner. Drop down to Template. This will create a 50% Opacity and Lockout the Layer. Create a New Layer above to start working in Adobe Illustrator. It will give you an error message (no sign) if you try to draw on the Template Layer. LEARNING TARGET: Establish a Template Layer Setting so that you can see the Reference Image while not becoming too distracting when building in Adobe Illustrator.
              Image

              STOCK PHOTOS: As I create my artwork, pay attention to the resources used throughout the workflow. Download Free Stock Photos (Unsplash) to use as Drawing, Design, or Color References. BEGINNER: For your own artwork, I recommend starting from a Drawing, Sketch, or Traced Stock Photo. ADVANCED: Gather and organize resources within the same project folder (Stock Photos / Sketches / Thumbnails / Color Swatches). FREE RESOURCES GUIDE / RESOURCE GUIDES

              STOCK PHOTOS: As I create my artwork, pay attention to the resources used throughout the workflow. Download Free Stock Photos (Unsplash) to use as Drawing, Design, or Color References. BEGINNER: For your own artwork, I recommend starting from a Drawing, Sketch, or Traced Stock Photo. ADVANCED: Gather and organize resources within the same project folder (Stock Photos / Sketches / Thumbnails / Color Swatches). 

              RESOURCES: As I create my artwork, pay attention to the resources being used throughout the workflow. BEGINNER: For your own artwork, I recommend starting from a Drawing, Sketch, or Traced Stock Photo. ADVANCED: Gather and organize resources within the same project folder (Stock Photos / Sketches / Thumbnails / Color Swatches). 

              RESOURCES: As I create my artwork, pay attention to the resources used throughout the workflow. BEGINNER: For your own artwork, start from a Drawing, Sketch, or Traced Stock Photo. ADVANCED: I recommend gathering and organizing resources within the same project folder (Stock Photos / Sketches / Thumbnails / Color Swatches). RESOURCE GUIDES

              STOCK PHOTOS: Download Free Stock Photos (Unsplash) to use as Drawing, Design, or Color References. BEGINNER: For your own artwork, I recommend starting from a Drawing, Sketch, or Traced Stock Photo in Adobe Illustrator. ADVANCED: I recommend gathering and organizing resources within the same project folder (Stock Photos / Sketches / Thumbnails / Color Swatches). 

              RESOURCES: As I create my artwork, pay attention to the resources being used throughout the workflow. BEGINNER: Download Free Stock Photos (Unsplash) to use as Drawing, Design, or Color References. BEGINNER: For your own artwork, I recommend starting from a Drawing, Sketch, or Traced Stock Photo. ADVANCED: I recommend gathering and organizing resources within the same project folder (Stock Photos / Sketches / Thumbnails / Color Swatches). 

              REFERENCE IMAGES: For your own artwork, download Free Stock Photos (Unsplash) to use as Drawing, Design, and Color References. I recommend gathering and organizing resources within the same project folder (Stock Photos / Sketches / Thumbnails / Color Swatches).  BEGINNER/ADVANCED: For your own artwork, I recommend starting from a Drawing, Sketch, or Traced Stock Photo.

              STOCK PHOTOS: For your own artwork, I recommend downloading Free Stock Photos (Unsplash) to use as Drawing, Design, or Color References. Start from a Drawing, Sketch, or Traced Stock Photo. BEGINNER: As I create my artwork, pay attention to the resources used throughout the workflow. ADVANCED: I recommend gathering and organizing resources within the same project folder (Stock Photos / Sketches / Thumbnails / Color Swatches). 

              WELCOME. Welcome to our website if you are a visitor or a new subscriber. My name is Jason and I am an Illustrator and Teacher (BFA). (Nerd Alert) My Master's Degree is in Education, specifically in Curriculum and Instruction. We have (100+) Tutorials, Challenges, and Guides for you to Learn Adobe Illustrator.
              DOWNLOADS: Many of you are jumping over from YouTube looking to download our Adobe Illustrator Cartoon, Comic Strip, and Mascot Brushes. Digital Downloads will come to you through our friends at Teachable. Learning Target: Download and Extract Brush Libraries and save to your "User Defined" for quick access.
              GETTING STARTED: Our Getting Started Guides will walk you through the process of creating templates and gathering resources for your own artwork. LEARNING TARGET: Download Photo References, Brush Libraries, and Color Swatches for your own Artwork and Designs. 
              BEGINNER GUIDES: Many of our tutorials will follow an easy process for creating artwork in Adobe Illustrator. If you are new to Adobe Illustrator, start with Beginner Tutorials or Primary Building Tools.  LEARNING TARGET: Understand the Primary Building Tools and Options in Adobe Illustrator.
              ILLUSTRATOR TUTORIALS: Focus on the Sequence of Events as it relates to building a Workflow. I recommend establishing an "Initial Workflow" based on ease of use. Learning Target: Apply the Building Tools, Editing Options, and Advanced Coloring Techniques in Adobe Illustrator.
              Image
              SKETCH: For those of you looking to use a Sketch or Drawing, I will recommend a Clean Line Drawing. If you are new to Adobe Illustrator, align your Basic Design Elements (Shapes + Lines) with the Primary Building Tools. 
              Image
              PHOTO: For those of you using a Photo Reference, it's important to make sure the details are still visible after creating a template layer or adjusting the opacity. Find a Template Layer Setting where you can still see the Photo and Paths.
              Image
              TRACE: For those of you looking to use a Photo Reference, I will still recommend doing a simple Trace. A Clean Line Drawing will give you a “Traceable Path” to align with the Building Tools in Adobe Illustrator.
              Image
              New Artboards: I recommend establishing a "Building Artboard" that you can use for your own artwork. A habit that I would like you to break is treating Adobe Illustrator like Photoshop. The initial Artboard Size can be changed at any point without ruining your own artwork. Pick the size you will use most frequently to establish a routine while learning. Example: 1080px by 1080px - RGB - 300 PPI. LEARNING TARGET: Establish a "Standardized Approach" that includes Artboard Size, Resource Type, and Template Layers that will relate to your own artwork.
              Image
              Template Layer: Have your Resource Layer Selected. (It will usually be your only layer). In your Layers Panel, select the Menu in the Upper-Right Hand Corner. Drop down to Template. This will create a 50% Opacity and Lockout the Layer. Create a New Layer above to start working in Adobe Illustrator. It will give you an error message (no sign) if you try to draw on the Template Layer. LEARNING TARGET: Establish a Template Layer Setting so that you can see the Reference Image while not becoming too distracting when building in Adobe Illustrator.
              Image
              DRAWING TEMPLATE: I have created a Drawing Template of 2160px by 1080px in Adobe Photoshop. This will allow me to Export my Drawing or Sketch from Layers at 1080px by 1080px. I have created a Frame of 1080px by 1080px. File - Place in your Photo Reference. You can add Adjustment Layers to assist your drawings and sketches. DIGITAL: Create a New Document 2160px by 1080px. PAPER: For those of you using Paper Methods, download any Free Scanning App on your phone to digitize your paper sketches and drawings.
              WELCOME. Welcome to our website if you are a visitor or a new subscriber. My name is Jason and I am an Illustrator and Teacher (BFA). (Nerd Alert) My Master's Degree is in Education, specifically in Curriculum and Instruction. We have (100+) Tutorials, Challenges, and Guides for you to Learn Adobe Illustrator.
              DOWNLOADS: Many of you are jumping over from YouTube looking to download our Adobe Illustrator Cartoon, Comic Strip, and Mascot Brushes. Digital Downloads will come to you through our friends at Teachable. Learning Target: Download and Extract Brush Libraries and save to your "User Defined" for quick access.
              GETTING STARTED: Our Getting Started Guides will walk you through the process of creating templates and gathering resources for your own artwork. LEARNING TARGET: Download Photo References, Brush Libraries, and Color Swatches for your own Artwork and Designs. 
              BEGINNER GUIDES: Many of our tutorials will follow an easy process for creating artwork in Adobe Illustrator. If you are new to Adobe Illustrator, start with Beginner Tutorials or Primary Building Tools.  LEARNING TARGET: Understand the Primary Building Tools and Options in Adobe Illustrator.
              ILLUSTRATOR TUTORIALS: Focus on the Sequence of Events as it relates to building a Workflow. I recommend establishing an "Initial Workflow" based on ease of use. Learning Target: Apply the Building Tools, Editing Options, and Advanced Coloring Techniques in Adobe Illustrator.
              Image
              SKETCH: For those of you looking to use a Sketch or Drawing, I will recommend a Clean Line Drawing. If you are new to Adobe Illustrator, align your Basic Design Elements (Shapes + Lines) with the Primary Building Tools. 
              Image
              PHOTO: For those of you using a Photo Reference, it's important to make sure the details are still visible after creating a template layer or adjusting the opacity. Find a Template Layer Setting where you can still see the Photo and Paths.
              Image
              TRACE: For those of you looking to use a Photo Reference, I will still recommend doing a simple Trace. A Clean Line Drawing will give you a “Traceable Path” to align with the Building Tools in Adobe Illustrator.
              Image
              New Artboards: I recommend establishing a "Building Artboard" that you can use for your own artwork. A habit that I would like you to break is treating Adobe Illustrator like Photoshop. The initial Artboard Size can be changed at any point without ruining your own artwork. Pick the size you will use most frequently to establish a routine while learning. Example: 1080px by 1080px - RGB - 300 PPI. LEARNING TARGET: Establish a "Standardized Approach" that includes Artboard Size, Resource Type, and Template Layers that will relate to your own artwork.
              Image
              Template Layer: Have your Resource Layer Selected. (It will usually be your only layer). In your Layers Panel, select the Menu in the Upper-Right Hand Corner. Drop down to Template. This will create a 50% Opacity and Lockout the Layer. Create a New Layer above to start working in Adobe Illustrator. It will give you an error message (no sign) if you try to draw on the Template Layer. LEARNING TARGET: Establish a Template Layer Setting so that you can see the Reference Image while not becoming too distracting when building in Adobe Illustrator.
              Image
              DRAWING OR TRACED PHOTO: If you are a beginner to Adobe Illustrator I would try to avoid starting from a Blank Artboard, Full-Color Photo, or Super Sketchy Drawing. BEGINNER: For your own artwork, create a "Traceable Path" to align with the Building Tools in Adobe Illustrator. ADVANCED: Prepare your drawings for Specific Tools (ex. Ellipse, Pen, or Pencil) or Steps in your Workflow (ex. Building, Brushes, or Values). DRAWING GUIDE
              DRAWING OR TRACED PHOTO: The easiest starting point for Adobe Illustrator is a Clean Line Drawing or Traced Stock Photo. BEGINNER: For your own artwork, create a "Traceable Path" to align with the Building Tools in Adobe Illustrator. ADVANCED: Prepare your drawings for Specific Tools (ex. Ellipse, Pen, or Pencil) or Steps in your Workflow (ex. Building, Brushes, or Values).  
              DRAWING OR TRACED PHOTO: If you are a beginner to Adobe Illustrator I would try to avoid starting from a Blank Artboard, Full-Color Photo, or Super Sketchy Drawing. BEGINNER: For your own artwork, create a "Traceable Path" to align with the Building Tools in Adobe Illustrator. ADVANCED: Prepare your drawings for Specific Tools (ex. Ellipse, Pen, or Pencil) or Steps in your Workflow (ex. Building, Brushes, or Values).  DRAWING GUIDE / GETTING STARTED GUIDE
              DRAWING OR TRACED PHOTO: If you are new to Adobe Illustrator, it's best to avoid starting from a blank artboard, a full-color photo, or a super sketchy drawing. BEGINNER: For your own artwork, create a "Traceable Path" to align with the Building Tools in Adobe Illustrator. ADVANCED: Prepare your drawings for Specific Tools (ex. Ellipse, Pen, or Pencil) or Steps in your Workflow (ex. Building, Brushes, or Values).  
              DRAWING OR TRACED PHOTO: The easiest starting point for Adobe Illustrator is a Clean Line Drawing or Traced Stock Photo. BEGINNER: Avoid starting from a Blank Artboard, Full-Color Photo, or Super Sketchy Rough Draft. BEGINNER: For your own artwork, create a "Traceable Path" to align with the Building Tools in Adobe Illustrator. ADVANCED: Prepare your drawings for Specific Tools (ex. Ellipse, Pen, or Pencil) or Steps in your Workflow (ex. Building, Brushes, or Values).
              Image
              EXPORTING FROM LAYERS: When done with your Sketches, Drawings, or Traced Stock Photos, I recommend Exporting from the Layers Panel. Select All of your Drawing Layers. Click on Export As from the Layers Panel Menu. This will Export All of your Drawing Layers.
              WELCOME. Welcome to our website if you are a visitor or a new subscriber. My name is Jason and I am an Illustrator and Teacher (BFA). (Nerd Alert) My Master's Degree is in Education, specifically in Curriculum and Instruction. We have (100+) Tutorials, Challenges, and Guides for you to Learn Adobe Illustrator.
              DOWNLOADS: Many of you are jumping over from YouTube looking to download our Adobe Illustrator Cartoon, Comic Strip, and Mascot Brushes. Digital Downloads will come to you through our friends at Teachable. Learning Target: Download and Extract Brush Libraries and save to your "User Defined" for quick access.
              GETTING STARTED: Our Getting Started Guides will walk you through the process of creating templates and gathering resources for your own artwork. LEARNING TARGET: Download Photo References, Brush Libraries, and Color Swatches for your own Artwork and Designs. 
              BEGINNER GUIDES: Many of our tutorials will follow an easy process for creating artwork in Adobe Illustrator. If you are new to Adobe Illustrator, start with Beginner Tutorials or Primary Building Tools.  LEARNING TARGET: Understand the Primary Building Tools and Options in Adobe Illustrator.
              ILLUSTRATOR TUTORIALS: Focus on the Sequence of Events as it relates to building a Workflow. I recommend establishing an "Initial Workflow" based on ease of use. Learning Target: Apply the Building Tools, Editing Options, and Advanced Coloring Techniques in Adobe Illustrator.
              Image
              SKETCH: For those of you looking to use a Sketch or Drawing, I will recommend a Clean Line Drawing. If you are new to Adobe Illustrator, align your Basic Design Elements (Shapes + Lines) with the Primary Building Tools. 
              Image
              PHOTO: For those of you using a Photo Reference, it's important to make sure the details are still visible after creating a template layer or adjusting the opacity. Find a Template Layer Setting where you can still see the Photo and Paths.
              Image
              TRACE: For those of you looking to use a Photo Reference, I will still recommend doing a simple Trace. A Clean Line Drawing will give you a “Traceable Path” to align with the Building Tools in Adobe Illustrator.
              Image
              New Artboards: I recommend establishing a "Building Artboard" that you can use for your own artwork. A habit that I would like you to break is treating Adobe Illustrator like Photoshop. The initial Artboard Size can be changed at any point without ruining your own artwork. Pick the size you will use most frequently to establish a routine while learning. Example: 1080px by 1080px - RGB - 300 PPI. LEARNING TARGET: Establish a "Standardized Approach" that includes Artboard Size, Resource Type, and Template Layers that will relate to your own artwork.
              Image
              Template Layer: Have your Resource Layer Selected. (It will usually be your only layer). In your Layers Panel, select the Menu in the Upper-Right Hand Corner. Drop down to Template. This will create a 50% Opacity and Lockout the Layer. Create a New Layer above to start working in Adobe Illustrator. It will give you an error message (no sign) if you try to draw on the Template Layer. LEARNING TARGET: Establish a Template Layer Setting so that you can see the Reference Image while not becoming too distracting when building in Adobe Illustrator.
              Image
              EXPORTING VS. DRAG: I recommend breaking up your workflow into separate sketch and vector days. This will allow you to gather resources and begin sketching, drawing, or designing. Save your drawing template, and File-Place in your reference images into Adobe Illustrator. If you go straight from Sketch to Vector, drag your sketch into a working artboard (unlocked layer) in Adobe Illustrator.
              WELCOME. Welcome to our website if you are a visitor or a new subscriber. My name is Jason and I am an Illustrator and Teacher (BFA). (Nerd Alert) My Master's Degree is in Education, specifically in Curriculum and Instruction. We have (100+) Tutorials, Challenges, and Guides for you to Learn Adobe Illustrator.
              DOWNLOADS: Many of you are jumping over from YouTube looking to download our Adobe Illustrator Cartoon, Comic Strip, and Mascot Brushes. Digital Downloads will come to you through our friends at Teachable. Learning Target: Download and Extract Brush Libraries and save to your "User Defined" for quick access.
              GETTING STARTED: Our Getting Started Guides will walk you through the process of creating templates and gathering resources for your own artwork. LEARNING TARGET: Download Photo References, Brush Libraries, and Color Swatches for your own Artwork and Designs. 
              BEGINNER GUIDES: Many of our tutorials will follow an easy process for creating artwork in Adobe Illustrator. If you are new to Adobe Illustrator, start with Beginner Tutorials or Primary Building Tools.  LEARNING TARGET: Understand the Primary Building Tools and Options in Adobe Illustrator.
              ILLUSTRATOR TUTORIALS: Focus on the Sequence of Events as it relates to building a Workflow. I recommend establishing an "Initial Workflow" based on ease of use. Learning Target: Apply the Building Tools, Editing Options, and Advanced Coloring Techniques in Adobe Illustrator.
              Image
              SKETCH: For those of you looking to use a Sketch or Drawing, I will recommend a Clean Line Drawing. If you are new to Adobe Illustrator, align your Basic Design Elements (Shapes + Lines) with the Primary Building Tools. 
              Image
              PHOTO: For those of you using a Photo Reference, it's important to make sure the details are still visible after creating a template layer or adjusting the opacity. Find a Template Layer Setting where you can still see the Photo and Paths.
              Image
              TRACE: For those of you looking to use a Photo Reference, I will still recommend doing a simple Trace. A Clean Line Drawing will give you a “Traceable Path” to align with the Building Tools in Adobe Illustrator.
              Image
              New Artboards: I recommend establishing a "Building Artboard" that you can use for your own artwork. A habit that I would like you to break is treating Adobe Illustrator like Photoshop. The initial Artboard Size can be changed at any point without ruining your own artwork. Pick the size you will use most frequently to establish a routine while learning. Example: 1080px by 1080px - RGB - 300 PPI. LEARNING TARGET: Establish a "Standardized Approach" that includes Artboard Size, Resource Type, and Template Layers that will relate to your own artwork.
              Image
              Template Layer: Have your Resource Layer Selected. (It will usually be your only layer). In your Layers Panel, select the Menu in the Upper-Right Hand Corner. Drop down to Template. This will create a 50% Opacity and Lockout the Layer. Create a New Layer above to start working in Adobe Illustrator. It will give you an error message (no sign) if you try to draw on the Template Layer. LEARNING TARGET: Establish a Template Layer Setting so that you can see the Reference Image while not becoming too distracting when building in Adobe Illustrator.
              Image
              Image
              ARTBOARDS: I will recommend a (1080px by 1080px, 300PPI, RGB) as your Initial or Base Artboard Size. The Initial Artboard Size can be changed at any point without ruining your own artwork. Use the Properties Panel to Scale Artwork and Artboards. LEARNING TARGET: Create a "Building Template" that includes Artboard Size, Resource Images, and Template Layers. LEARNING TARGET: For your own artwork, pick a "Building" Artboard Size you can use for your Website and Social Media Postings. Example: Instagram uses 1080px as its base size to modify for Landscape, Square, or Portrait. 
              ARTBOARDS: I will recommend a (1080px by 1080px, 300PPI, RGB) as your Initial or Base Artboard Size. The Initial Artboard Size can be changed at any point without ruining your own artwork. Use the Properties Panel to Scale Artwork and Artboards. BEGINNER: Create a "Building Template" that includes Artboard Size, Resource Images, and Template Layers. ADVANCED: For your own artwork, pick a "Building" Artboard Size you can use for your Website and Social Media Postings. Example: Instagram uses 1080px as its base size to modify for Landscape, Square, or Portrait. 
              Image
              GENERAL PREFERENCES: All of our initial preferences are designed to gain more control over what you are clicking on. The more you can zoom in and see your anchors and handles the better. You can adjust the size of your Anchors and Handles under Selection and Anchor Display. Under your General Settings, make sure that Disable Auto Add/Delete is Selected.
              Image
              SELECTION TOOLS: The Direct Selection Tool can grab and adjust the Anchors, Handles, and Paths. It is worth having your Smart Guides Path Labels Turned On so you know what the tool is selecting before dragging. The Selection Tool will move and select objects. I like using the Bounding Box for my Transform Tools, Turn On under View. I recommend this for Quick Scaling.
              Image
              TEMPLATE LAYER: File-Place in your Resource Image (Traced Stock Photo, Drawing, or Sketch). Scale to Fit Artboard Size. In your Layers Panel, select the Menu in the Upper-Right Hand Corner. Drop down to Template. This will create a 50% Opacity and Lockout the Layer. Create a New Layer above to start working in Adobe Illustrator. LEARNING TARGET (1): Create a Template Layer. Add a new Layer above for "Building." 
              Image

              ELLIPSE TOOL: A good place to start if you are new to Adobe Illustrator is our Beginner Guide (Shapes). We will be going through Building with Shapes, Align Panel, Pathfinder, and Basic Color Fills. TUTORIAL 1, TUTORIAL 2, TUTORIAL 3

                Image

                PENCIL TOOL: Many of you are looking to use your Tablet with Adobe Illustrator and are potentially on our Pug Challenge. I am going to highly recommend using the Pencil Tool as your Primary Building Tool using a Tablet. TUTORIAL 1, TUTORIAL 2

                  Image

                  PEN TOOL: If you are frustrated with the Pen Tool, a simple tip is to break down the process into 2 Steps for Anchor Points and Curves. The first step is to apply Anchor Points to the start-curve-end of a line. TUTORIAL 1, TUTORIAL 2, TUTORIAL 3

                    Image

                    (PENCIL TOOL): Many of you are looking to use your Tablet with Adobe Illustrator. I am going to recommend breaking down your current tablet workflow into multiple steps. I do see a lot of mistakes when people try to combine too many steps all at once with their new tablets. 

                      Image

                      (ELLIPSE TOOL): A good place to start if you are new to Adobe Illustrator is our Beginner Guide (Shapes). We will be going through Building with Shapes, Align Panel, Pathfinder, and Basic Color Fills. There are Beginner Guides for the Pen Tool and Tablet if you are new to the website or Adobe Illustrator. 

                        Image

                        (PEN TOOL): If you are frustrated with the Pen Tool, a simple tip is to break down the process into 2 Steps. The first step is to just apply Anchor Points to the start-curve-end of a line or path. The second step is to adjust the Curves with the Anchor Point Tool or Smooth Curve Button in the Control Panel. 

                          Image
                          Image
                          PRIMARY BUILDING: As I create my artwork, I notice I am aligning the tools with the shapes and lines within my sketch or drawing. Many of you will use Shape, Pencil, and Pen Tools as your Primary Building Tools. LEARNING TARGET (1): Understand the Building Tools and Options in Adobe Illustrator. LEARNING TARGET (2): Align the Building Tools (Ellipse, Pen, and Curvature Tools) to the Design Elements (Shapes, Lines, and Curves) in your artwork. BEGINNER GUIDES / ILLUSTRATOR TUTORIALS 
                          PRIMARY BUILDING: As I create my artwork, notice I am aligning the Building Tools to the Shapes and Lines within my Sketch or Drawing. Many of you will be using Shape, Pencil, and Pen Tools as your Primary Building Tools. BEGINNER: Understand the Building Tools and Options in Adobe Illustrator. ADVANCED: Align the Building Tools (Ellipse, Pen, and Curvature Tools) to the Design Elements (Shapes, Lines, and Curves) in your own drawing or sketch. 
                          PRIMARY BUILDING: As I create my artwork, notice I am aligning the Building Tools to the Shapes and Lines within my Sketch or Drawing. Many of you will be using Shape, Pencil, and Pen Tools as your Primary Building Tools. BEGINNER: Understand the Building Tools and Options in Adobe Illustrator. ADVANCED: Align the Building Tools (Ellipse, Pen, and Curvature Tools) to the Design Elements (Shapes, Lines, and Curves) in your own drawing or sketch.
                          PRIMARY BUILDING: As I create my artwork, notice I am aligning the Building Tools to the Shapes and Lines within my Sketch or Drawing. Many of you will be using Shape, Pencil, and Pen Tools as your Primary Building Tools. BEGINNER: Understand the Building Tools and Options in Adobe Illustrator. ADVANCED: Align the Building Tools (Ellipse, Pen, and Curvature Tools) to the Design Elements (Shapes, Lines, and Curves) in your own drawing or sketch. BEGINNER GUIDES / ILLUSTRATOR TUTORIALS / RESOURCE GUIDES
                          Image
                          Image
                          PRIMARY BUILDING TOOLS: Many of you will be bouncing from the Ellipse Tool for Shapes and the Pen or Pencil Tool for your Linework. Once you know the Primary Building Tools you can start prepping your own sketches and drawings directly for Adobe Illustrator. CHECKLIST: For your own artwork, use the most obvious Primary Building Tool to lay down your initial paths and objects. 
                          beginner adobe illustrator tutorial whale
                          PENCIL TOOL: Many of you are looking to use your Tablet with Adobe Illustrator. I am going to recommend breaking down your current tablet workflow into multiple steps. I do see a lot of mistakes when people try to combine too many steps all at once with their new tablets. 
                          beginner adobe illustrator tutorial pug
                          ELLIPSE TOOL: A good place to start if you are new to Adobe Illustrator is our Beginner Guide (Shapes). We will be going through Building with Shapes, Align Panel, Pathfinder, and Basic Color Fills. There are Beginner Guides for the Pen Tool and Tablet if you are new to the website or Adobe Illustrator. 
                          beginner adobe illustrator tutorial pug
                          PEN TOOL: If you are frustrated with the Pen Tool, a simple tip is to break down the process into 2 Steps. The first step is to just apply Anchor Points to the start-curve-end of a line or path. The second step is to adjust the Curves with the Anchor Point Tool or Smooth Curve Button in the Control Panel. 
                          Image
                          Image
                          DIGITAL DOWNLOADS: Many of you are jumping over from YouTube looking to download our Adobe Illustrator Brushes and Resource Folders. Once you have downloaded and extracted the folders, Digital Downloads are ready to use in Adobe Illustrator. Start with our Resource Guides, Illustrator Tutorials, or YouTube Playlists to understand how to apply resources in Adobe Illustrator. BRUSH LIBRARIES / COMIC HALFTONES / T-SHIRT TEXTURES / RESOURCE BUNDLE
                          DIGITAL DOWNLOADS: Many of you are jumping over from YouTube looking to download our Adobe Illustrator Brushes and Resource Folders. Once you have downloaded and extracted the folders, Digital Downloads are ready to use in Adobe Illustrator. Start with our Resource Guides, Illustrator Tutorials, or YouTube Playlists to understand how to apply resources in Adobe Illustrator. BRUSH LIBRARIES / COMIC HALFTONES / T-SHIRT TEXTURES / RESOURCE BUNDLE
                          ILLUSTRATOR

                          DIGITAL DOWNLOADS
                          DOWNLOAD

                          RESOURCE BUNDLE

                          DOWNLOAD 600 RESOURCES
                          30% OFF (SAVE $60)
                          Image
                          200 ADOBE ILLUSTRATOR BRUSHES. Brush Libraries are specifically designed for Illustrators and Cartoonists to speed up their workflow. Brush Libraries are compatible with Adobe Illustrator CC through CS. Mac or PC. Brush Libraries include 70 Cartoon, 100 Comic Strip, and 50 Vintage Mascot Brushes.
                          Image
                          70 ADOBE ILLUSTRATOR HALFTONES. Halftone Patterns Fills are designed for easy application even if you are new to Adobe Illustrator. Halftone Fills behave the same as a Color Swatch so you can apply them quickly using the Blob Brush, Live Paint, or Basic Fills. Halftones include 70 Comic Strip Halftone Pattern Fills.
                          Image
                          400 ADOBE ILLUSTRATOR BMP TEXTURES. BMP Textures are extremely easy to use even if you are a beginner to Adobe Illustrator. Use BMP Textures along with Opacity Masks in the Transparency Panel for T-Shirt Distressing. BMP Textures include 145 Cracks, 120 Grunge, 75 Paper, and 77 Paint Textures.
                          Image
                          200 ADOBE ILLUSTRATOR BRUSHES. Brush Libraries are specifically designed for Illustrators and Cartoonists to speed up their workflow. Brush Libraries are compatible with Adobe Illustrator CC through CS. Mac or PC. Brush Libraries include 70 Cartoon, 100 Comic Strip, and 50 Vintage Mascot Brushes.
                          Image
                          70 ADOBE ILLUSTRATOR HALFTONES. Halftone Patterns Fills are designed for easy application even if you are new to Adobe Illustrator. Halftone Fills behave the same as a Color Swatch so you can apply them quickly using the Blob Brush, Live Paint, or Basic Fills. Halftones include 70 Comic Strip Halftone Pattern Fills.
                          Image
                          400 ADOBE ILLUSTRATOR BMP TEXTURES. BMP Textures are extremely easy to use even if you are a beginner to Adobe Illustrator. Use BMP Textures along with Opacity Masks in the Transparency Panel for T-Shirt Distressing. BMP Textures include 145 Cracks, 120 Grunge, 75 Paper, and 77 Paint Textures.
                          ADOBE ILLUSTRATOR

                          RESOURCE BUNDLE

                          RESOURCE BUNDLE

                          Image
                          200 ADOBE ILLUSTRATOR BRUSHES. Brush Libraries are specifically designed for Illustrators and Cartoonists to speed up their workflow. Brush Libraries are compatible with Adobe Illustrator CC through CS. Mac or PC. Brush Libraries include 70 Cartoon, 100 Comic Strip, and 50 Vintage Mascot Brushes.
                          Image
                          70 ADOBE ILLUSTRATOR HALFTONES. Halftone Patterns Fills are designed for easy application even if you are new to Adobe Illustrator. Halftone Fills behave the same as a Color Swatch so you can apply them quickly using the Blob Brush, Live Paint, or Basic Fills. Halftones include 70 Comic Strip Halftone Pattern Fills.
                          Image
                          400 ADOBE ILLUSTRATOR BMP TEXTURES. BMP Textures are extremely easy to use even if you are a beginner to Adobe Illustrator. Use BMP Textures along with Opacity Masks in the Transparency Panel for T-Shirt Distressing. BMP Textures include 145 Cracks, 120 Grunge, 75 Paper, and 77 Paint Textures.
                          Image
                          200 ADOBE ILLUSTRATOR BRUSHES. Brush Libraries are specifically designed for Illustrators and Cartoonists to speed up their workflow. Brush Libraries are compatible with Adobe Illustrator CC through CS. Mac or PC. Brush Libraries include 70 Cartoon, 100 Comic Strip, and 50 Vintage Mascot Brushes.
                          Image
                          70 ADOBE ILLUSTRATOR HALFTONES. Halftone Patterns Fills are designed for easy application even if you are new to Adobe Illustrator. Halftone Fills behave the same as a Color Swatch so you can apply them quickly using the Blob Brush, Live Paint, or Basic Fills. Halftones include 70 Comic Strip Halftone Pattern Fills.
                          Image
                          400 ADOBE ILLUSTRATOR BMP TEXTURES. BMP Textures are extremely easy to use even if you are a beginner to Adobe Illustrator. Use BMP Textures along with Opacity Masks in the Transparency Panel for T-Shirt Distressing. BMP Textures include 145 Cracks, 120 Grunge, 75 Paper, and 77 Paint Textures.
                          ADOBE ILLUSTRATOR

                          RESOURCE BUNDLE

                          RESOURCE BUNDLE

                          DIGITAL DOWNLOADS: Many of you are jumping over from YouTube looking to download our Adobe Illustrator Brushes and Resource Folders. Once you have downloaded and extracted the folders, Digital Downloads are ready to use in Adobe Illustrator. Start with our Resource Guides, Illustrator Tutorials, or YouTube Playlists to understand how to apply resources in Adobe Illustrator. BRUSH LIBRARIES / COMIC HALFTONES / T-SHIRT TEXTURES / RESOURCE BUNDLE
                          DIGITAL DOWNLOADS: Many of you are jumping over from YouTube looking to download our Adobe Illustrator Brushes and Resource Folders. Once you have downloaded and extracted the folders, Digital Downloads are ready to use in Adobe Illustrator. Start with our Resource Guides, Illustrator Tutorials, or YouTube Playlists to understand how to apply resources in Adobe Illustrator. BRUSH LIBRARIES / COMIC HALFTONES / T-SHIRT TEXTURES / RESOURCE BUNDLE

                          DOWNLOAD BRUSHES: Adobe Illustrator Brushes are specifically designed for Illustrators and Cartoonists to speed up their workflow. (Updated) Libraries are pressure-sensitive for those of you looking for the option to use your Tablets. Brush Libraries are compatible with Adobe Illustrator CC through CS. Mac or PC. Brush Libraries: Updated Cartoon, Comic Strip, and Vintage Mascot Brushes.

                          DOWNLOAD BRUSHES: Many of you are jumping over from YouTube looking to download our Adobe Illustrator Brushes.  Once you have downloaded and extracted the folders, Brush Libraries will be ready to use in Adobe Illustrator. Start with our Resource Guides, Illustrator Tutorials, or YouTube Playlists to understand how to apply Brush Libraries in Adobe Illustrator. (Updated) Brushes include Cartoon, Comic Strip, and Vintage Mascot Libraries.

                          BRUSH LIBRARIES: Our Brushes are specifically designed for Illustrators and Cartoonists to speed up their workflow. (Updated) Libraries are pressure-sensitive for those of you looking to use your Tablets. Apply Brushes with Pen, Pencil, Shapes, or Paintbrush Tools. Brush Libraries are compatible with Adobe Illustrator CC through CS. Mac or PC. Adobe Illustrator Brush Libraries: Updated Cartoon, Comic Strip, and Vintage Mascot Brushes.

                          beginner adobe illustrator tutorial whale
                          CARTOON BRUSHES: Cartoon Brushes are my go-to brushes for Professional Logos, Cartoons, Mascots, and Branding. Use Cartoon Illustrator Brushes with the Pen, Pencil, or Paint Brush Tools to Apply different Line Variation to your Vector Artwork. (Updated) Cartoon, Cartoon 2, and Original Cartoon Brush Libraries. 
                          beginner adobe illustrator tutorial pug
                          COMIC STRIP BRUSHES: Hand Painted + Comic Strip Brushes to get a lived in feel back into your Vector Art. Comic Strips and Hand Painted are painted based on some of my favorite artists and cartoonists. These brushes are designed to look ready for the Sunday Paper. (Updated) Comic Strip, Hand-Painted, Paintbrush, and Fine Liner Brush Libraries. 
                          beginner adobe illustrator tutorial coyote
                          MASCOT BRUSHES: Jittery Hand, Caffeinated Cartoonist + Rough Ink Brushes to Mimic Paper Bleed and Caffeine. Designed to be a little less stiff with your vector art. Use these Brush Libraries to get more of a distressed look or ink bleed back in your own Vector Artwork. (Updated) Caffeinated Cartoonist, Rough Ink, and Jittery Hand Brush Libraries. 
                          beginner adobe illustrator tutorial whale
                          70 CARTOON BRUSHES: Cartoon Brushes are my go-to brushes for Professional Logos, Cartoons, Mascots, and Branding. Use Cartoon Illustrator Brushes with the Pen, Pencil, or Paint Brush Tools to Apply different Line Variation to your Vector Artwork. (Updated) Cartoon, Cartoon 2, and Original Cartoon Brush Libraries. 
                          beginner adobe illustrator tutorial pug
                          100 COMIC STRIP BRUSHES: Hand Painted + Comic Strip Brushes to get a lived in feel back into your Vector Art. Comic Strips and Hand Painted are painted based on some of my favorite artists and cartoonists. These brushes are designed to look ready for the Sunday Paper. (Updated) Comic Strip, Hand-Painted, Paintbrush, and Fine Liner Brush Libraries. 
                          beginner adobe illustrator tutorial coyote
                          50 MASCOT BRUSHES: Jittery Hand, Caffeinated Cartoonist + Rough Ink Brushes to Mimic Paper Bleed and Caffeine. Designed to be a little less stiff with your vector art. Use these Brush Libraries to get more of a distressed look or ink bleed back in your own Vector Artwork. (Updated) Caffeinated Cartoonist, Rough Ink, and Jittery Hand Brush Libraries. 
                          beginner adobe illustrator tutorial whale
                          CARTOON BRUSHES: Cartoon Brushes are my go-to brushes for Professional Logos, Cartoons, Mascots, and Branding. Use Cartoon Illustrator Brushes with the Pen, Pencil, or Paint Brush Tools to Apply different Line Variation to your Vector Artwork. (Updated) Cartoon, Cartoon 2, and Original Cartoon Brush Libraries. 
                          beginner adobe illustrator tutorial pug
                          COMIC STRIP BRUSHES: Hand Painted + Comic Strip Brushes to get a lived in feel back into your Vector Art. Comic Strips and Hand Painted are painted based on some of my favorite artists and cartoonists. These brushes are designed to look ready for the Sunday Paper. (Updated) Comic Strip, Hand-Painted, Paintbrush, and Fine Liner Brush Libraries. 
                          beginner adobe illustrator tutorial coyote
                          MASCOT BRUSHES: Jittery Hand, Caffeinated Cartoonist + Rough Ink Brushes to Mimic Paper Bleed and Caffeine. Designed to be a little less stiff with your vector art. Use these Brush Libraries to get more of a distressed look or ink bleed back in your own Vector Artwork. (Updated) Caffeinated Cartoonist, Rough Ink, and Jittery Hand Brush Libraries. 

                          DOWNLOAD BRUSHES. Many of you are jumping over from YouTube looking to download our Adobe Illustrator Brushes and Resource Folders. Digital Downloads will come through our friends at Teachable. Once you have downloaded and extracted the Folders, Brush Libraries are ready to be used in Adobe Illustrator. Start with our Resource Guides, Illustrator Tutorials, or YouTube Playlists to understand how to apply Brush Libraries in Adobe Illustrator.

                          DIGITAL DOWNLOADS. Many of you are jumping over from YouTube looking to download our Adobe Illustrator Brushes and Resource Folders. Digital Downloads will come through our friends at Teachable. Download our Adobe Illustrator Brush Libraries, T-Shirt Textures, and Comic Halftones. BRUSH LIBRARIES / COMIC HALFTONES / T-SHIRT TEXTURES

                          beginner adobe illustrator tutorial pug
                          SAVE BRUSHES: Open All of the Brushes Libraries in Adobe Illustrator. (File - Open). Have your Brushes Panel Open. Under Window - Brushes. In the Brushes Menu, select "Save Brush Library." The Default Save Location is "User Defined." Repeat this step for each Brush Library.
                          beginner adobe illustrator tutorial whale
                          OPEN BRUSHES: Under Window - Select Brushes. In the Brushes Menu, drop down to Open Brush Library. Hover over it and select "Other Library." A Normal Open Dialogue Box will appear to select any Brush Library to use in Illustrator. Almost all Tutorials use this method. 
                          beginner adobe illustrator tutorial pug
                          DOWNLOAD BRUSHES: Many of you are jumping over from YouTube looking to download our Adobe Illustrator Brushes. Once you have downloaded and extracted the folders, Brushes are ready to be used in Adobe Illustrator. Brushes include our Cartoon, Comic Strip, and Vintage Mascot Libraries.
                          beginner adobe illustrator tutorial pug
                          SAVE BRUSHES: Open All of the Brushes Libraries in Adobe Illustrator. (File - Open). Have your Brushes Panel Open. Under Window - Brushes. In the Brushes Menu, select "Save Brush Library." The Default Save Location is "User Defined." Repeat this step for each Brush Library.
                          beginner adobe illustrator tutorial whale
                          OPEN BRUSHES: Under Window - Select Brushes. In the Brushes Menu, drop down to Open Brush Library. Hover over it and select "Other Library." A Normal Open Dialogue Box will appear to select any Brush Library to use in Illustrator. Almost all Tutorials use this method. 
                          ADOBE ILLUSTRATOR

                          BRUSH LIBRARIES

                          BRUSH LIBRARIES

                          ILLUSTRATOR

                          DIGITAL DOWNLOADS
                          DOWNLOAD

                          RESOURCE BUNDLE

                          DOWNLOAD 600 RESOURCES
                          30% OFF (SAVE $60)
                          Image
                          Image
                          PRIMARY BUILDING: Many of you will be deciding between the Pen and Pencil Tools as your Primary Building Tool in Adobe Illustrator. A Quick Assessment of your own sketch, drawing, or traced photo to look for: Obvious Shapes (Ellipse), Corners (Anchor Point), and Curves. Resource Progression: Prep your Drawings for the Building Tools.
                          SELECTION TOOLS: In Adobe Illustrator you will have 3 Selection Tools to be aware of: Selection, Direct Selection Tool, and Deselect. I want you to pay attention to the Deselect (Selection Tool + click on Empty Artboard). After applying or finishing a step, build up a routine to hit Selection Tool (V) and click your artboard.
                          APPLYING PATHS: Find the Building Tool that works the best with your sketch or that is the easiest to use based on the materials that you have (Tablet). When applying “Paths” the easiest thing is to trace your drawing or sketch (Pencil Tool). It will give you an easy frame of reference as it relates to each stroke.
                          “LIVE” EDITING: I recommend the Scissor Tool to cut Paths as an easy “Live Path” Editing Tool. Please note that the Eraser Tool will be for “Expanded Editing.” Another solution is under Object - Path - Simplify. This can get rid of some of the extra Anchor Points as you are applying with the Pencil Tool.
                          LIVE PAINT BUCKET: As I color my artwork, notice I am using Live Paint to create my Basic Fills or Flat Color Layer. Select what you want to color. Object - Live Paint - Make. Click to dump color just like in Adobe Photoshop with the Live Paint Bucket Tool. Remember to expand and ungroup when you have completed the coloring step. BEGINNER: Understand how to apply Flat Color using Live Paint Bucket. ADVANCED: For your own artwork, duplicate your Flat Color Layer for Value and Gradient Steps. Separate your Final Line by using the Magic Wand Tool to select your Edited and Expanded Brushes Layer.   
                          beginner adobe illustrator tutorial whale
                          COLOR SWATCHES: Use Color Swatches from your Library or save them from Adobe Color as an .ASE File. Open Swatch Library from the “Other Library” Option. Most Color Themes will use Hues as the Base Color. We will be using Live Paint to create our Basic Fills or Flat Color Layer.
                          beginner adobe illustrator tutorial pug
                          LIVE PAINT: Coloring will be extremely easy using Live Paint Bucket. The goal of Live Paint is to create Shapes that we can color using Fills. Once you have completed the Live Paint Group, it is important to Expand and Upgroup. We will leverage these shapes for our Values and Gradients.
                          beginner adobe illustrator tutorial pug
                          KNIFE TOOL: After using Live Paint, Expand and Ungroup. Use a Duplicated Flat Color Layer for your Value Layers. The Knife Tool will cut Shapes. I recommend cutting out all of the shapes first before deleting them. You can use this technique for Highlights, Shadows, or Cast Shadows.
                          Image
                          Image
                          COLOR SWATCHES: Use Color Swatches from your Library or save free swatches from Adobe Color as an .ASE File. Open Swatch Libraries from the “Other Library” Option. Most Color Themes will use Hues as the Base Color. We will be using Live Paint to create our Basic Fills or Flat Color Layer. LEARNING TARGET (3): Apply Color, Values, and Gradients using Advanced Coloring Techniques.
                          COLOR SWATCHES: Download Free Color Swatches (Adobe Color) to use with your own artwork and designs. I recommend starting by typing in the Subject Matter using the Explore Tab. You can also use the Extract Theme feature on Adobe Color or Canva to create a Color Theme based on your own Photo Reference. Add the Color Themes to your Library (CC) or download them as ASE files.
                          beginner adobe illustrator tutorial whale
                          COLOR SWATCHES: Use Color Swatches from your Library or save them from Adobe Color as an .ASE File. Open Swatch Library from the “Other Library” Option. Most Color Themes will use Hues as the Base Color. We will be using Live Paint to create our Basic Fills or Flat Color Layer.
                          beginner adobe illustrator tutorial pug
                          LIVE PAINT: Coloring will be extremely easy using Live Paint Bucket. The goal of Live Paint is to create Shapes that we can color using Fills. Once you have completed the Live Paint Group, it is important to Expand and Upgroup. We will leverage these shapes for our Values and Gradients.
                          beginner adobe illustrator tutorial pug
                          KNIFE TOOL: After using Live Paint, Expand and Ungroup. Use a Duplicated Flat Color Layer for your Value Layers. The Knife Tool will cut Shapes. I recommend cutting out all of the shapes first before deleting them. You can use this technique for Highlights, Shadows, or Cast Shadows.
                          Image
                          Image
                          COLOR SWATCHES: Use Color Swatches from your Library or save free swatches from Adobe Color as an .ASE File. Open Swatch Libraries from the “Other Library” Option. Most Color Themes will use Hues as the Base Color. We will be using Live Paint to create our Basic Fills or Flat Color Layer. LEARNING TARGET (3): Apply Color, Values, and Gradients using Advanced Coloring Techniques.
                          SAVING SWATCHES: If you have a CC Account, simply click Add to Library from Adobe Color. If you don't have a CC Account, download Color Swatches from Adobe Color as an ASE File.  LEARNING TARGET (1): Save or Download Free Color Swatches for your own artwork and designs.
                          beginner adobe illustrator tutorial whale
                          COLOR SWATCHES: Use Color Swatches from your Library or save them from Adobe Color as an .ASE File. Open Swatch Library from the “Other Library” Option. Most Color Themes will use Hues as the Base Color. We will be using Live Paint to create our Basic Fills or Flat Color Layer.
                          beginner adobe illustrator tutorial pug
                          LIVE PAINT: Coloring will be extremely easy using Live Paint Bucket. The goal of Live Paint is to create Shapes that we can color using Fills. Once you have completed the Live Paint Group, it is important to Expand and Upgroup. We will leverage these shapes for our Values and Gradients.
                          beginner adobe illustrator tutorial pug
                          KNIFE TOOL: After using Live Paint, Expand and Ungroup. Use a Duplicated Flat Color Layer for your Value Layers. The Knife Tool will cut Shapes. I recommend cutting out all of the shapes first before deleting them. You can use this technique for Highlights, Shadows, or Cast Shadows.
                          Image
                          Image
                          COLOR SWATCHES: Use Color Swatches from your Library or save free swatches from Adobe Color as an .ASE File. Open Swatch Libraries from the “Other Library” Option. Most Color Themes will use Hues as the Base Color. We will be using Live Paint to create our Basic Fills or Flat Color Layer. LEARNING TARGET (3): Apply Color, Values, and Gradients using Advanced Coloring Techniques.
                          OPENING SWATCHES: If you downloaded ASE files, Open Swatch Libraries from the “Other Library” Option. If you added to your Library (CC). Open from the Library Panel.  LEARNING TARGET (1): Open through the Swatches Panel or Library. LEARNING TARGET (2): Right-click on the Swatch to "Add Theme to Swatches." 
                          beginner adobe illustrator tutorial whale
                          COLOR SWATCHES: Use Color Swatches from your Library or save them from Adobe Color as an .ASE File. Open Swatch Library from the “Other Library” Option. Most Color Themes will use Hues as the Base Color. We will be using Live Paint to create our Basic Fills or Flat Color Layer.
                          beginner adobe illustrator tutorial pug
                          LIVE PAINT: Coloring will be extremely easy using Live Paint Bucket. The goal of Live Paint is to create Shapes that we can color using Fills. Once you have completed the Live Paint Group, it is important to Expand and Upgroup. We will leverage these shapes for our Values and Gradients.
                          beginner adobe illustrator tutorial pug
                          KNIFE TOOL: After using Live Paint, Expand and Ungroup. Use a Duplicated Flat Color Layer for your Value Layers. The Knife Tool will cut Shapes. I recommend cutting out all of the shapes first before deleting them. You can use this technique for Highlights, Shadows, or Cast Shadows.
                          Image
                          COLOR SWATCHES: Use Color Swatches from your Library or save free swatches from Adobe Color as an .ASE File. Open Swatch Libraries from the “Other Library” Option. Most Color Themes will use Hues as the Base Color. We will be using Live Paint to create our Basic Fills or Flat Color Layer. LEARNING TARGET (3): Apply Color, Values, and Gradients using Advanced Coloring Techniques.
                          FONT FAMILIES: Download Font Families (Adobe Fonts) to use with your own artwork and designs. Sort through the Adobe Fonts that will align with your artwork or design. I recommend using the Tags to sort Fonts based on the Theme or Style of your design or artwork. LEARNING TARGET (1): Add Font Families that will align with your artwork or design. 
                          beginner adobe illustrator tutorial whale
                          COLOR SWATCHES: Use Color Swatches from your Library or save them from Adobe Color as an .ASE File. Open Swatch Library from the “Other Library” Option. Most Color Themes will use Hues as the Base Color. We will be using Live Paint to create our Basic Fills or Flat Color Layer.
                          beginner adobe illustrator tutorial pug
                          LIVE PAINT: Coloring will be extremely easy using Live Paint Bucket. The goal of Live Paint is to create Shapes that we can color using Fills. Once you have completed the Live Paint Group, it is important to Expand and Upgroup. We will leverage these shapes for our Values and Gradients.
                          beginner adobe illustrator tutorial pug
                          KNIFE TOOL: After using Live Paint, Expand and Ungroup. Use a Duplicated Flat Color Layer for your Value Layers. The Knife Tool will cut Shapes. I recommend cutting out all of the shapes first before deleting them. You can use this technique for Highlights, Shadows, or Cast Shadows.
                          Image
                          COLOR SWATCHES: Use Color Swatches from your Library or save free swatches from Adobe Color as an .ASE File. Open Swatch Libraries from the “Other Library” Option. Most Color Themes will use Hues as the Base Color. We will be using Live Paint to create our Basic Fills or Flat Color Layer. LEARNING TARGET (3): Apply Color, Values, and Gradients using Advanced Coloring Techniques.
                          SAVING FONTS: When you find a Font or Family you like, you can simply click the Add Family to your Account. The Fonts will be available across your Adobe Programs.
                          beginner adobe illustrator tutorial whale
                          COLOR SWATCHES: Use Color Swatches from your Library or save them from Adobe Color as an .ASE File. Open Swatch Library from the “Other Library” Option. Most Color Themes will use Hues as the Base Color. We will be using Live Paint to create our Basic Fills or Flat Color Layer.
                          beginner adobe illustrator tutorial pug
                          LIVE PAINT: Coloring will be extremely easy using Live Paint Bucket. The goal of Live Paint is to create Shapes that we can color using Fills. Once you have completed the Live Paint Group, it is important to Expand and Upgroup. We will leverage these shapes for our Values and Gradients.
                          beginner adobe illustrator tutorial pug
                          KNIFE TOOL: After using Live Paint, Expand and Ungroup. Use a Duplicated Flat Color Layer for your Value Layers. The Knife Tool will cut Shapes. I recommend cutting out all of the shapes first before deleting them. You can use this technique for Highlights, Shadows, or Cast Shadows.
                          Image
                          Image
                          RESOURCE GUIDES: Digital Downloads will come as Zipped Folders. Once you have downloaded and extracted the Resource Folders, they are ready to be used in Adobe Illustrator. Start with our Resource Guides and Illustrator Tutorials to learn how to Apply Brush Libraries, Comic Halftones, and T-Shirt Textures.
                          RESOURCE GUIDES: Digital Downloads will come as Zipped Folders. Once you have downloaded and extracted the Resource Folders, they are ready to be used in Adobe Illustrator. Start with our Resource Guides and Illustrator Tutorials to learn how to Apply Brush Libraries, Comic Halftones, and T-Shirt Textures. BRUSHES GUIDE / HALFTONES GUIDE / TEXTURES GUIDE
                          Image
                          FILE + PLACE. Place a BMP Texture over your finished vector artwork. Simple File-Place. I recommend scaling the texture to fit over your completed artwork before you export or save. Simply scale the texture file using the Bounding Box or the Properties Panel. You can scale the texture to fit over the asset or the entire artboard.
                          Image
                          TRANSPARENCY PANEL. Adjustments to the texture file can be made in the Transparency Panel in Adobe Illustrator. Blend the Pattern toward your Background Color, you can simply click on a Color Swatch to Change the Color of the BMP Texture. Use the Transparency Slider to adjust the opacity for subtle texture overlays.

                          BEGINNER TUTORIALS

                          ILLUSTRATOR TUTORIALS: Tutorials and Playlists will focus on Building Tools, Applying Brushes, Editing Options, and Advanced Coloring Techniques in Adobe Illustrator. Learning Target (1): Understand the Primary Building Tools and Options in Adobe Illustrator. Learning Target (2): Apply the Building, Editing, and Coloring Tools using your own artwork.

                          How to Color in Adobe Illustrator

                          One of the easiest and fastest ways of filling in your color is through Live Paint. Live Paint Bucket is a part of the Shape Builder Tools which builds the shapes in the exact shape you need it. Select All. Go up to Object - Live Paint - Make. If you have a grayed out Make it simply means you didn't have anything selected. I do recommend Deselecting by clicking on your artboard before clicking on a Color Swatch. *Remember Everything is still Selected so it will Color the Full Selection if you click on a Color Swatch with everything selected. Click on the Live Paint Bucket (K) and Click to Dump Color. It will feel like the Paint Bucket in Adobe Photoshop. 

                          BEGINNER GUIDES

                          Image
                          Image
                          Image
                          Image
                          Image
                          Image
                          beginner adobe illustrator tutorial ice cream
                          BEGINNER: Understand the Building, Variation, and Basic Coloring Methods. VIEW BEGINNER GUIDE 
                          beginner adobe illustrator tutorial ice cream
                          BEGINNER: Understand the Building, Variation, and Basic Coloring Methods. VIEW BEGINNER GUIDE
                          beginner adobe illustrator tutorial posicle
                          BEGINNER: Understand the Building, Variation, and Basic Coloring Methods. VIEW BEGINNER GUIDE
                          beginner adobe illustrator tutorial duck
                          BEGINNER: Understand the Building, Variation, and Basic Coloring Methods. VIEW BEGINNER GUIDE
                          beginner adobe illustrator tutorial duck
                          BEGINNER: Understand the Building, Variation, and Basic Coloring Methods. VIEW BEGINNER GUIDE
                          beginner adobe illustrator tutorial ice cream
                          BEGINNER: Understand the Building, Variation, and Basic Coloring Methods. VIEW BEGINNER GUIDE
                          beginner adobe illustrator tutorial whale
                          BEGINNER: Understand the Building, Variation, and Advanced Coloring Methods. VIEW BEGINNER GUIDE
                          beginner adobe illustrator tutorial ice cream
                          BEGINNER: Understand Building, Variation, Editing, and Basic Coloring Methods. VIEW BEGINNER GUIDE
                          beginner adobe illustrator tutorial pug
                          BEGINNER: Understand the Building, Variation, and Advanced Coloring Methods. VIEW BEGINNER GUIDE

                          *Older Content (<2018) was originally recorded for my in-class students (children). You are all adults, it has gotten weird.

                          I appreciate your videos. I have been an illustrator user for years and have my own ways of doing things. It's great to see other ways of using tools and learning tricks I didn't know were available! It's also good to see you doing the same thing as me in other instances, confirming I'm on the right track!Andy Zenz
                          Awesome tutorial! I don't think I've picked up something so easily from someone who knows what they are doing. I managed to draw my first vector art and it was a joy! Great work keep it up!blitz145
                          Thank you loads! Compared to other tutorials, yours are just really well-explained and easy-to-follow. Can totally see that you've got a passion for what you're doing and that's just wonderful! 🙂 Keep it up, you're doing an amazing job. Yulia Kachurova
                          Love your video thanks so much. you blow Lynda.com out of the water!!!!Steve Yensel
                          Brilliant video. So much great info packed in here. I'm just getting started drawing cartoons with my Wacom tablet, and this was a huge help. Thumbs up and thanks!Dorian Staten
                          Wow Thanks Jason...was really struggling with making images with basic shapes. Your tutorial is helping me out!!Kishor Rajani
                          thanks a lot you are really one of my favorites, I like the steps you give us, and I'm so thankful for that effort you do for helping us :)Wessam Lotfi
                          Keep up the good work Jason. I’ve been doing Lynda.com tutorials for a few months now and I got more out of your videos than what I’ve received at Lynda. Keep it up and Thank You!!bobby jacobs • 1 year ago
                          These tutorials are amazing. Just started using illustrator and really glad I found your channel. The only videos that explain everything step by stepAida Stan
                          You are definitely one of the best teachers I've found dealing with start to finish creative process. Great work!!!Jasen Fisher
                          Thank you so much man, I loved the way you explain this, I spent days looking for a good tutorial vid, thanks a lot, gonna keep watching your videos!!!Karel Marccenaro
                          Awesome tutorial! I don't think I've picked up something so easily from someone who knows what they are doing. I managed to draw my first vector art and it was a joy! Great work keep it up!blitz145
                          Thank you loads! Compared to other tutorials, yours are just really well-explained and easy-to-follow. Can totally see that you've got a passion for what you're doing and that's just wonderful! 🙂 Keep it up, you're doing an amazing job. Yulia Kachurova
                          Love your video thanks so much. you blow Lynda.com out of the water!!!!Steve Yensel
                          Brilliant video. So much great info packed in here. I'm just getting started drawing cartoons with my Wacom tablet, and this was a huge help. Thumbs up and thanks!Dorian Staten
                          Keep up the good work Jason. I’ve been doing Lynda.com tutorials for a few months now and I got more out of your videos than what I’ve received at Lynda. Keep it up and Thank You!!bobby jacobs • 1 year ago
                          These tutorials are amazing. Just started using illustrator and really glad I found your channel. The only videos that explain everything step by stepAida Stan
                          You are definitely one of the best teachers I've found dealing with start to finish creative process. Great work!!!Jasen Fisher