
Beginner Adobe Illustrator Tutorial using Shapes
Adobe Illustrator Tutorial for Beginners
In this Adobe Illustrator Tutorial for Beginners, we will be using shapes to practice building using the shape tools and the pathfinder panel. Shapes are a great way of building your characters especially as you gain experience with blend, warp, shape builder, and pathfinder to create unique shapes. Shapes are an easy and effective way of building in Illustrator. Use the align panel to align to selection and the artboard to make symmetrical designs. This tutorial will focus on Building Tools, Editing Options, and Basic Coloring Techniques.
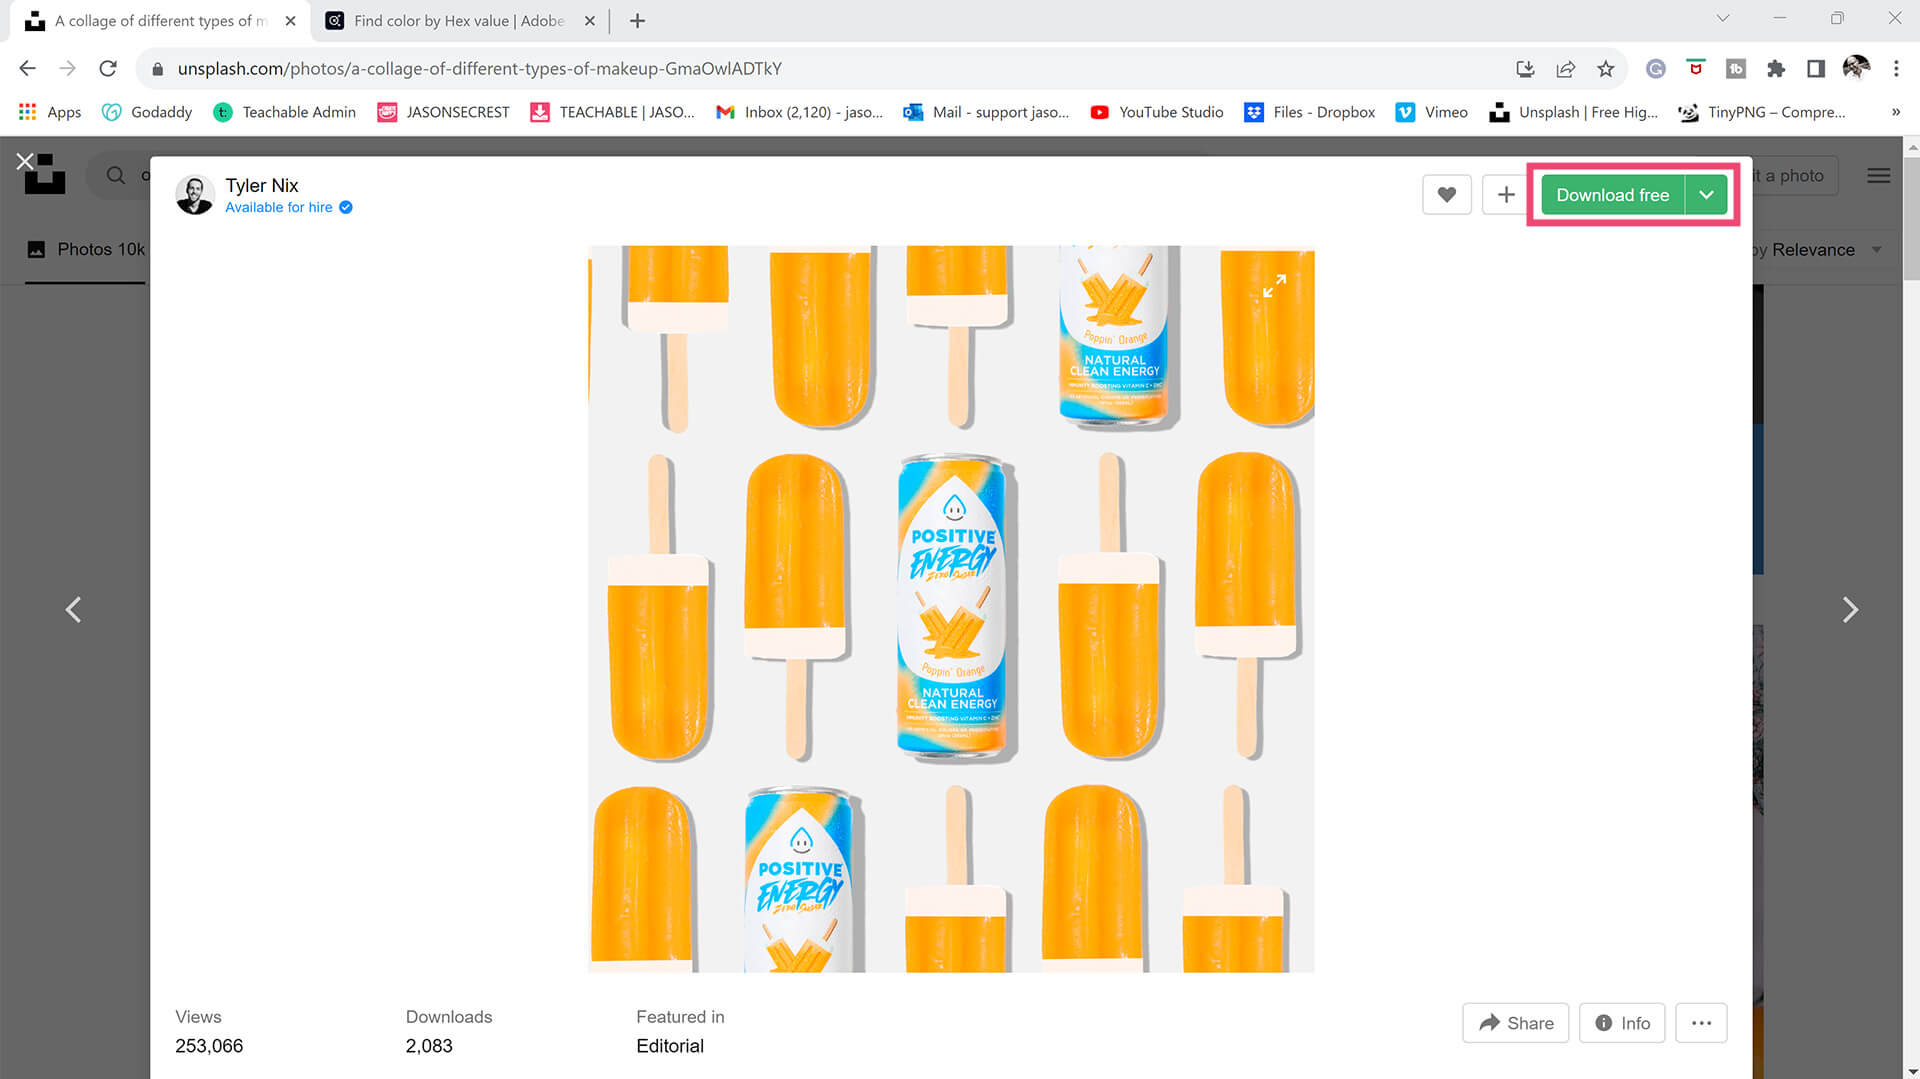
STOCK PHOTOS: For your own artwork and designs, I recommend using (Unsplash / Pixabay / Pexels) for Free Stock Photos. BEGINNER: As I create my artwork, pay attention to the resources being used throughout the Workflows, Tutorials, and YouTube Playlists. ADVANCED: When you are creating your own artwork or design projects, gather and organize resources within the same project folder (Stock Photos / Sketches / Thumbnails / Color Swatches / Font Families). FREE RESOURCES GUIDE
DRAWING OR TRACED PHOTO: If you are new to Adobe Illustrator, it's best to avoid starting from a blank artboard, a full-color photo, or a super sketchy drawing. BEGINNER: For your own artwork, create a "Traceable Path" to align with the Building Tools in Adobe Illustrator. ADVANCED: Prepare your drawings for Specific Tools (ex. Ellipse, Pen, or Pencil) or Steps in your Workflow (ex. Building, Brushes, or Values). DRAWING GUIDE
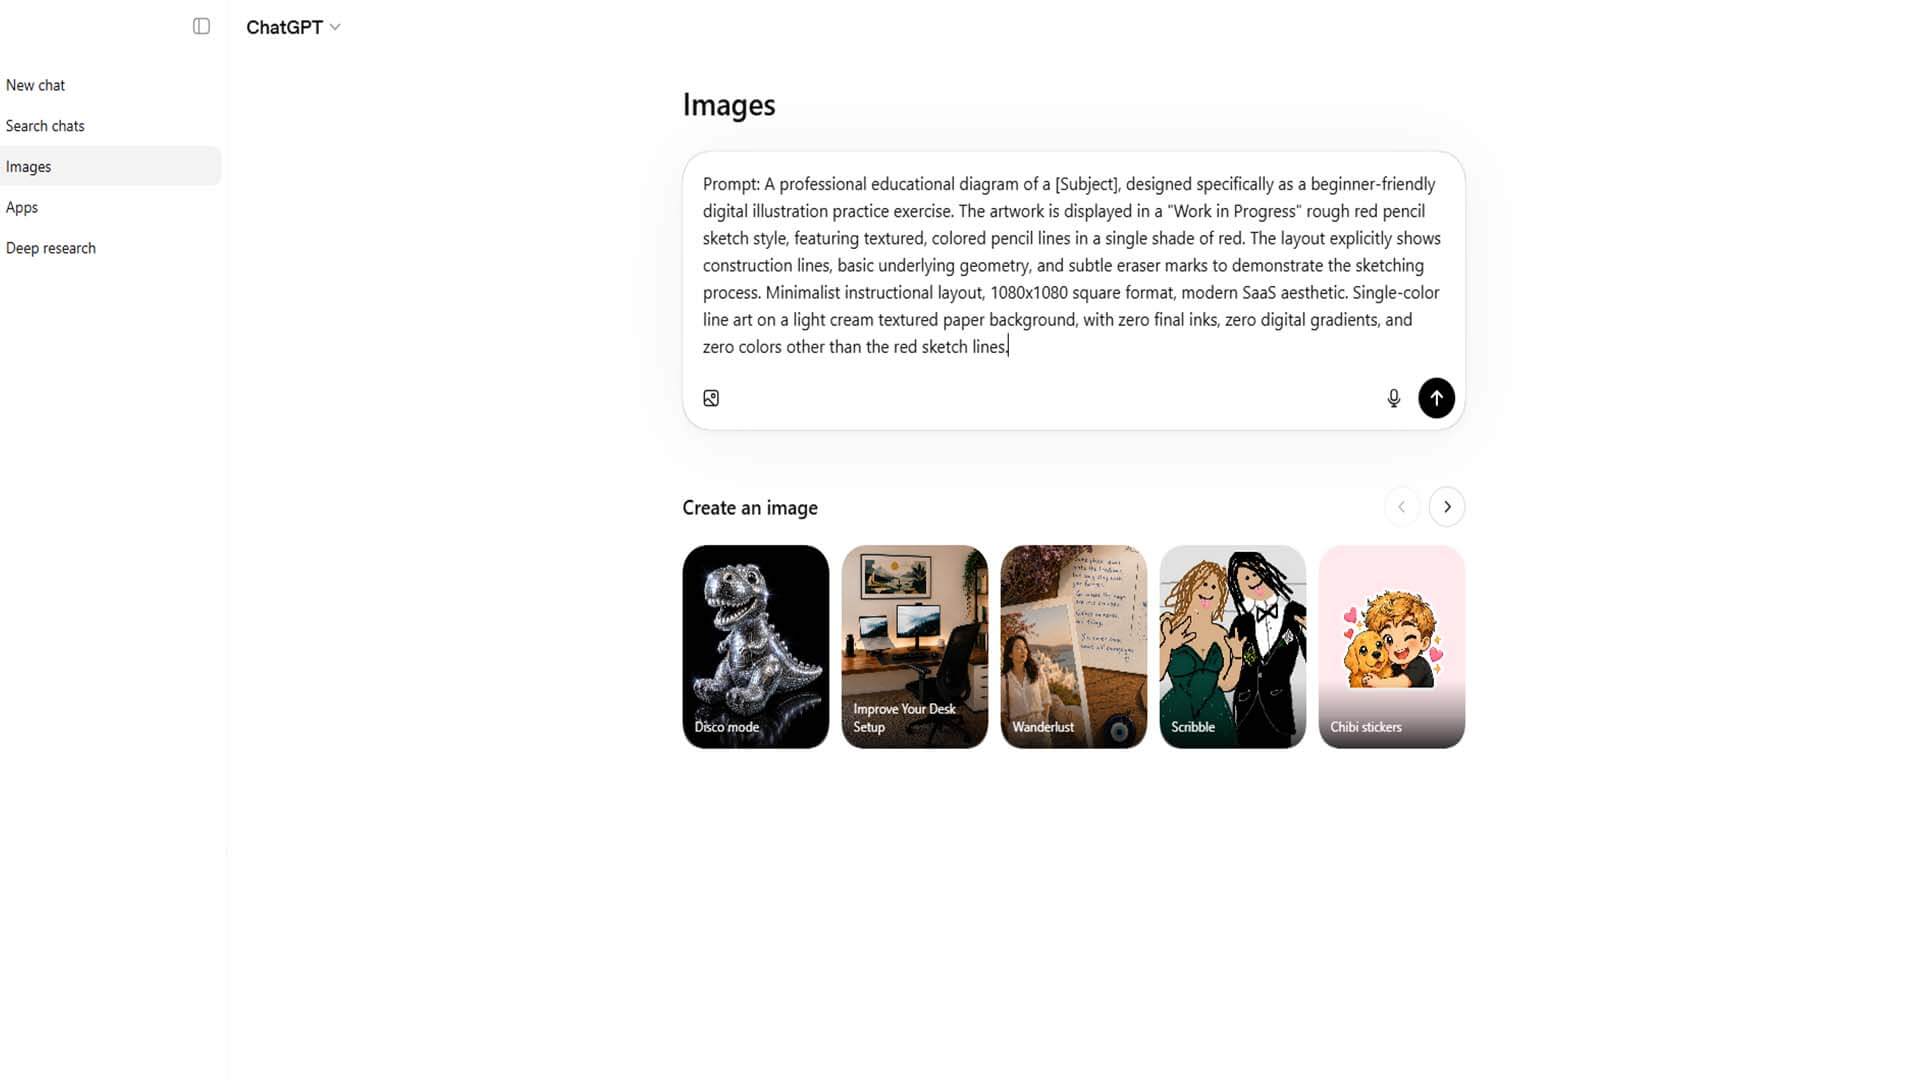
BEGINNER EXERCISE PROMPT: A professional educational diagram of a [Subject], designed specifically as a beginner-friendly Adobe Illustrator practice exercise. The [Subject] is constructed strictly using simplified, clean geometric shapes and flat, basic paths. The artwork is displayed in a "Work in Progress" vector blueprint style, featuring clearly visible bright blue square anchor points and distinct Bézier handles extending from the curves to demonstrate path construction. Minimalist instructional layout, 1080x1080 square format, modern SaaS aesthetic. Strictly flat design with solid outlines, zero gradients, zero shadows, and a solid plain white background. BEGINNER: Start with the Beginner Prompts to practice using the Pen Tool and Shapes. ADVANCED: Utilize the Intermediate or Advanced Prompts to enhance the efficiency and speed of your tools. Change the prompt [Subject] to match your own artwork. PROMPT EXERCISE GUIDE
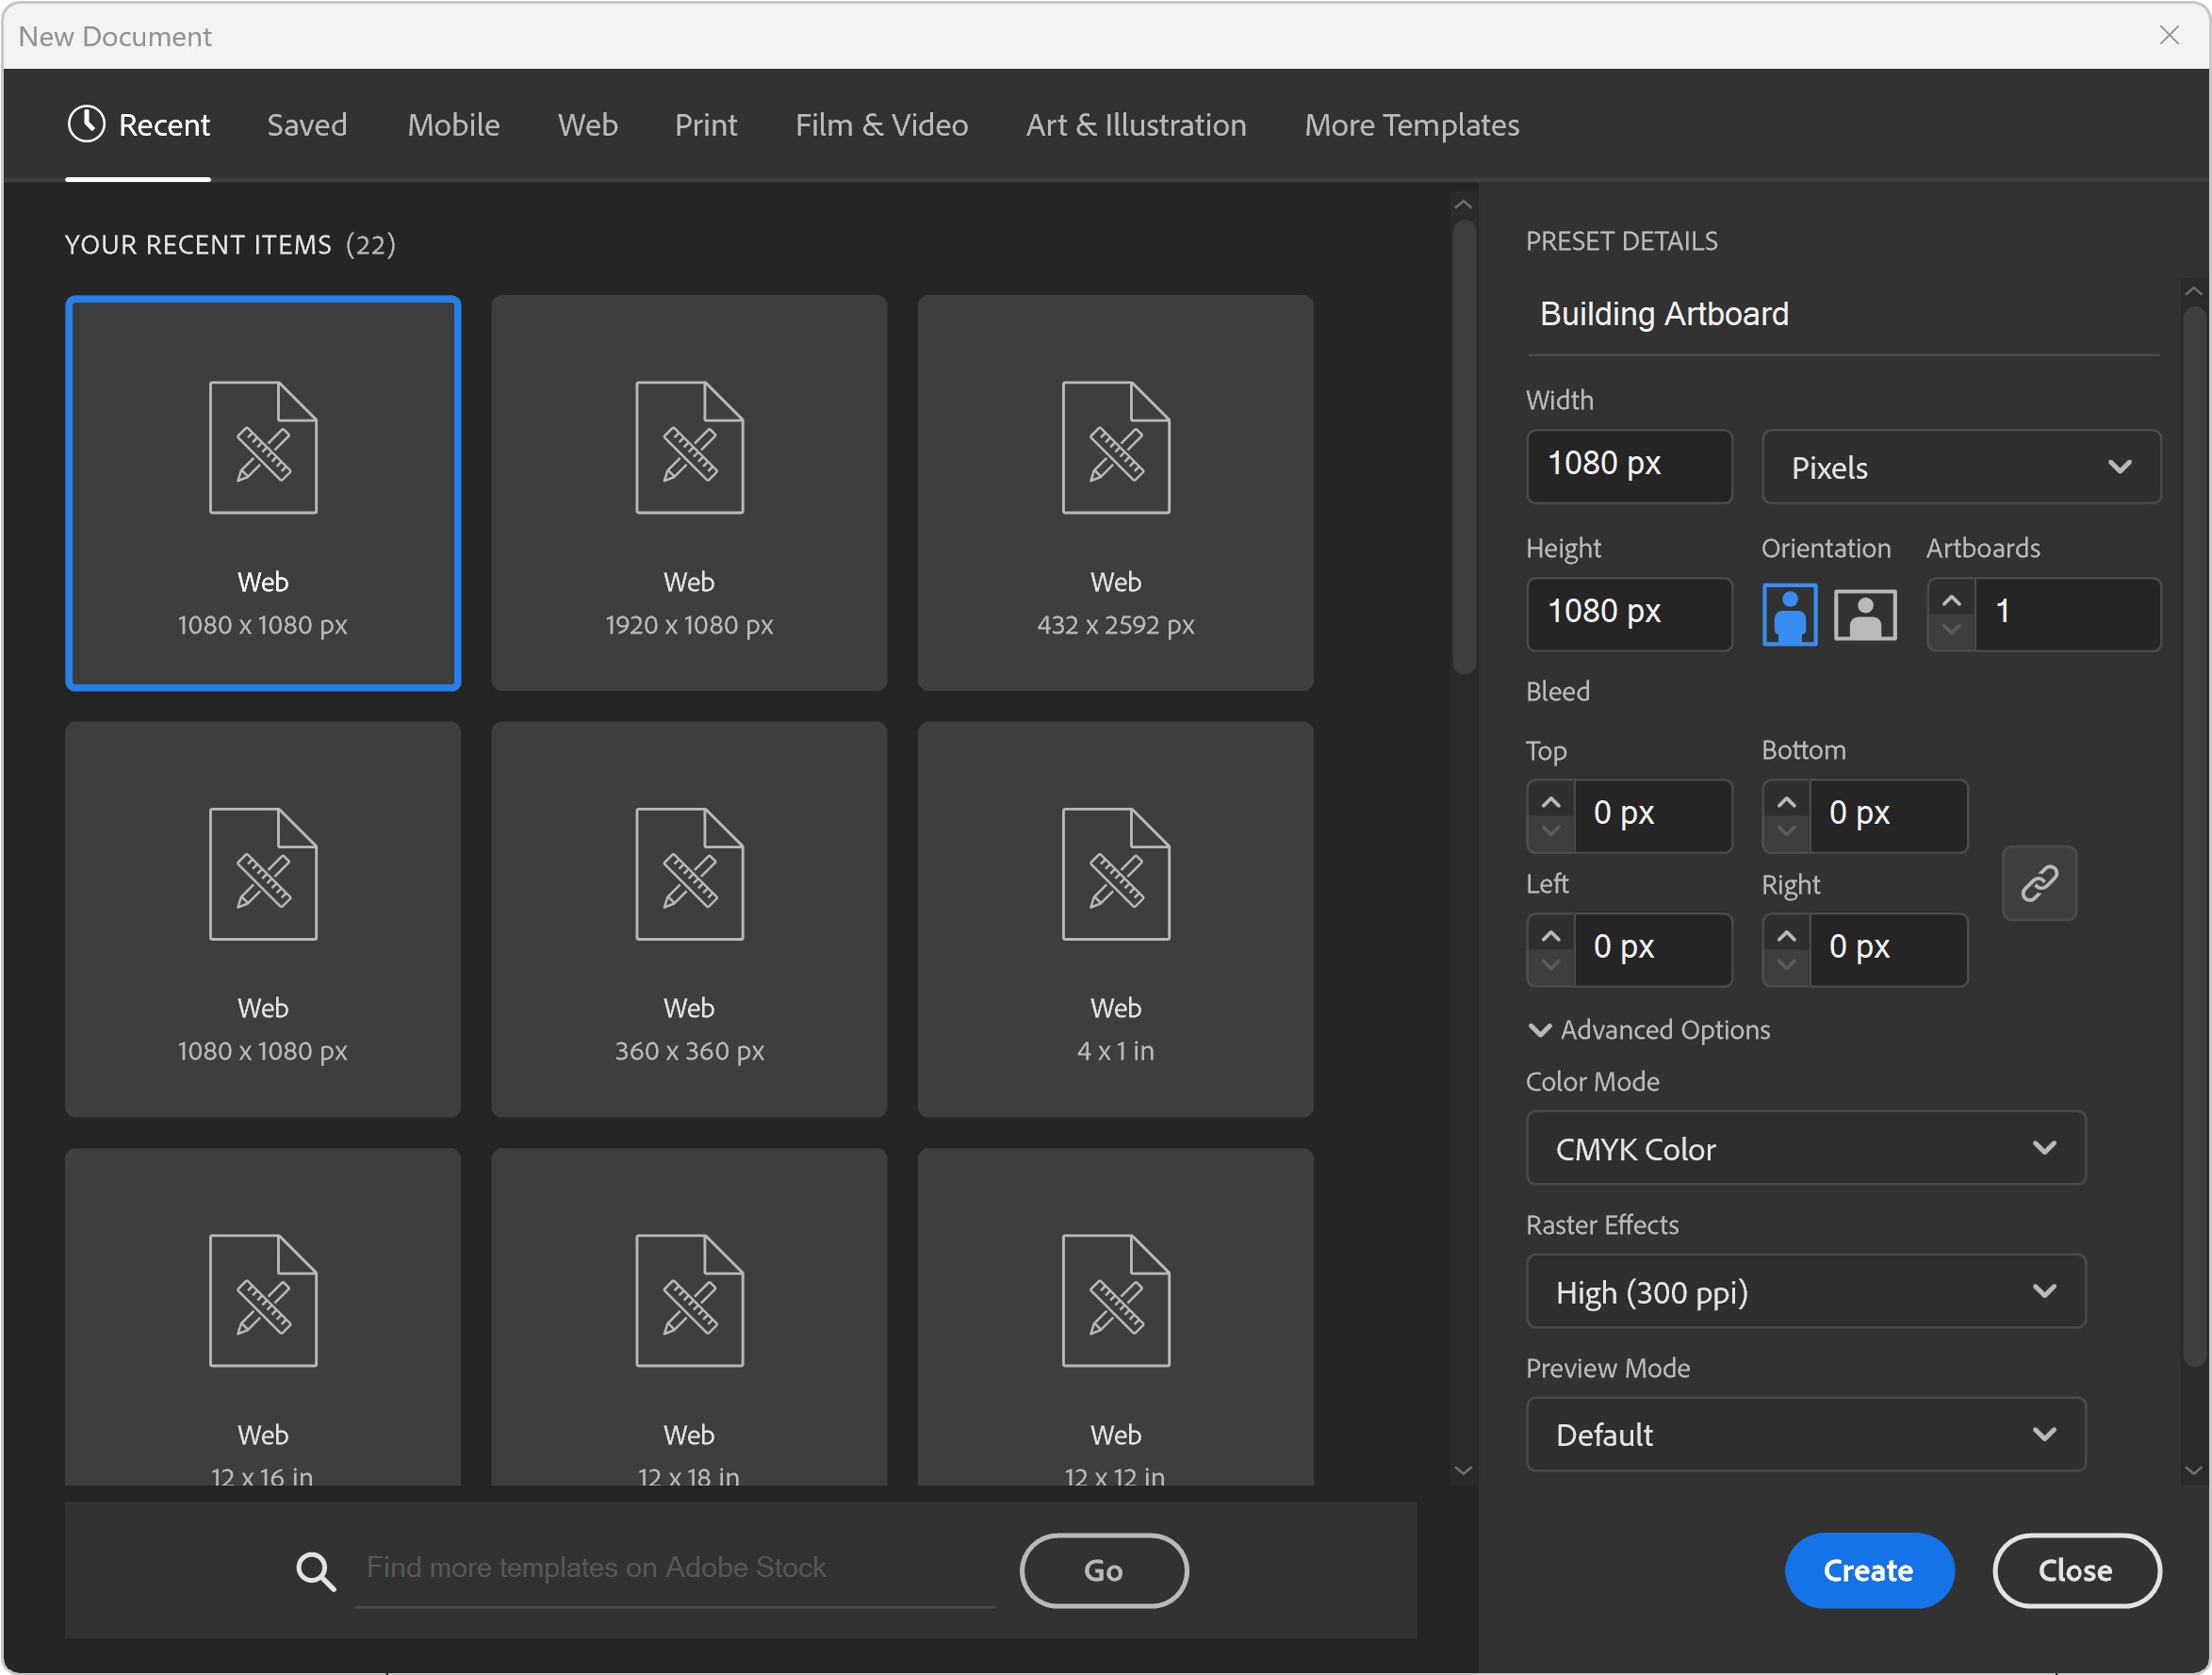
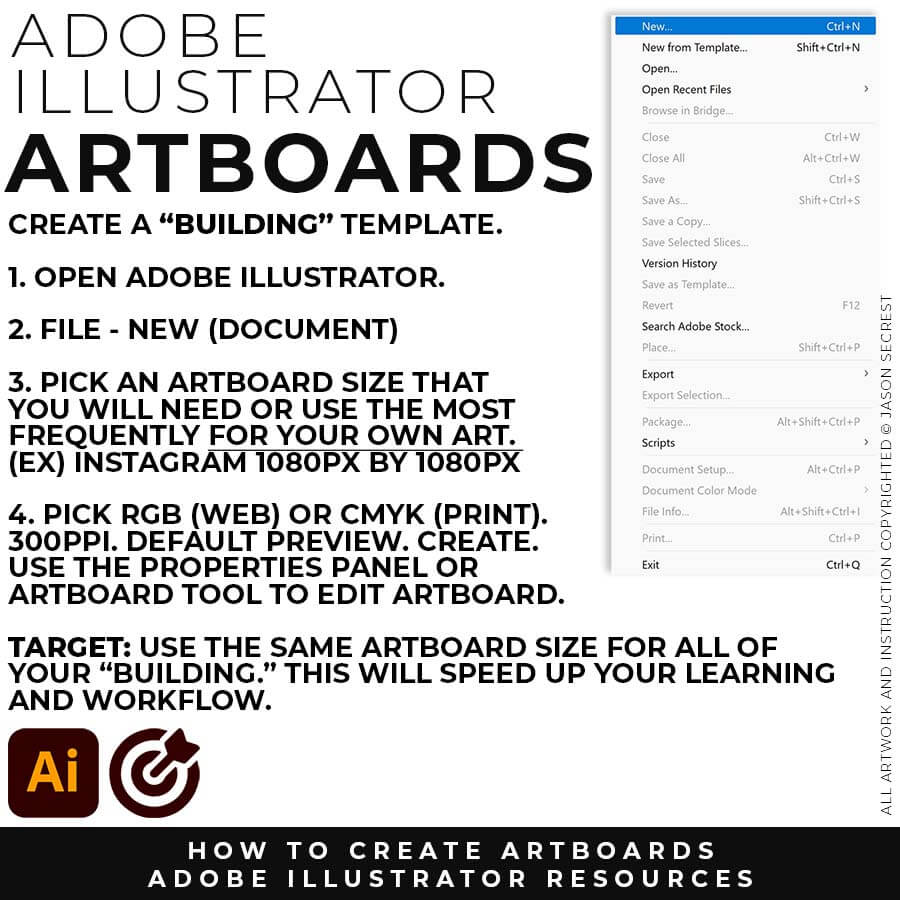
"BUILDING" ARTBOARD: I will recommend a (1080px by 1080px, 300PPI, RGB) as your Initial Artboard Size. The Initial Artboard Size can be changed at any point without ruining your own artwork. Use the Properties Panel to Scale Artwork and Artboards. LEARNING TARGET (1): Create a "Building Template" that includes Artboard Size, Resource Type, and Template Layers. LEARNING TARGET (2): Pick a "Building" Artboard Size you can use for your own Artwork and Social Media Postings.
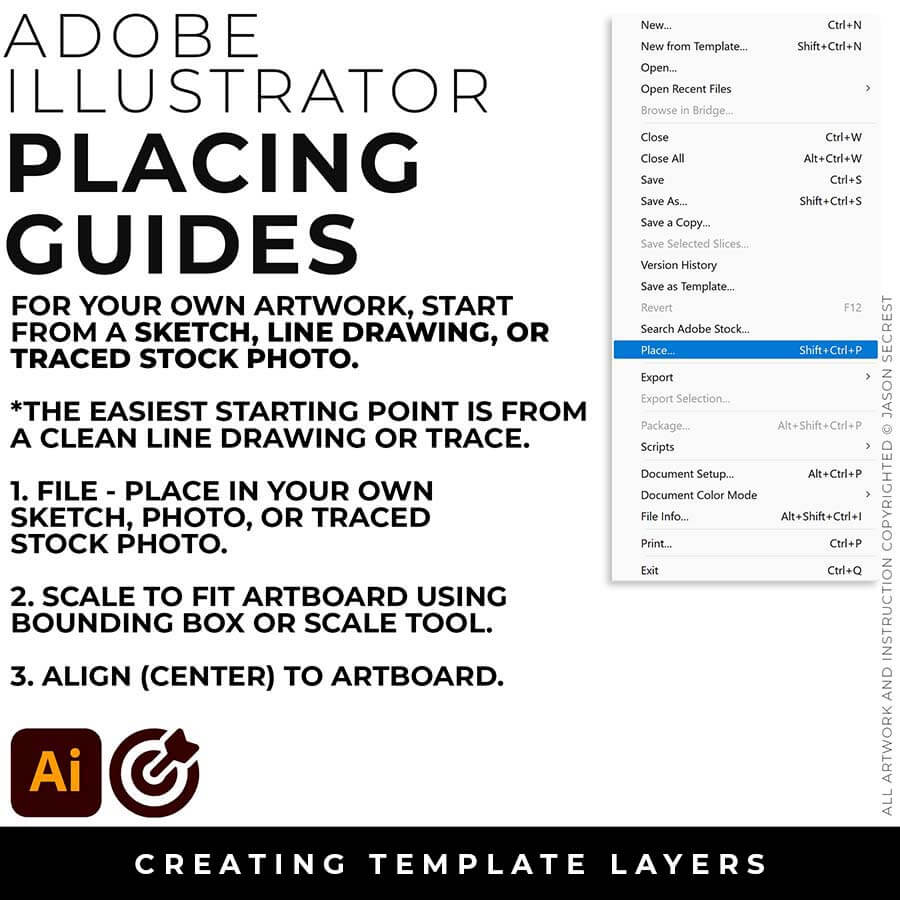
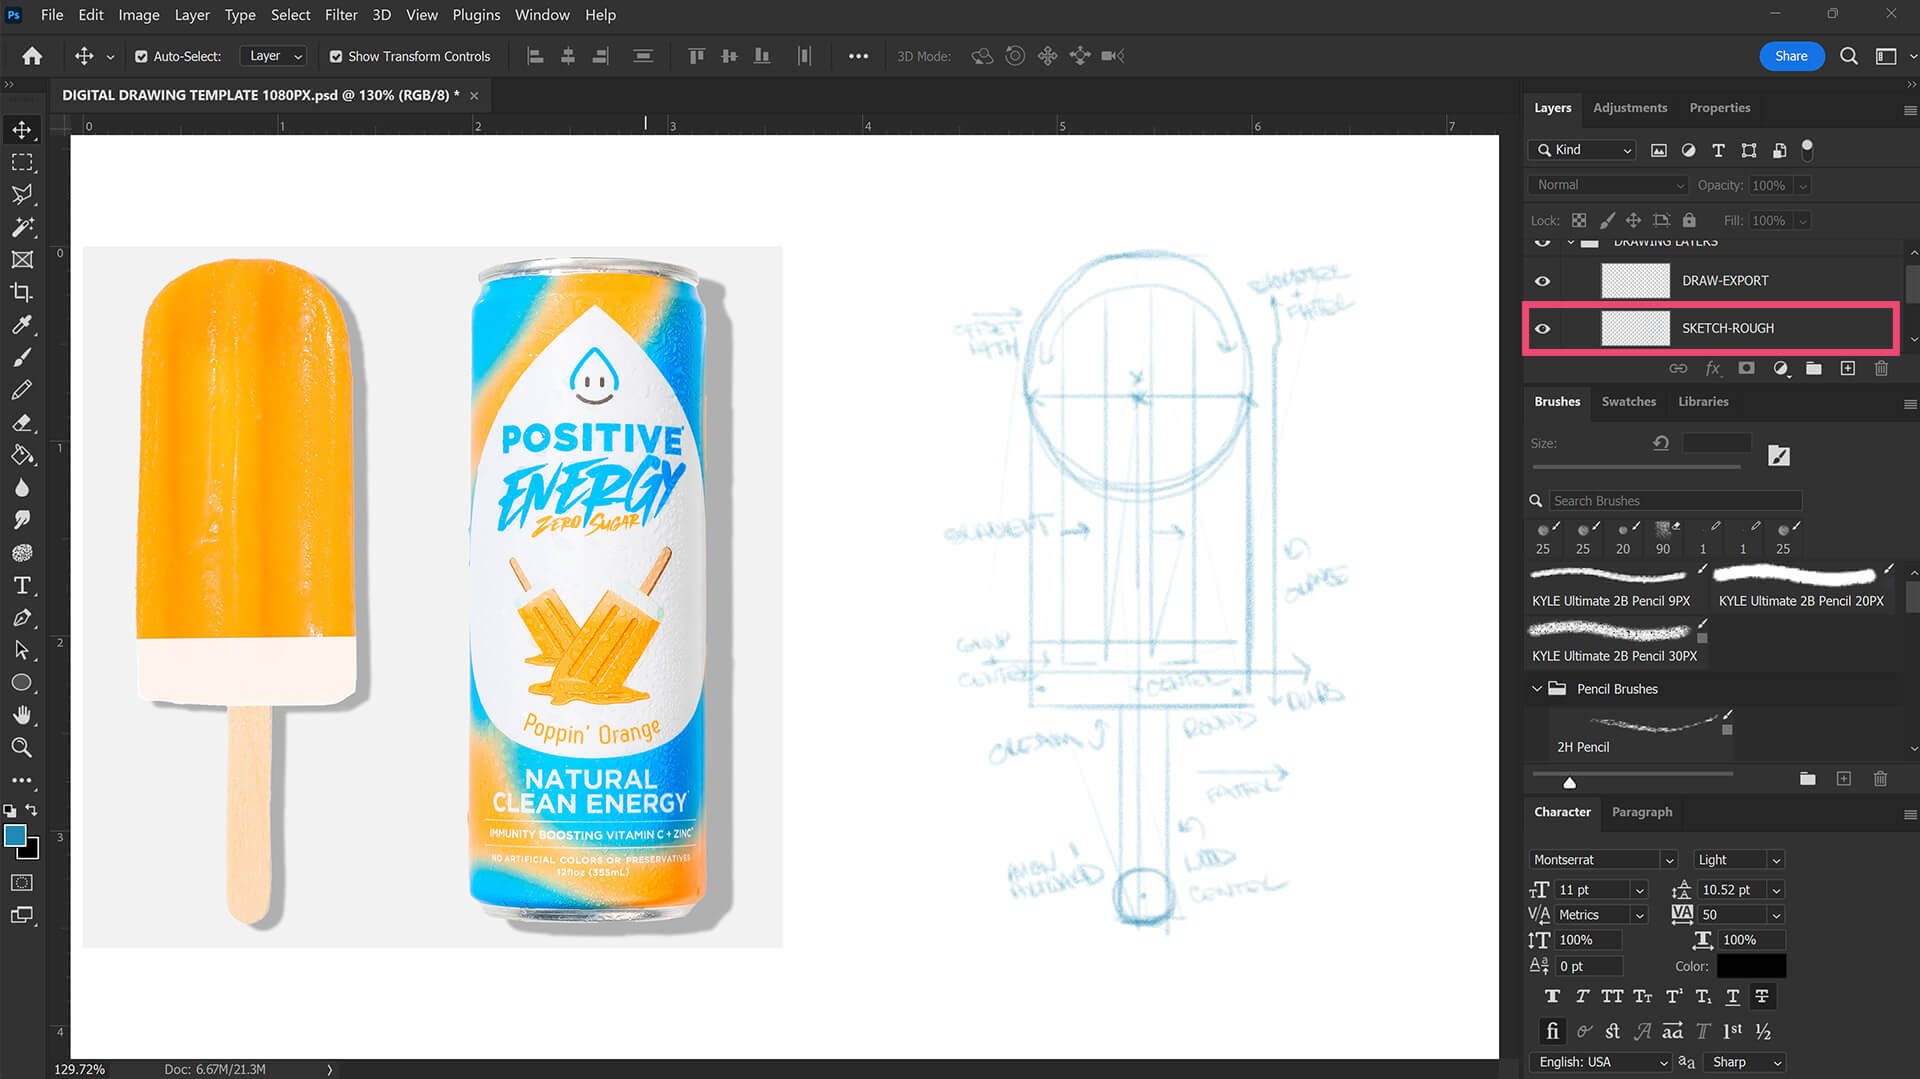
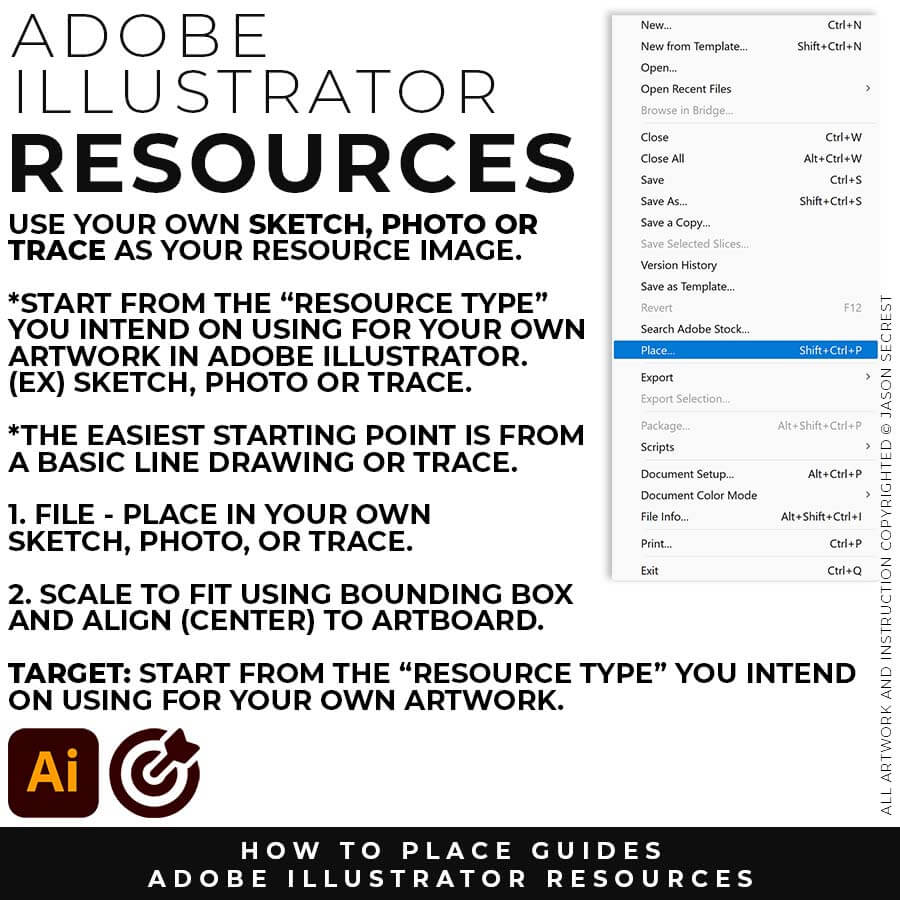
FILE - PLACE: File -Place in your own Drawing, Sketch, or Traced Stock Photo. I recommend starting from a Clean Line Drawing or a simple Traced Stock Photo for your artwork and designs.
SCALE TO FIT: You can modify the size of the artwork using the Bounding Box or Scale Tool. Scale to Fit Artbaord. Align the your Artwork to the center of the Artbaord using the Align Panel.
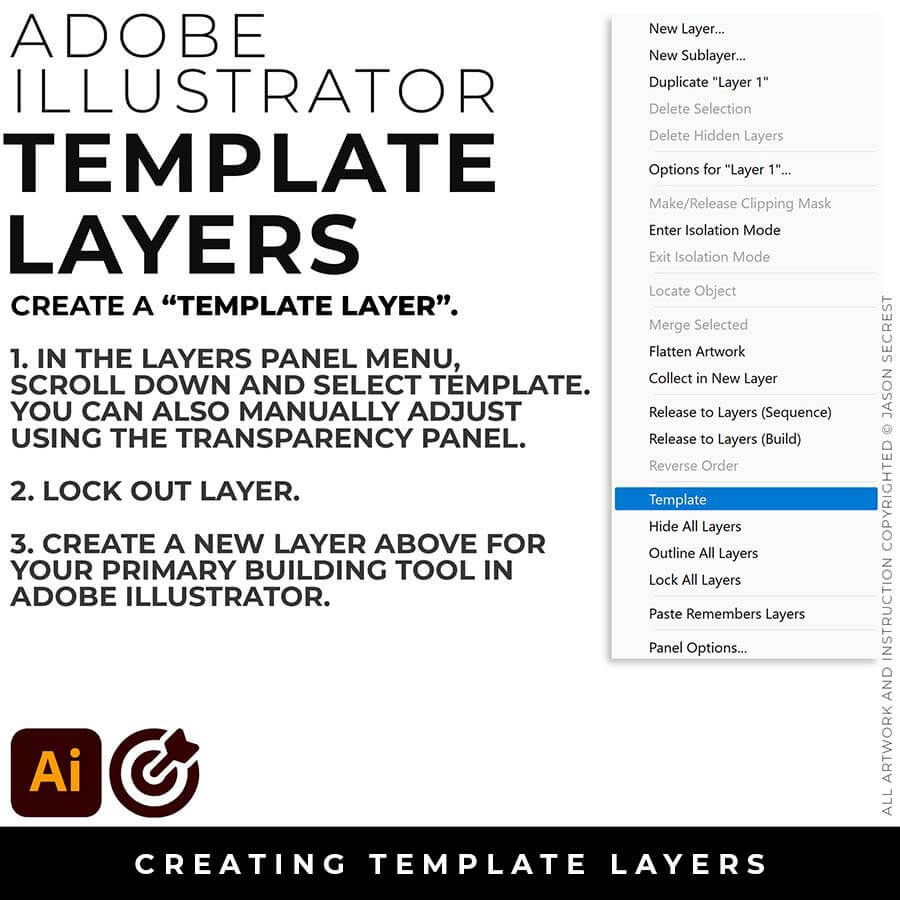
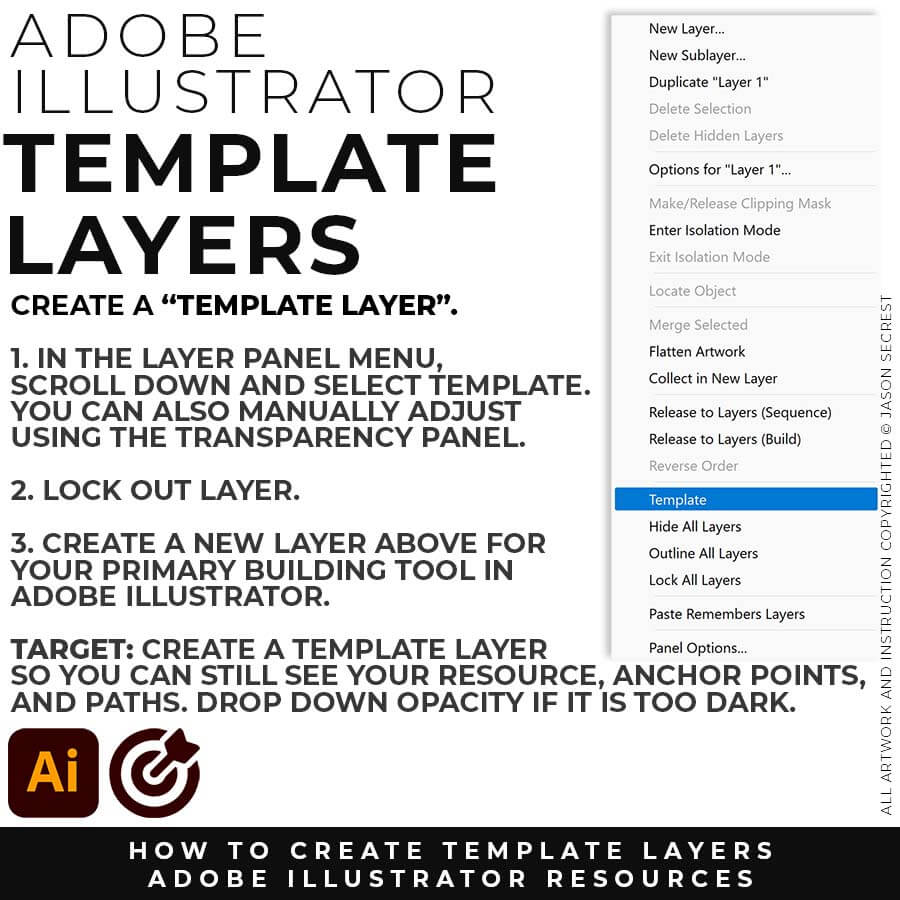
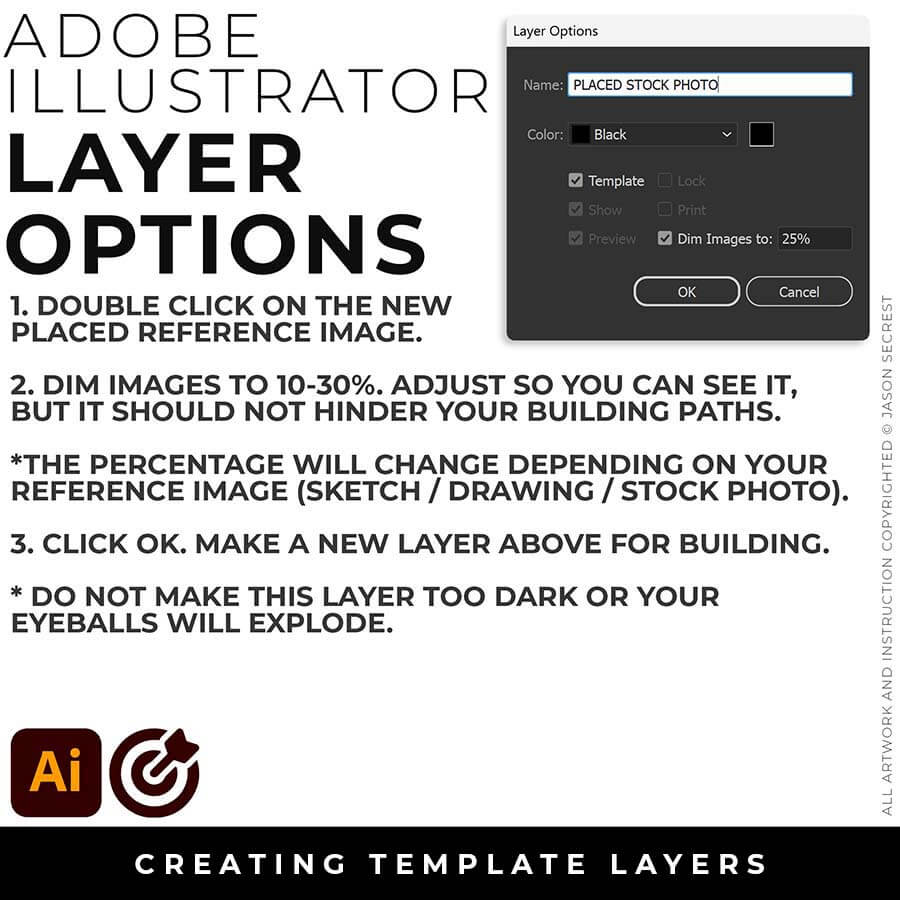
TEMPLATE LAYER: In the Layers Panel, drop down in the menu for Template (50%) or double click on the layer for properties (Dim 10-30%). Lock Layer. Create a New Layer above for Building.
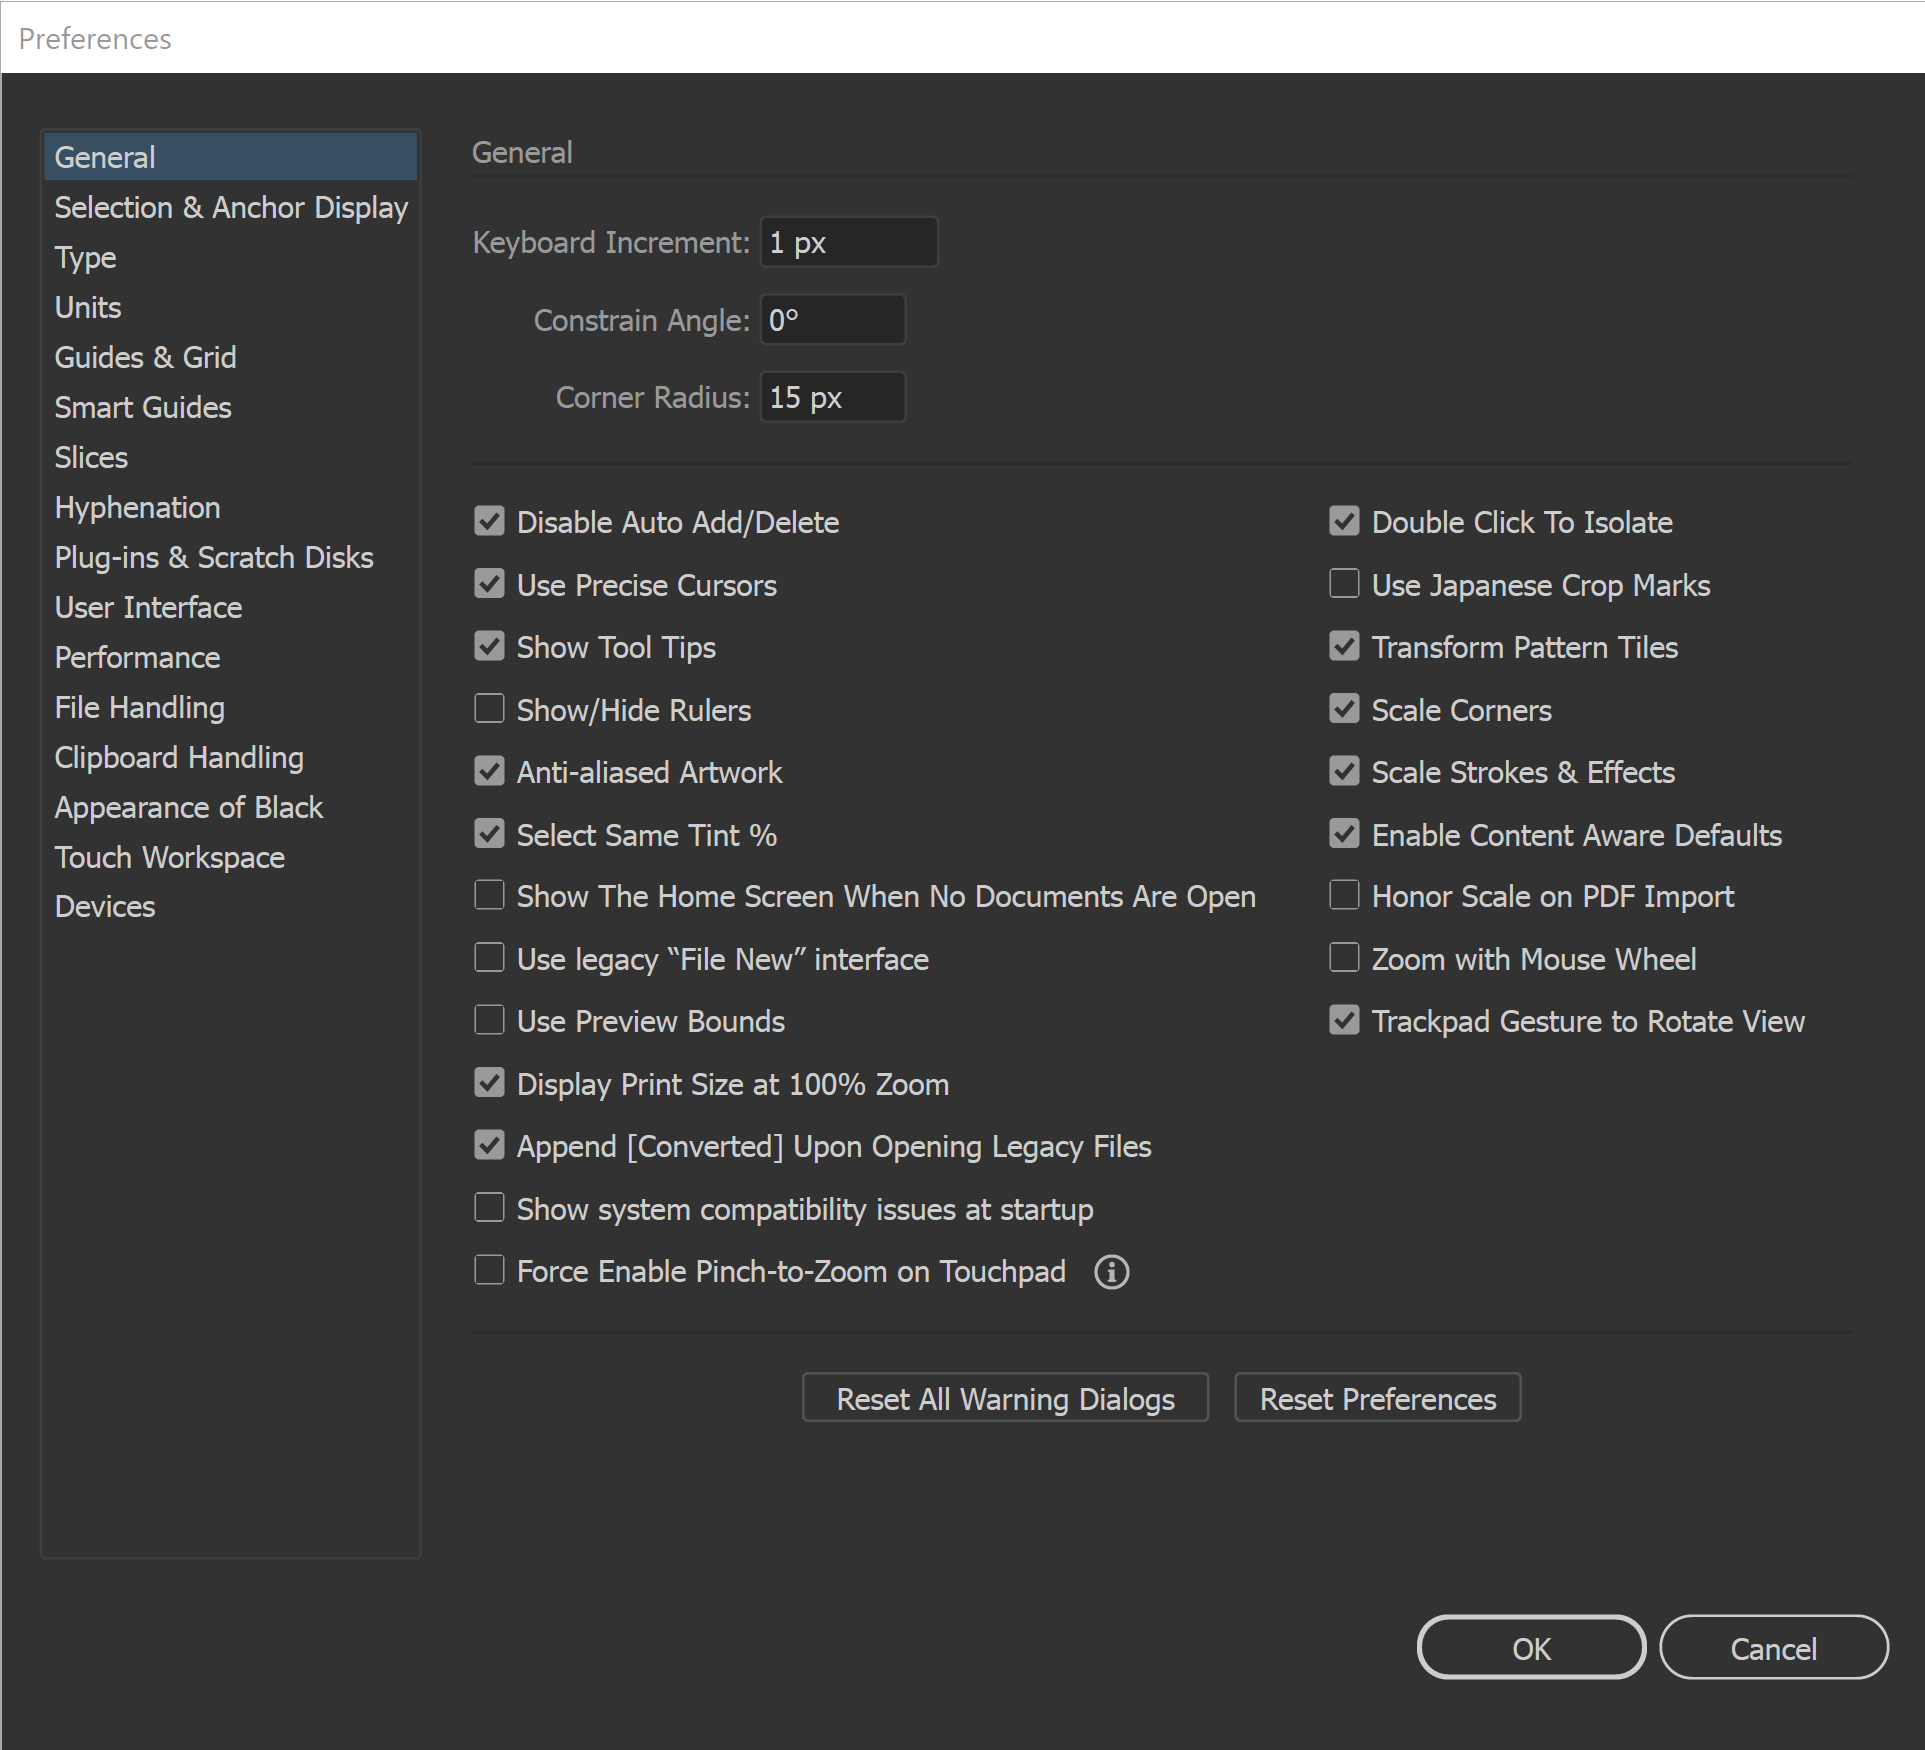
GENERAL PREFERENCES: All of our initial preferences are designed to gain more control over what you are clicking on. The more you can zoom in and see your anchors and handles the better. You can adjust the size of your Anchors and Handles under Selection and Anchor Display. Under your General Settings, make sure that Disable Auto Add/Delete is Selected.
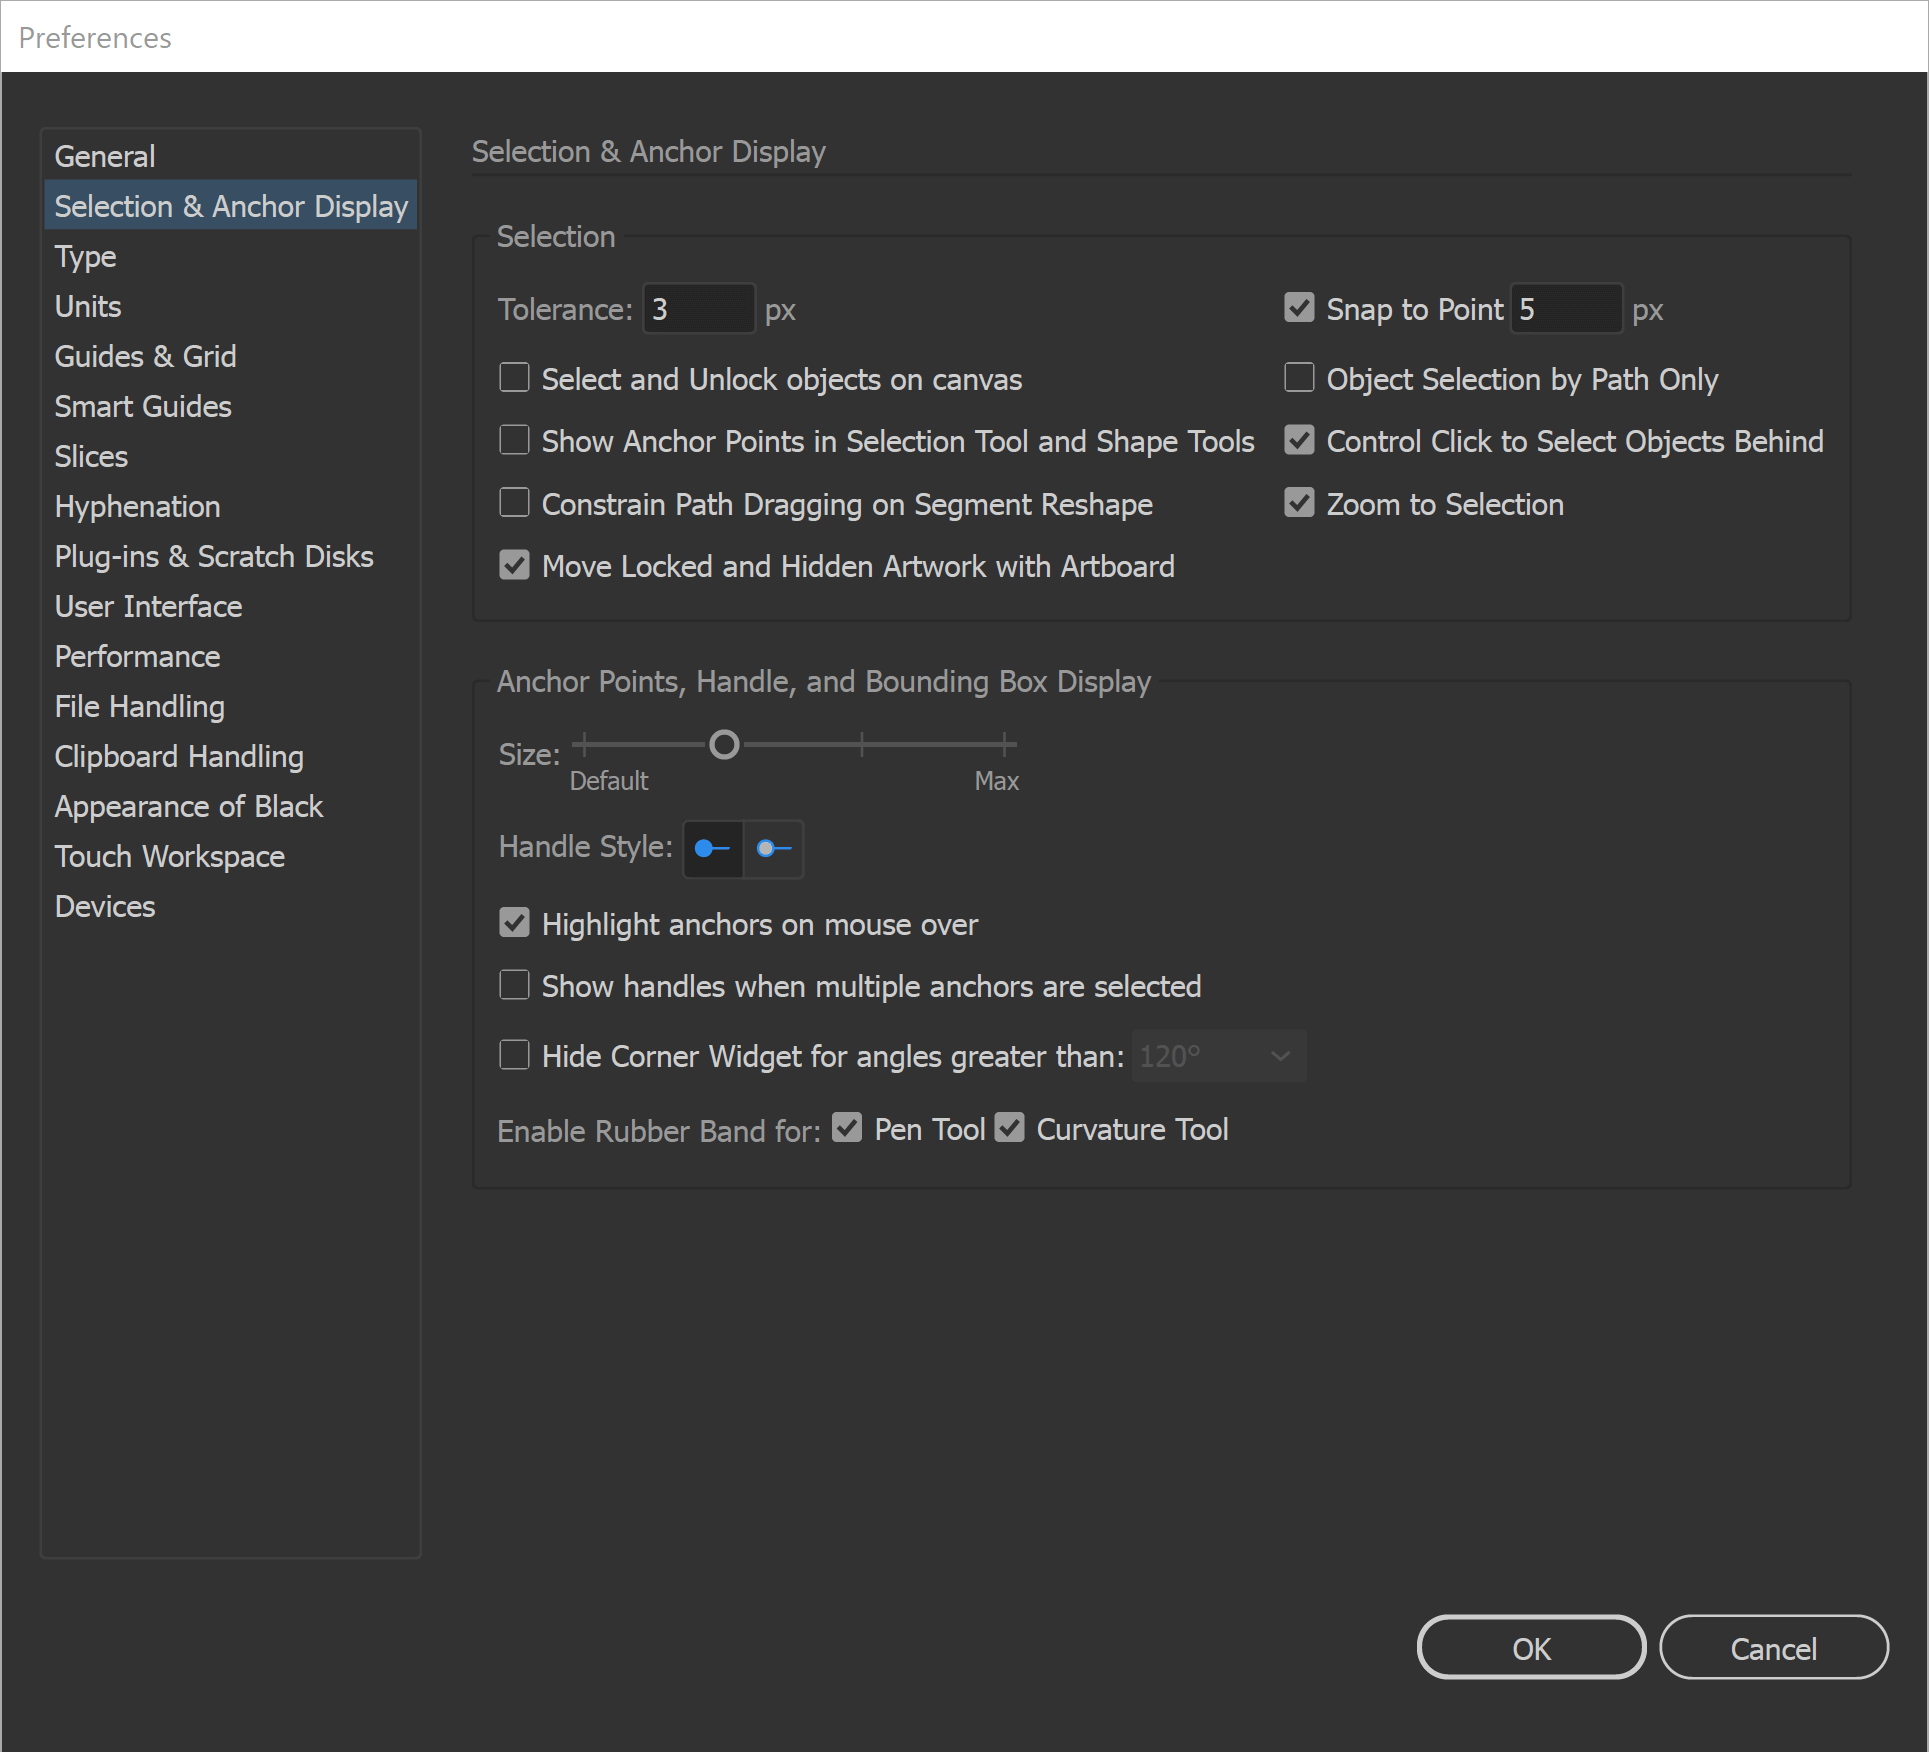
SELECTION TOOLS: The Direct Selection Tool can grab and adjust the Anchors, Handles, and Paths. It is worth having your Smart Guides Path Labels Turned On so you know what the tool is selecting before dragging. The Selection Tool will move and select objects. I like using the Bounding Box for my Transform Tools, Turn On under View. I recommend this for Quick Scaling.
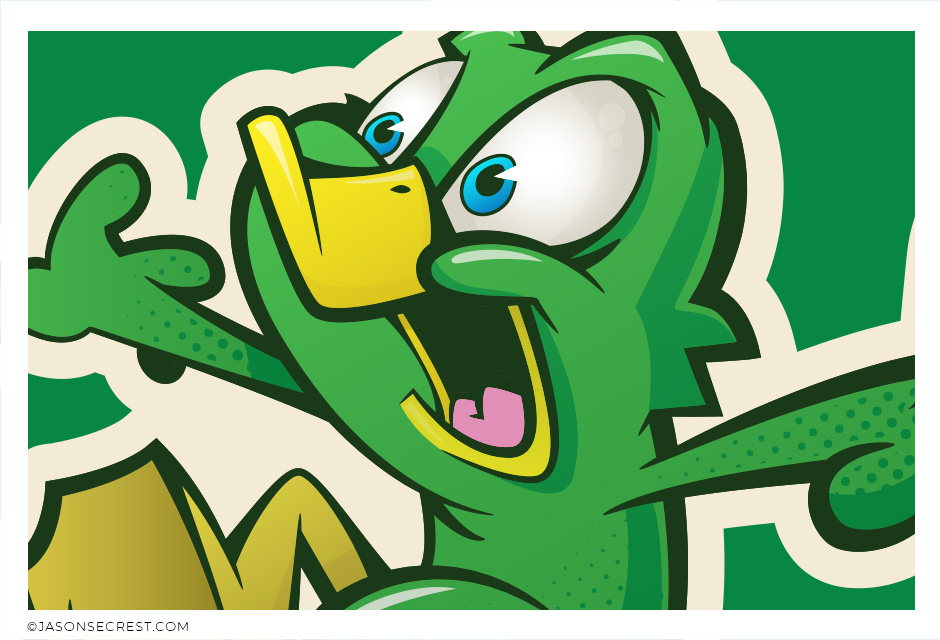
PRIMARY BUILDING: I will use Shapes, Pencil, and Pen Tools in Adobe Illustrator as my Primary Building Tools. Notice I have simplified my drawings and sketches to make this step feel like tracing.
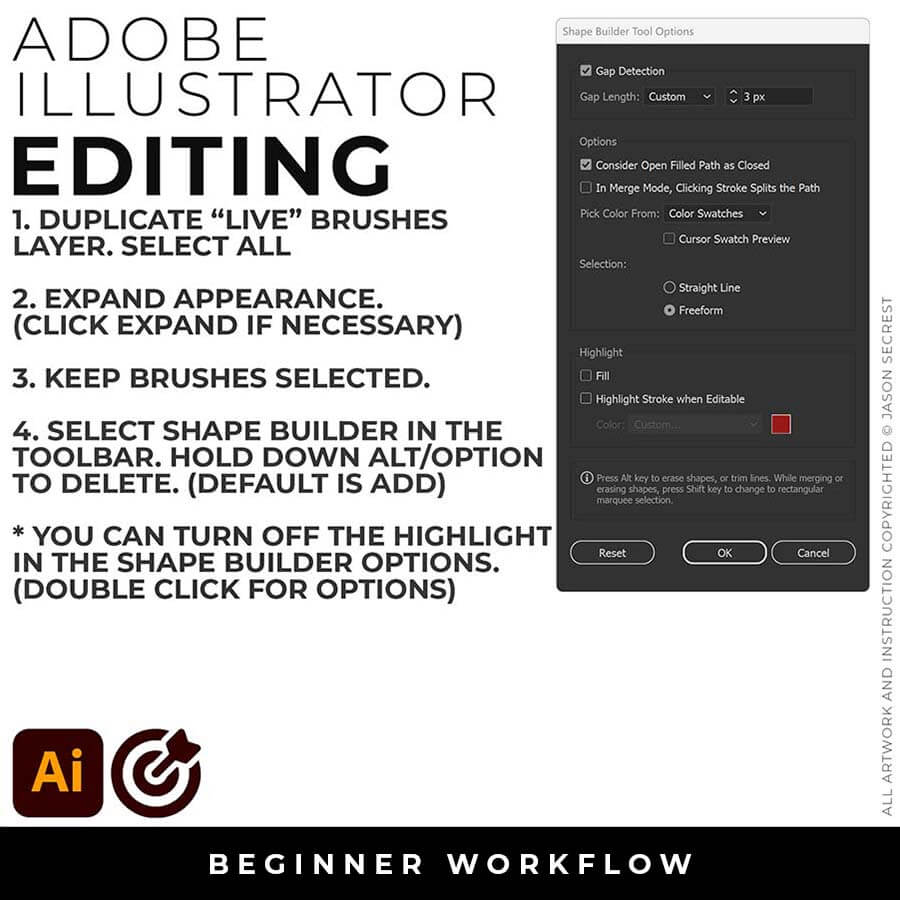
VARIATION + EDITING: I will apply Brush Libraries for my Line Variation. Notice I am using Expanded Editing Tools to clean up my Paths before moving on to the Coloring Step.
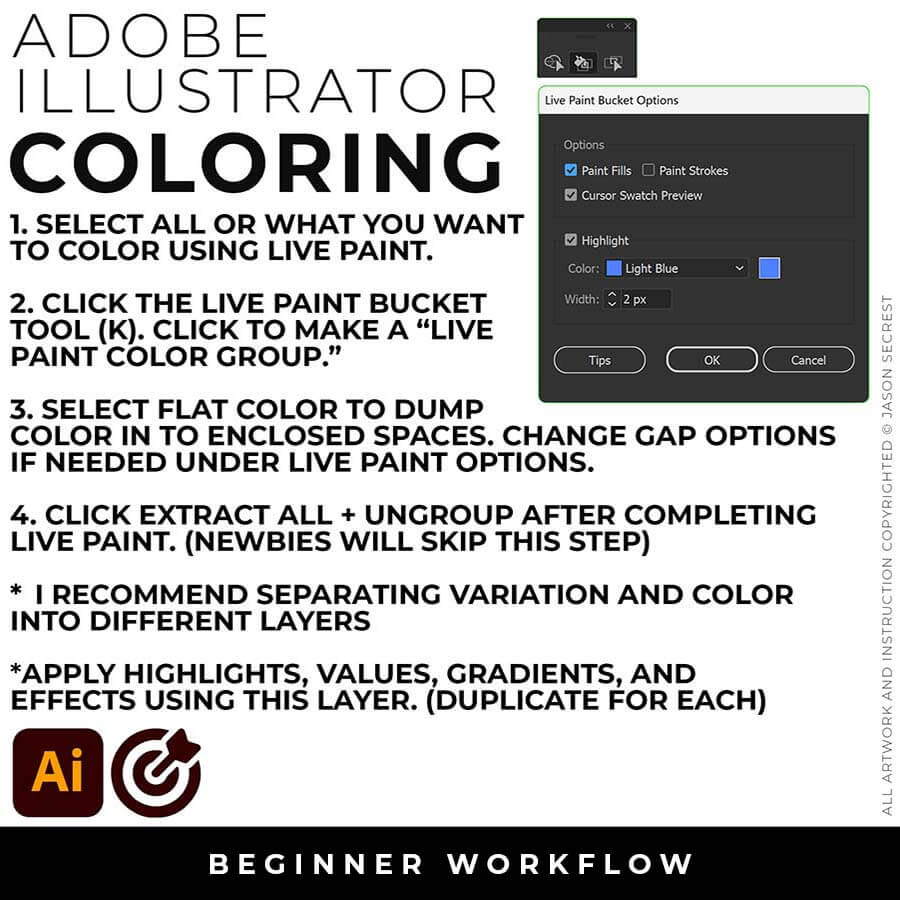
ADVANCED COLORING: I will use Live Paint and the Live Paint Bucket to create my Basic Fills. Notice I have duplicated out the Flat Color Layer for Highlights, Shadows, Gradients, and Effects.
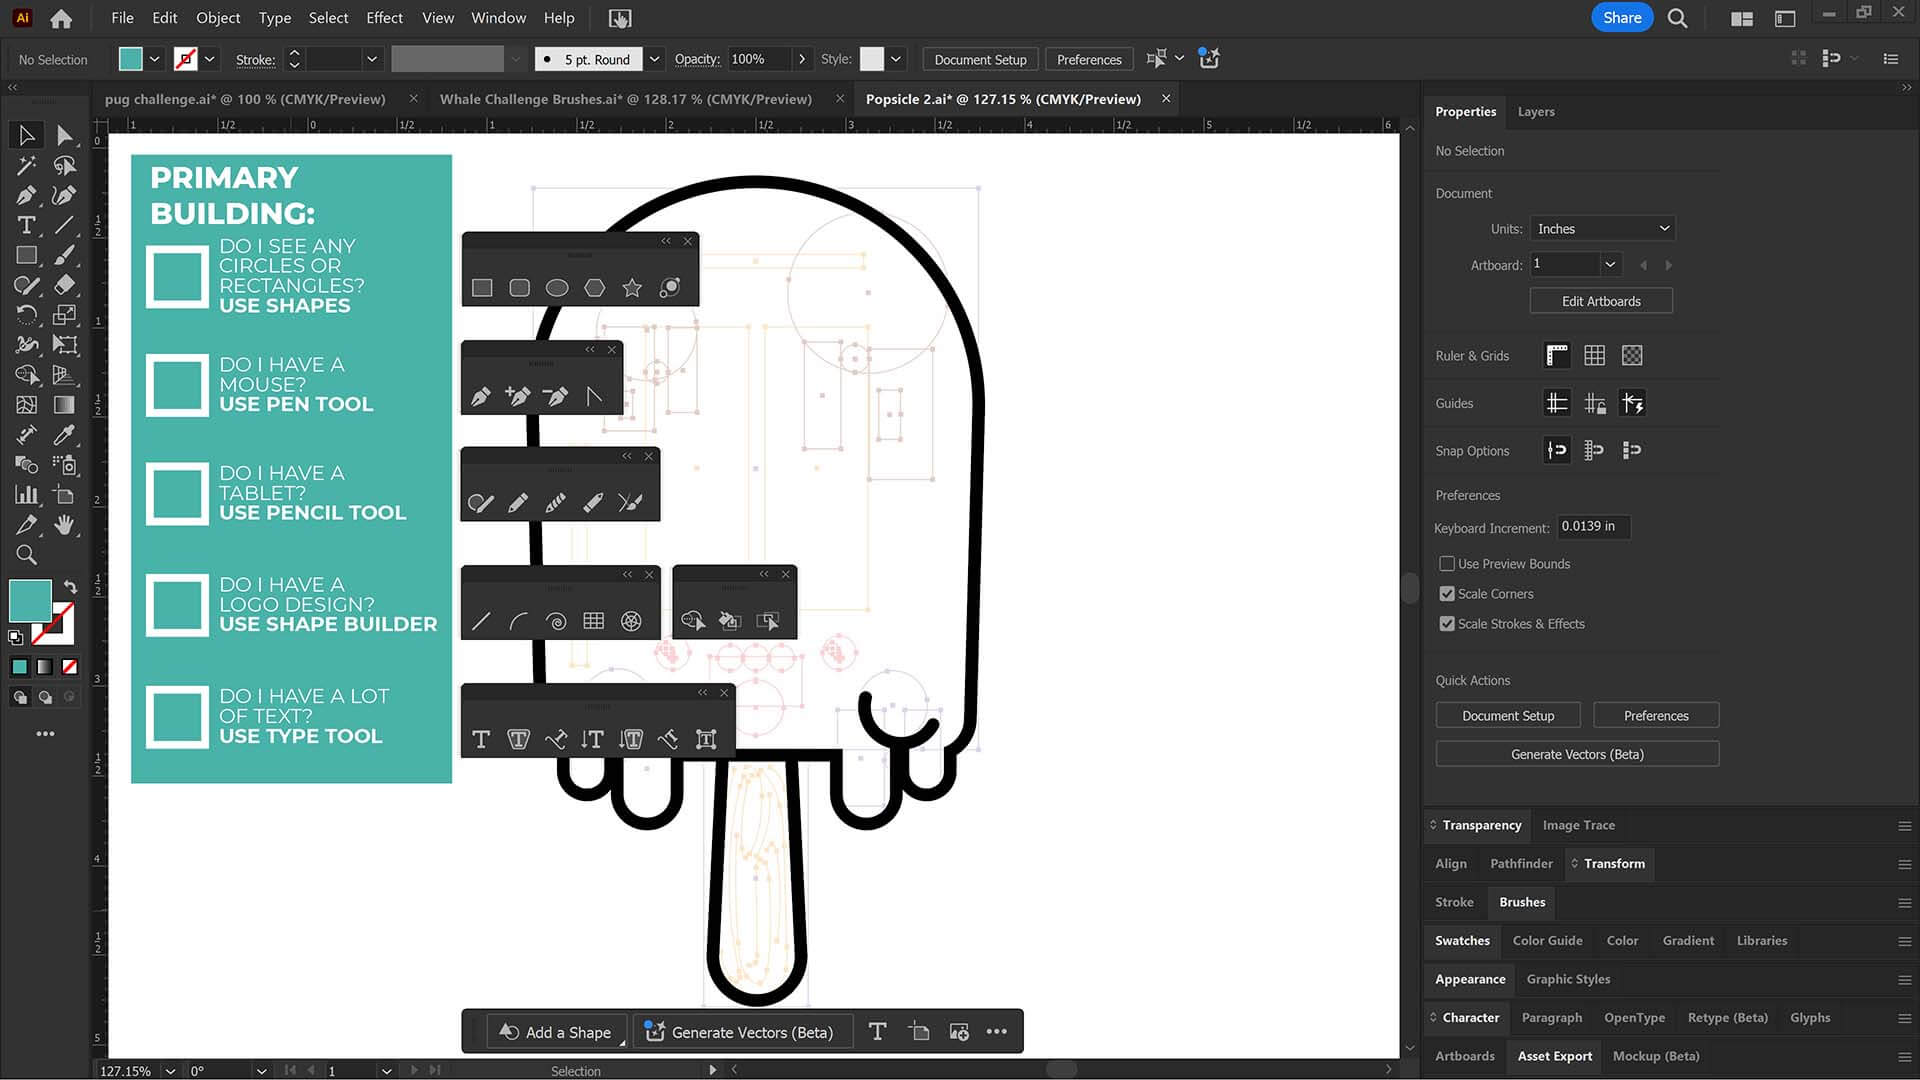
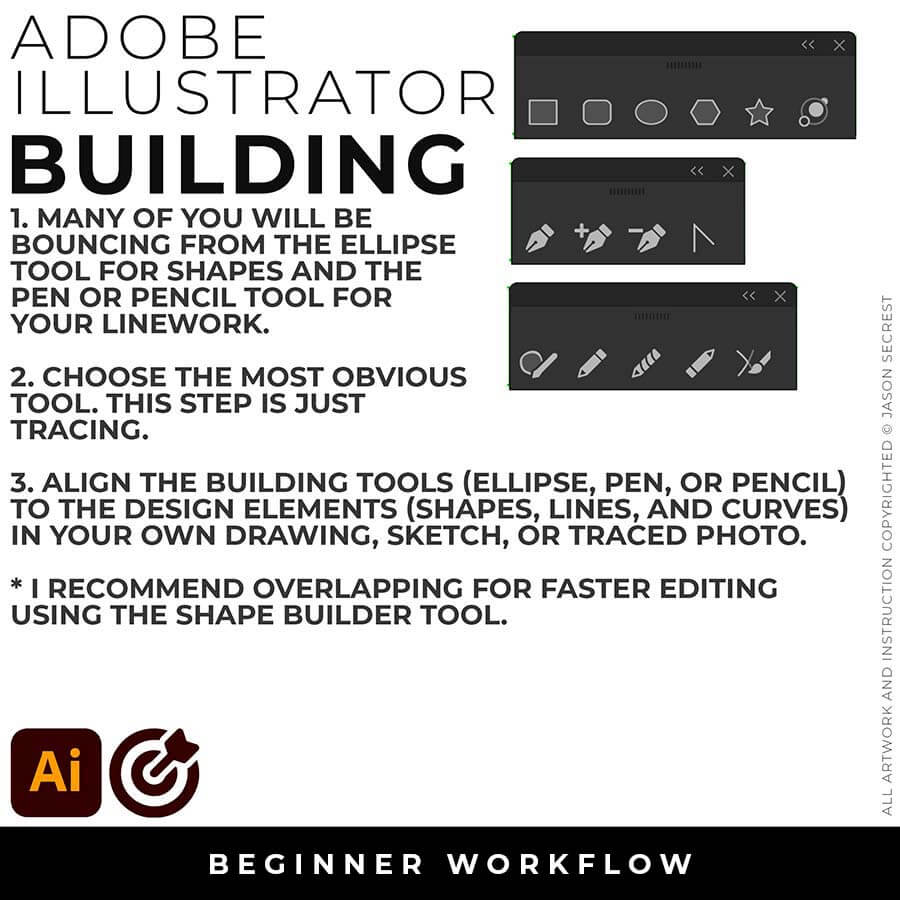
PRIMARY BUILDING TOOLS: Many of you will be bouncing from the Ellipse Tool for Shapes and the Pen or Pencil Tool for your Linework. Once you know the Primary Building Tools you can start prepping your sketches and drawings directly for Adobe Illustrator. CHECKLIST: For your own artwork, use the most obvious Primary Building Tool to lay down your initial paths and objects.
PRIMARY BUILDING: As I create my artwork, notice I am aligning the Building Tools to the Shapes and Lines within my Sketch or Drawing. Many of you will be using Shape, Pencil, and Pen Tools as your Primary Building Tools. BEGINNER: Understand the Building Tools and Options in Adobe Illustrator. ADVANCED: Align the Building Tools (Ellipse, Pen, and Curvature Tools) to the Design Elements (Shapes, Lines, and Curves) in your own drawing or sketch. BEGINNER WORKFLOW
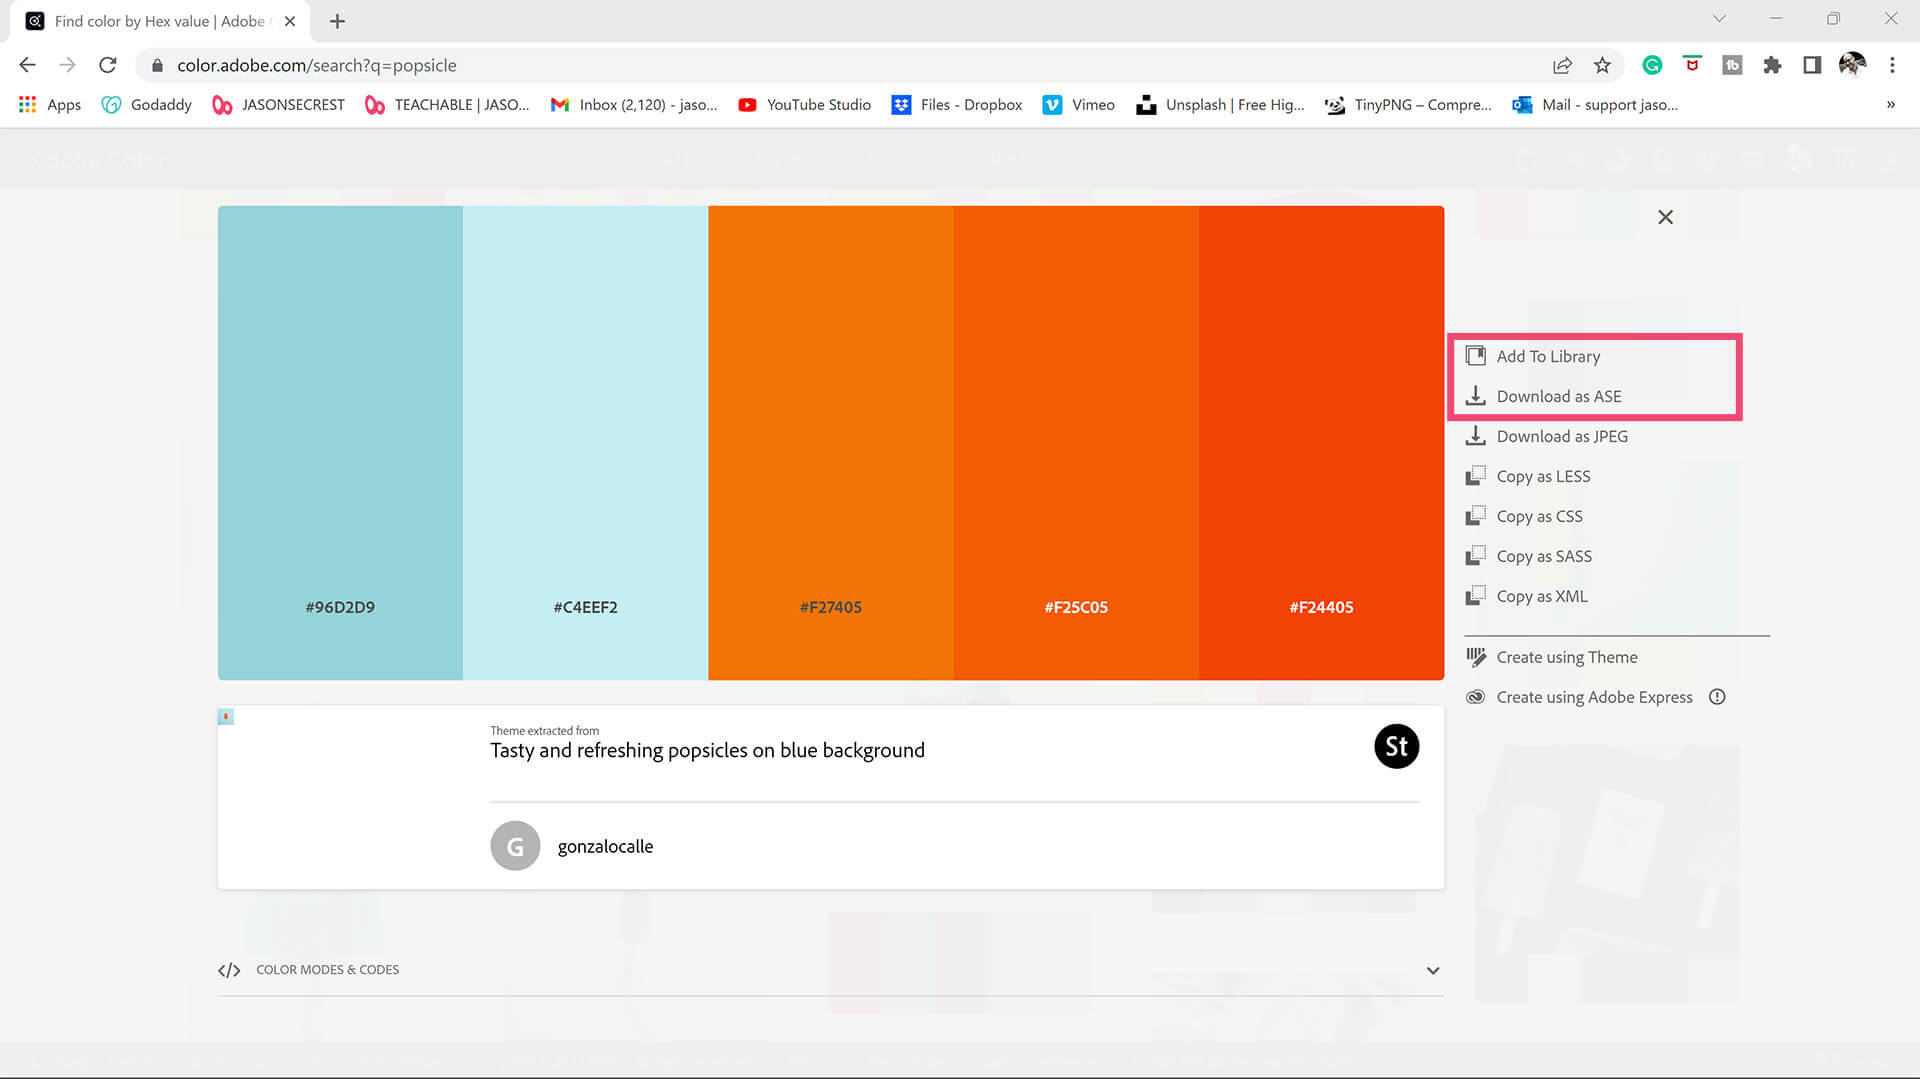
COLOR SWATCHES + THEMES: Download or Save Color Swatches (Adobe Color) for your own artwork and designs. I recommend gathering and organizing resources within the same project folder (Stock Photos / Sketches / Thumbnails / Color Swatches).
SAVE OR DOWNLOAD SWATCHES. You can save Color Themes for your own artwork and designs. If you have CC, click add to Library. You can also download Color Swatches as an .ASE File to open through "Other Library" in the Swatches Panel Menu.
COLOR SWATCHES: Use Color Swatches from your Library or save them from Adobe Color as an .ASE File. Open Swatch Library from the “Other Library” Option. Most Color Themes will use Hues as the Base Color. We will be using Live Paint to create our Basic Fills or Flat Color Layer.
LIVE PAINT: Coloring will be extremely easy using Live Paint Bucket. The goal of Live Paint is to create Shapes that we can color using Fills. Once you have completed the Live Paint Group, it is important to Expand and Upgroup. We will leverage these shapes for our Values and Gradients.
KNIFE TOOL: After using Live Paint, Expand and Ungroup. Use a Duplicated Flat Color Layer for your Value Layers. The Knife Tool will cut Shapes. I recommend cutting out all of the shapes first before deleting them. You can use this technique for Highlights, Shadows, or Cast Shadows.
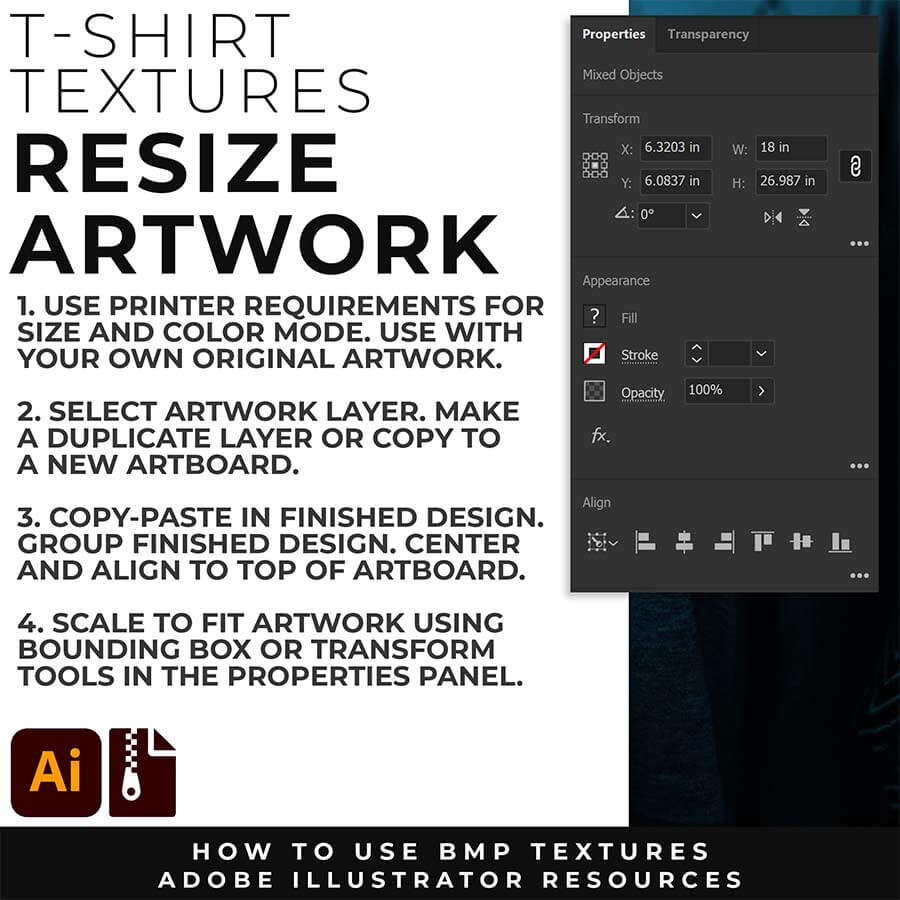
RESIZE ARTWORK: If you are building in a smaller scale you will need to resize your artwork before applying textures. I recommend duplicating the layer or copying and pasting to a new artboard. Select All - Group. Use the Properties Panel to transform your original Artwork or Design to fit Printer Requirements.
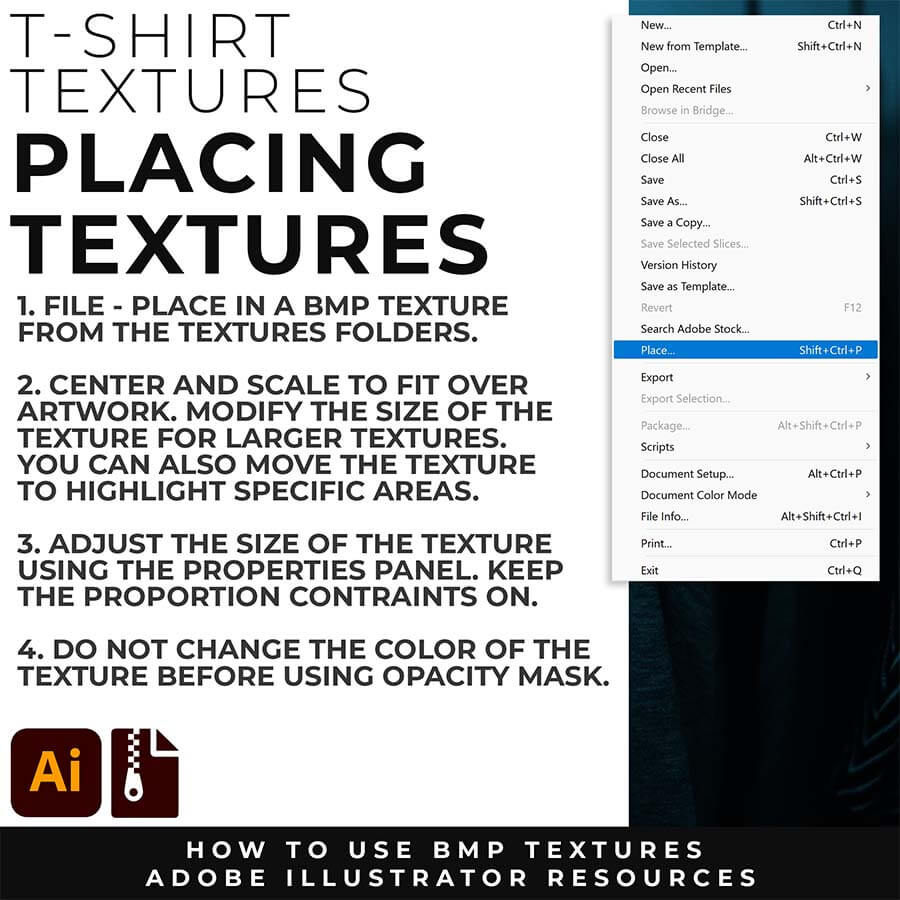
FILE - PLACE: Once you have grouped and resized (if needed) your own finished original artwork, you are ready to bring in the BMP Textures. Under File - Place Textures into your working Artboard. Scale to Fit over your entire design. To use Textures with Opacity Masks you will need to Group and Scale your Finished Artwork before Applying.
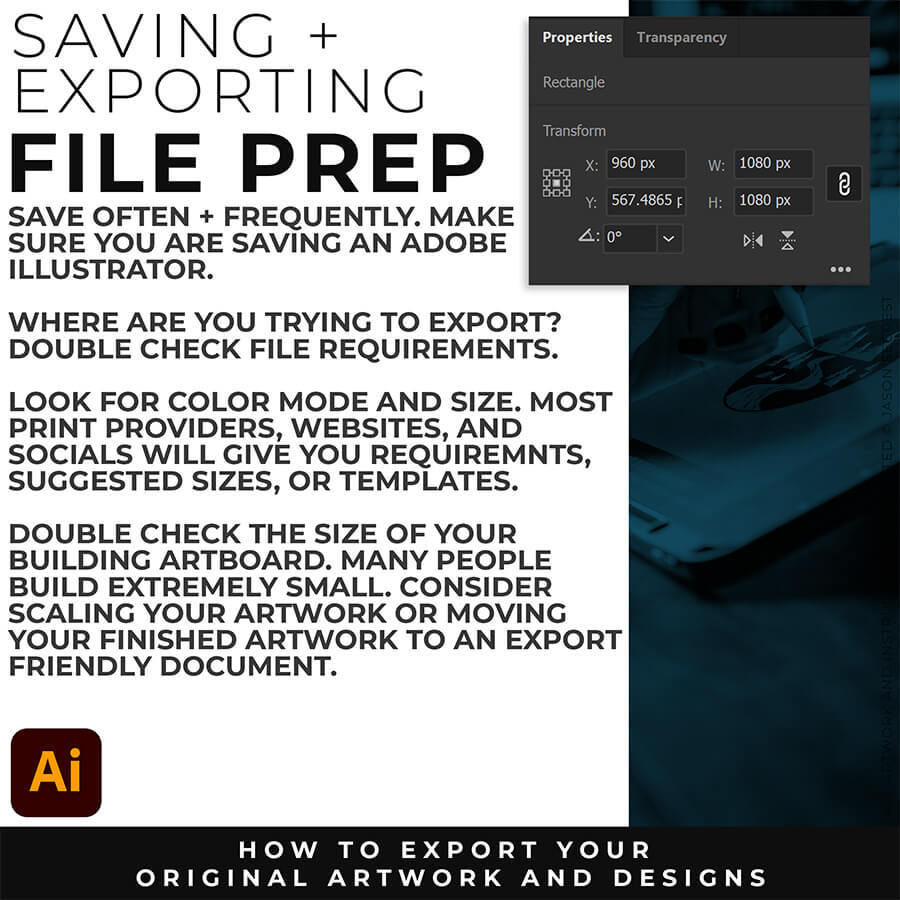
FILE PREP: An exported PNG looks blurry when the document is saved at a low resolution or when the anti-aliasing drops processing frames. To fix blurry PNG exports, verify that your export resolution is set to 300 PPI. Additionally, change the anti-aliasing option from "Type Optimized" to Art Optimized. This instructs Adobe Illustrator to prioritize smooth line work and vector curves rather than prioritizing text rendering.
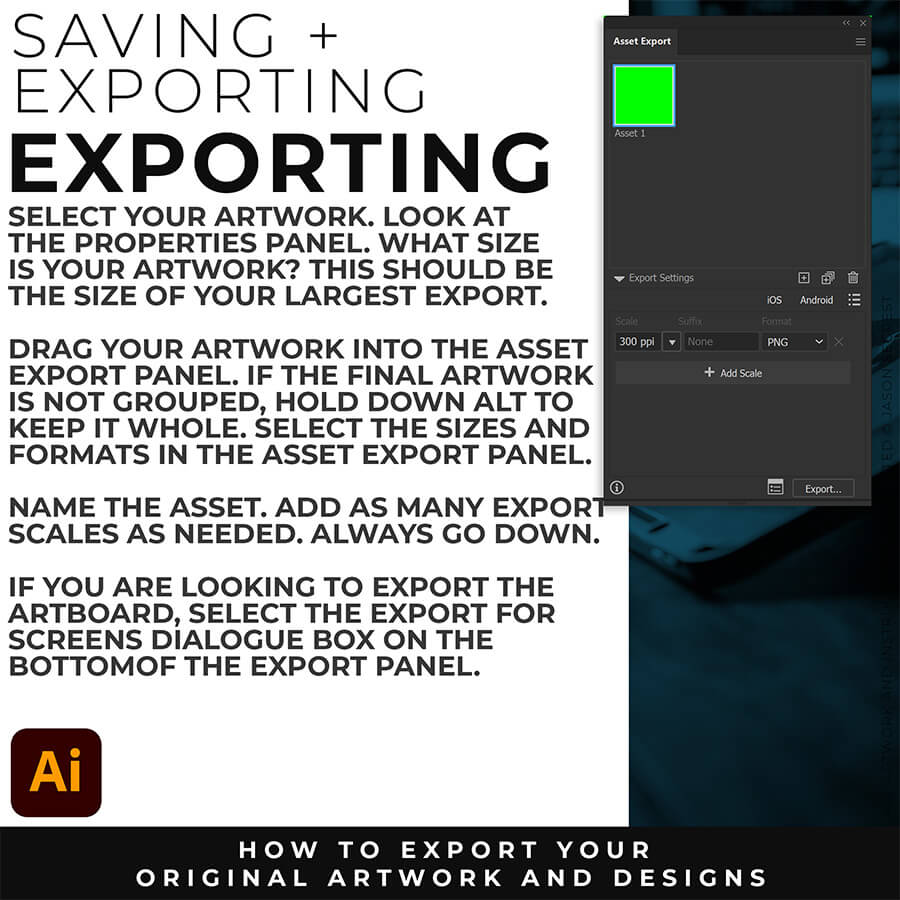
EXPORTING: The best export settings for a high-quality PNG are found by navigating to File > Export > Export for Screens. Set the format to PNG, choose a scale multiplier of 2x or 300 ppi for high-resolution displays, and ensure the anti-aliasing setting is explicitly set to Art Optimized (Supersampling). This combination guarantees that crisp vector outlines remain perfectly smooth when converted into a raster image file.