BEGINNER: The major decision you'll need to make is your starting point and build mode. First, determine whether you have drawings and sketches ready to use, or if you will be starting from stock photos. We are looking to align the starting point, build mode, and export size. LEARNING TARGET: If you are new, I recommend starting with our (NEW) FREE TOOLS.
INTERMEDIATE: The purpose of our Beginner Guides is to provide an overview of a workflow, allowing you to see the steps in sequence. These are designed to assist you as you go through our Free Tools and Workflow Guides. Clarifying these details will simplify your learning process in Adobe Illustrator. LEARNING TARGET: Go through each guide and print out the Final Checklists. (NEW) WORKFLOW GUIDES
ADVANCED: Pay attention to the Sequence of Events, Resources, and Tool Options as it relates to building a "Workflow." Have an initial workflow, then we can start streamlining or adding AI components to. LEARNING TARGET: As you are creating your own artwork, break down your steps in your workflow. (NEW) LINEAR WORKFLOW
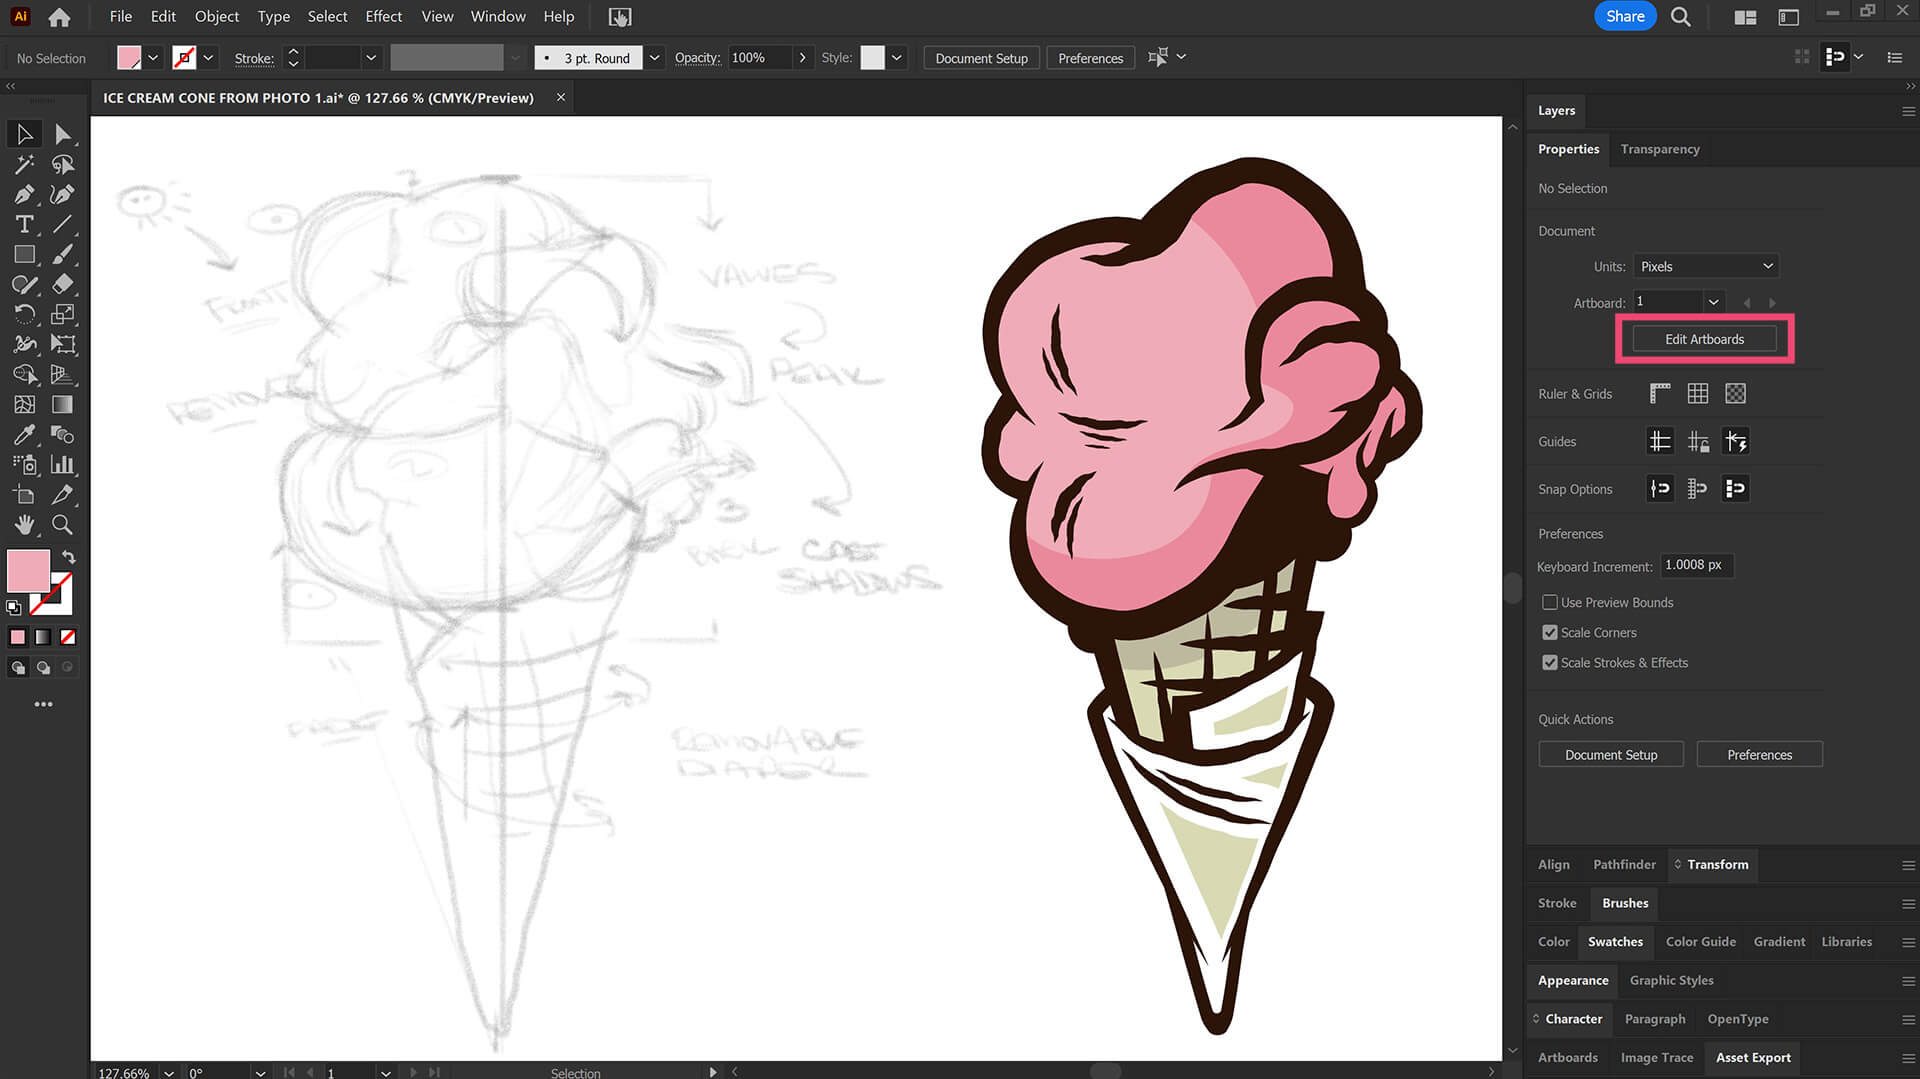
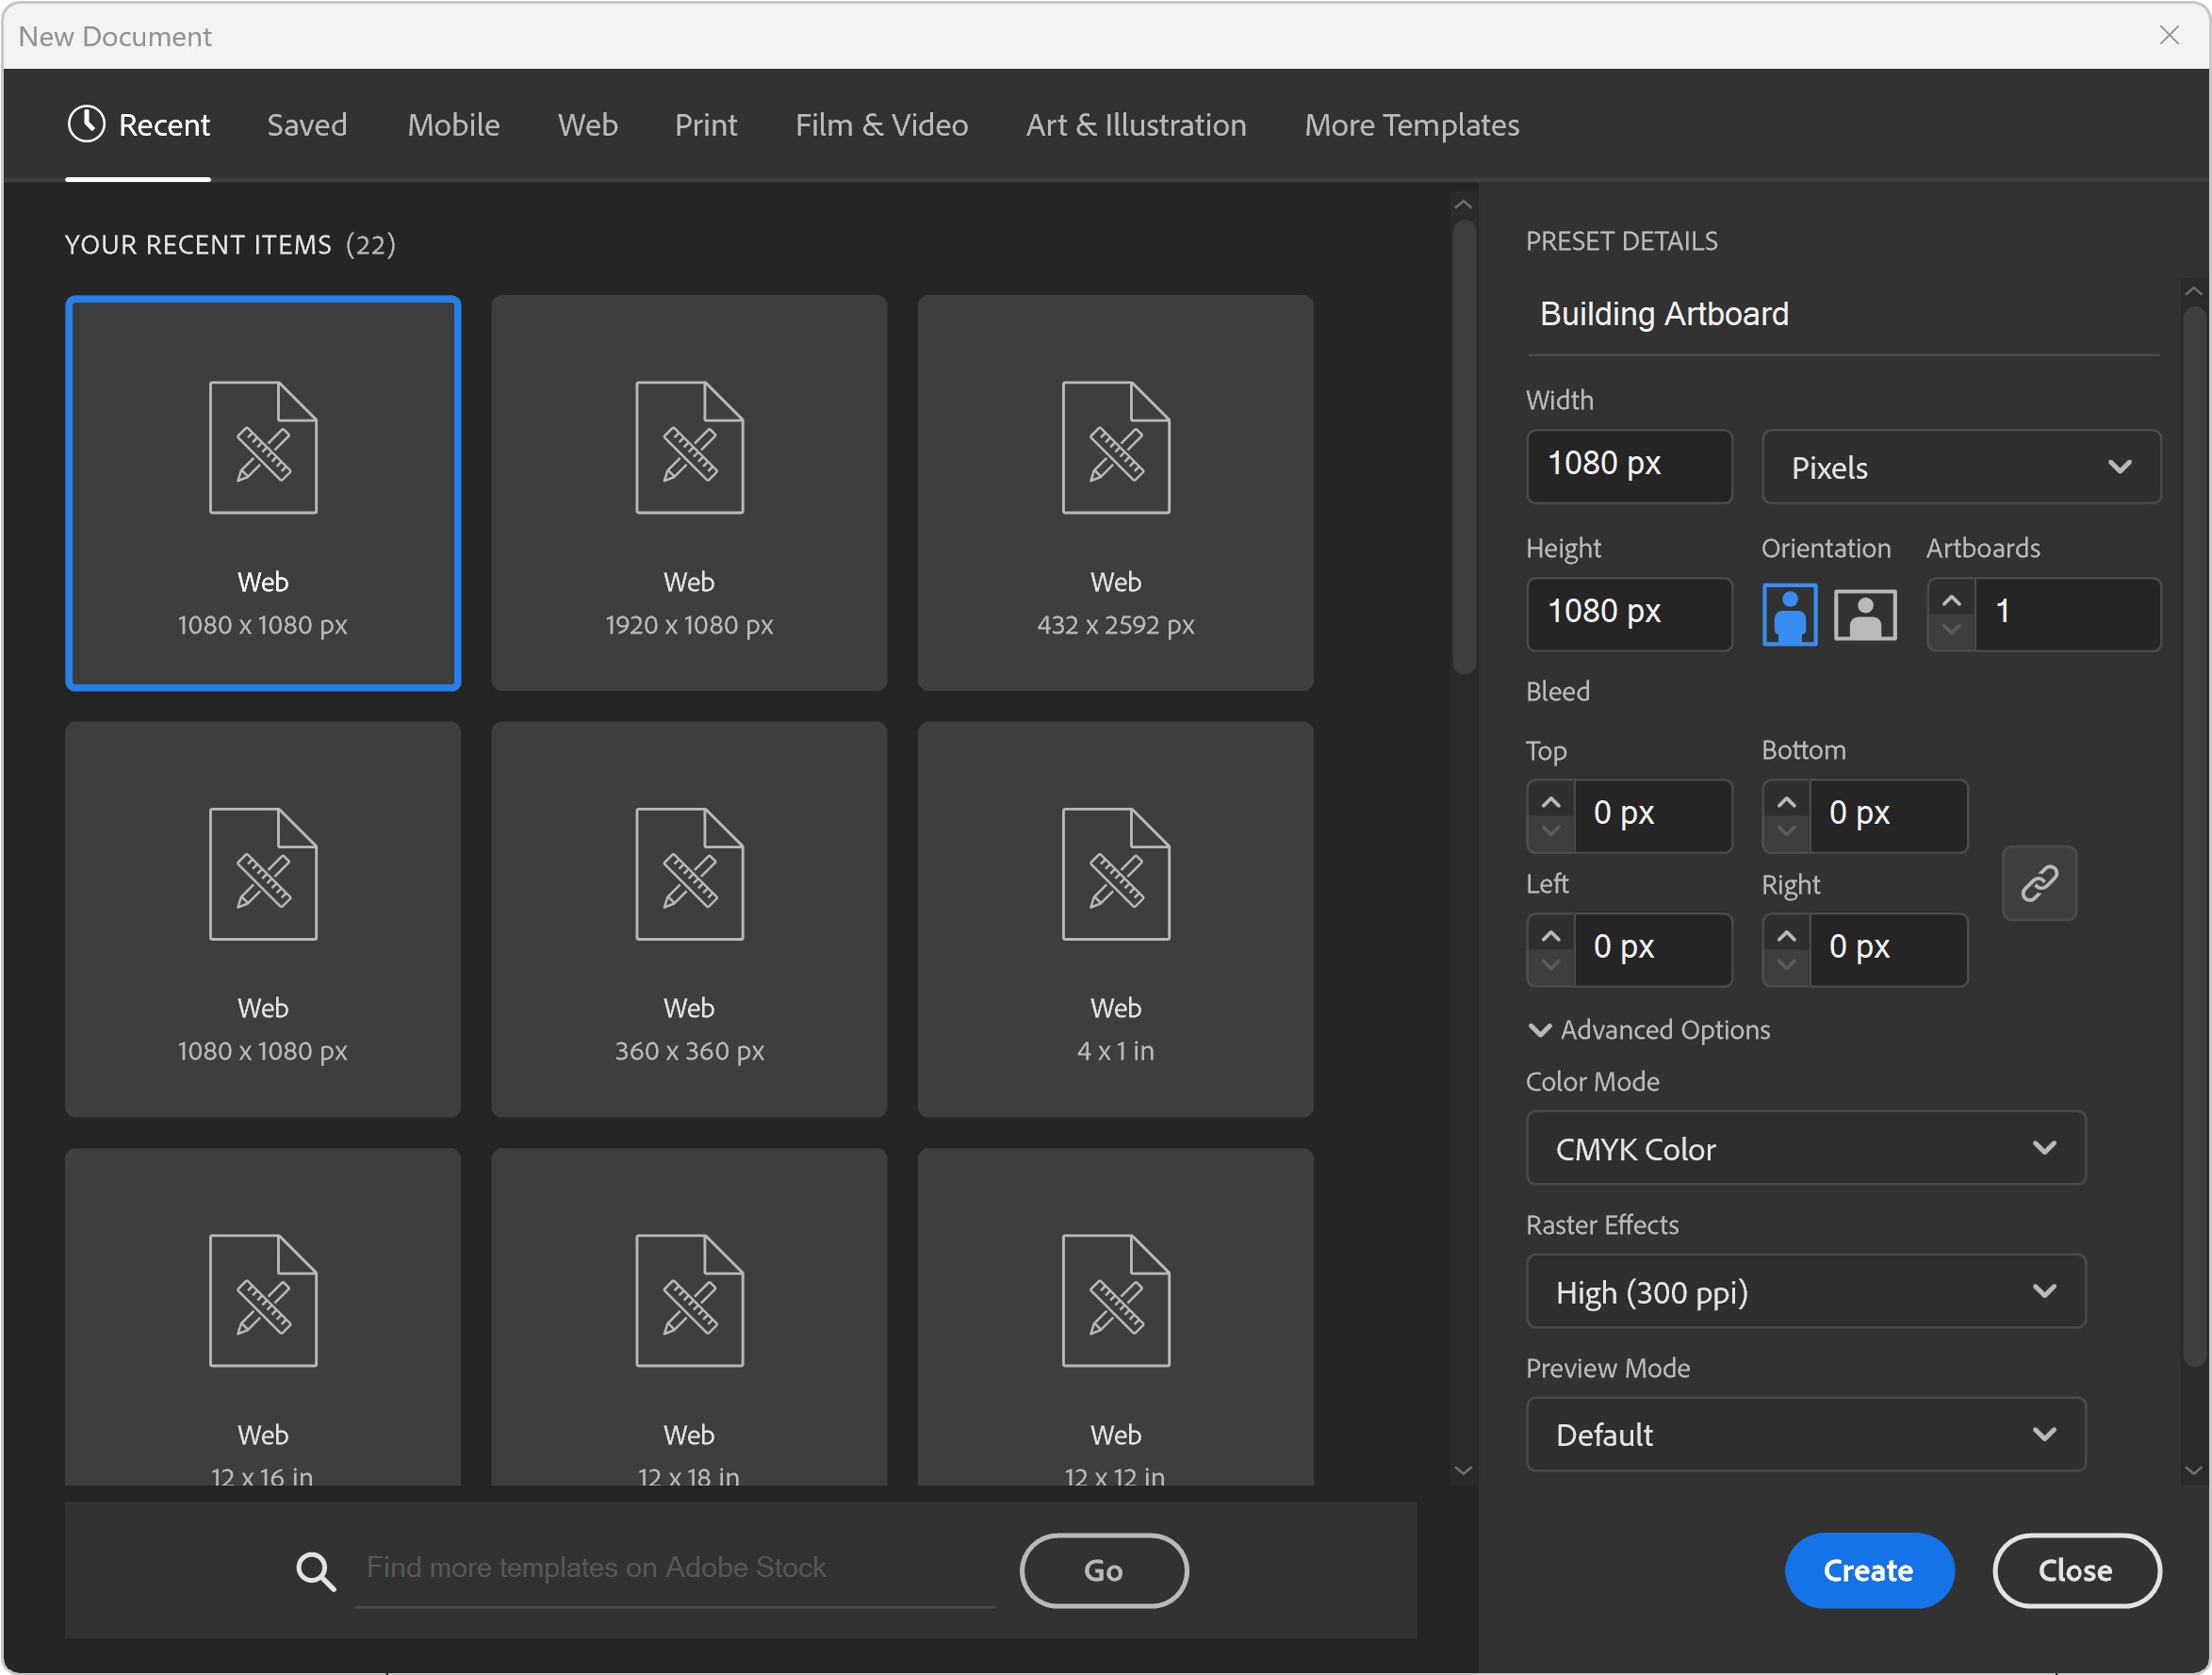
ARTBOARDS: I will recommend a (1080px by 1080px, 300PPI, RGB) as your Initial or Base Artboard Size. The Initial Artboard Size can be changed at any point without ruining your own artwork. Use the Properties Panel to Scale Artwork and Artboards. LEARNING TARGET: Create a "Building Template" that includes Artboard Size, Resource Images, and Template Layers. LEARNING TARGET: For your own artwork, pick a "Building" Artboard Size you can use for your Website and Social Media Postings. Example: Instagram uses 1080px as its base size to modify for Landscape, Square, or Portrait.
ARTBOARDS: I will recommend a (1080px by 1080px, 300PPI, RGB) as your Initial or Base Artboard Size. The Initial Artboard Size can be changed at any point without ruining your own artwork. Use the Properties Panel to Scale Artwork and Artboards. ACTION STEP: Create a "Building Template" that includes Artboard Size, Resource Images, and Template Layers. For your own artwork, pick a "Building" Artboard Size you can use for your Website and Social Media Postings. Most sites use a 1080px as its base size to modify for Landscape, Square, or Portrait. → ARTBOARD SIZE FINDER / SOCIAL MEDIA SIZE FINDER / POD SIZE FINDER
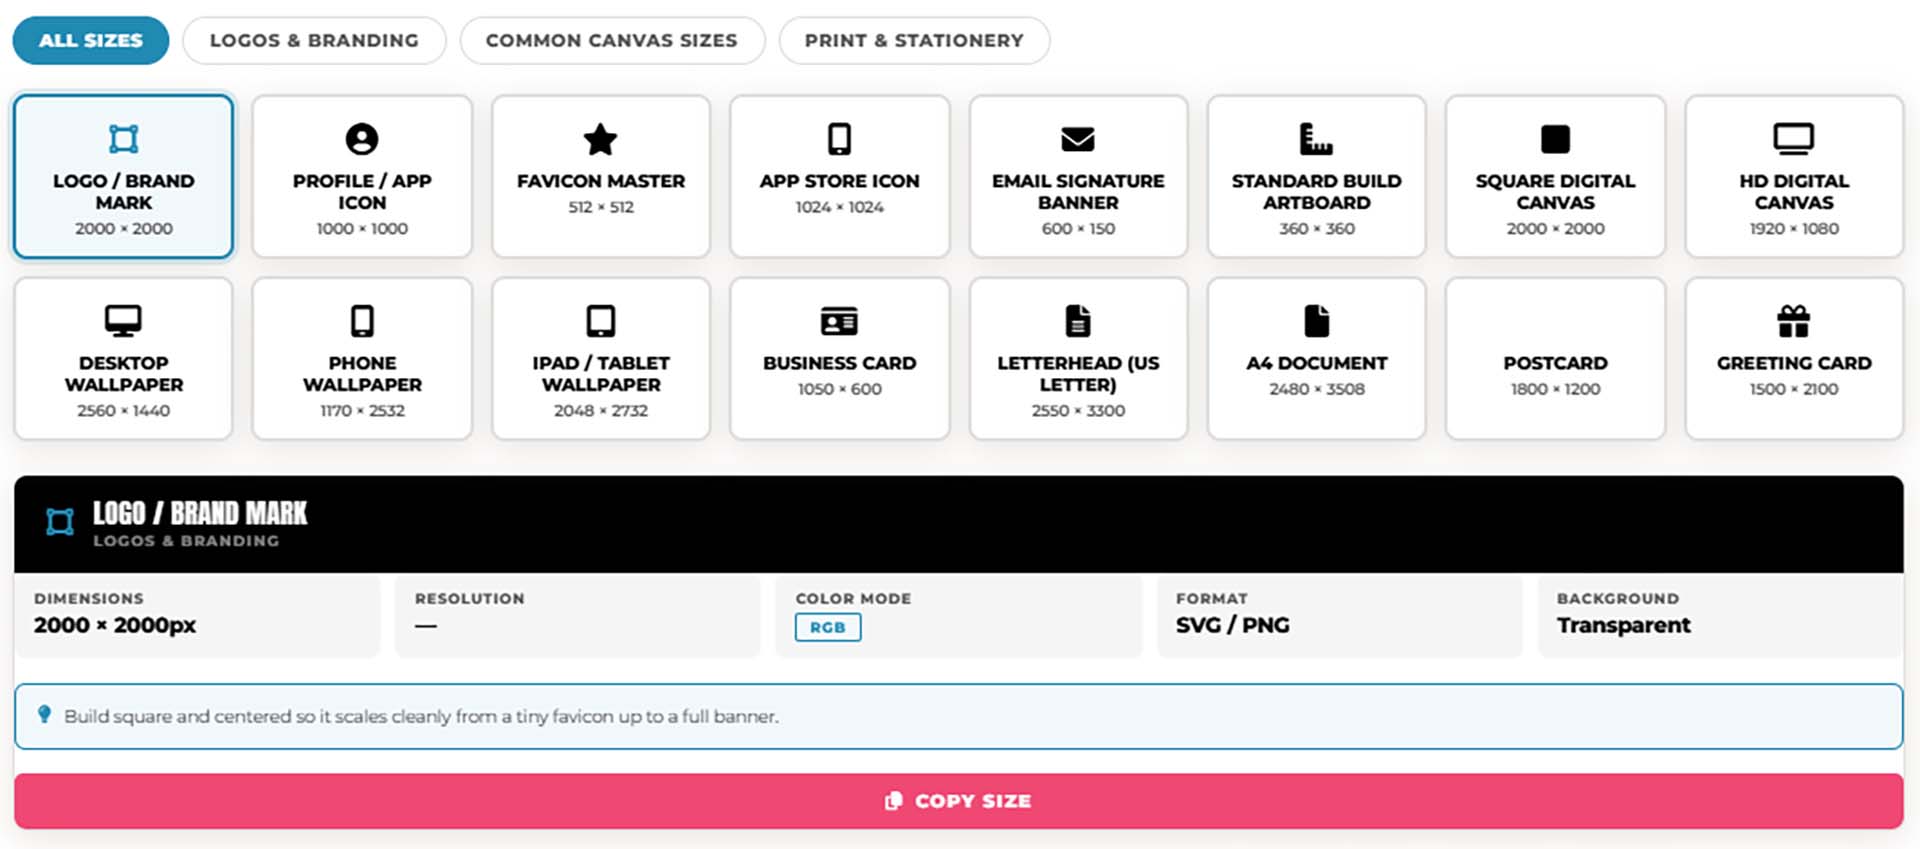
ARTBOARD SIZE FINDER: Not sure what size to set up your artboard before you start designing? Tap a card below to see the exact pixel dimensions, color mode, and resolution for logos, brand marks, profile icons, and common digital canvas sizes — so you're set up correctly in Adobe Illustrator before you draw a single line.
→ ARTBOARD SIZE FINDER
STOCK PHOTOS: For your own artwork and designs, I recommend using (Unsplash / Pixabay / Pexels) for Free Stock Photos. ACTION STEP: Quickly bookmark the websites to a Free Resources Folder in your browser. When you are creating your own artwork or design projects, download, gather, and organize resources within the same project folder on your computer (Stock Photos / Sketches / Thumbnails / Color Swatches / Font Families). → RESOURCE GUIDES / PRACTICE EXERCISE PROMPT BUILDER
RESOURCES: As I create my artwork, pay attention to the resources being used throughout the workflow. BEGINNER: For your own artwork, I recommend starting from a Drawing, Sketch, or Traced Stock Photo. ADVANCED: Gather and organize resources within the same project folder (Stock Photos / Sketches / Thumbnails / Color Swatches). RESOURCE GUIDES
RESOURCES: As I create my artwork, pay attention to the resources used throughout the workflow. BEGINNER: For your own artwork, I recommend starting from a Drawing, Sketch, or Traced Stock Photo. ADVANCED: Gather and organize resources within the same project folder (Stock Photos / Sketches / Thumbnails / Color Swatches). FREE RESOURCES / RESOURCE FOLDERS / RESOURCE GUIDES
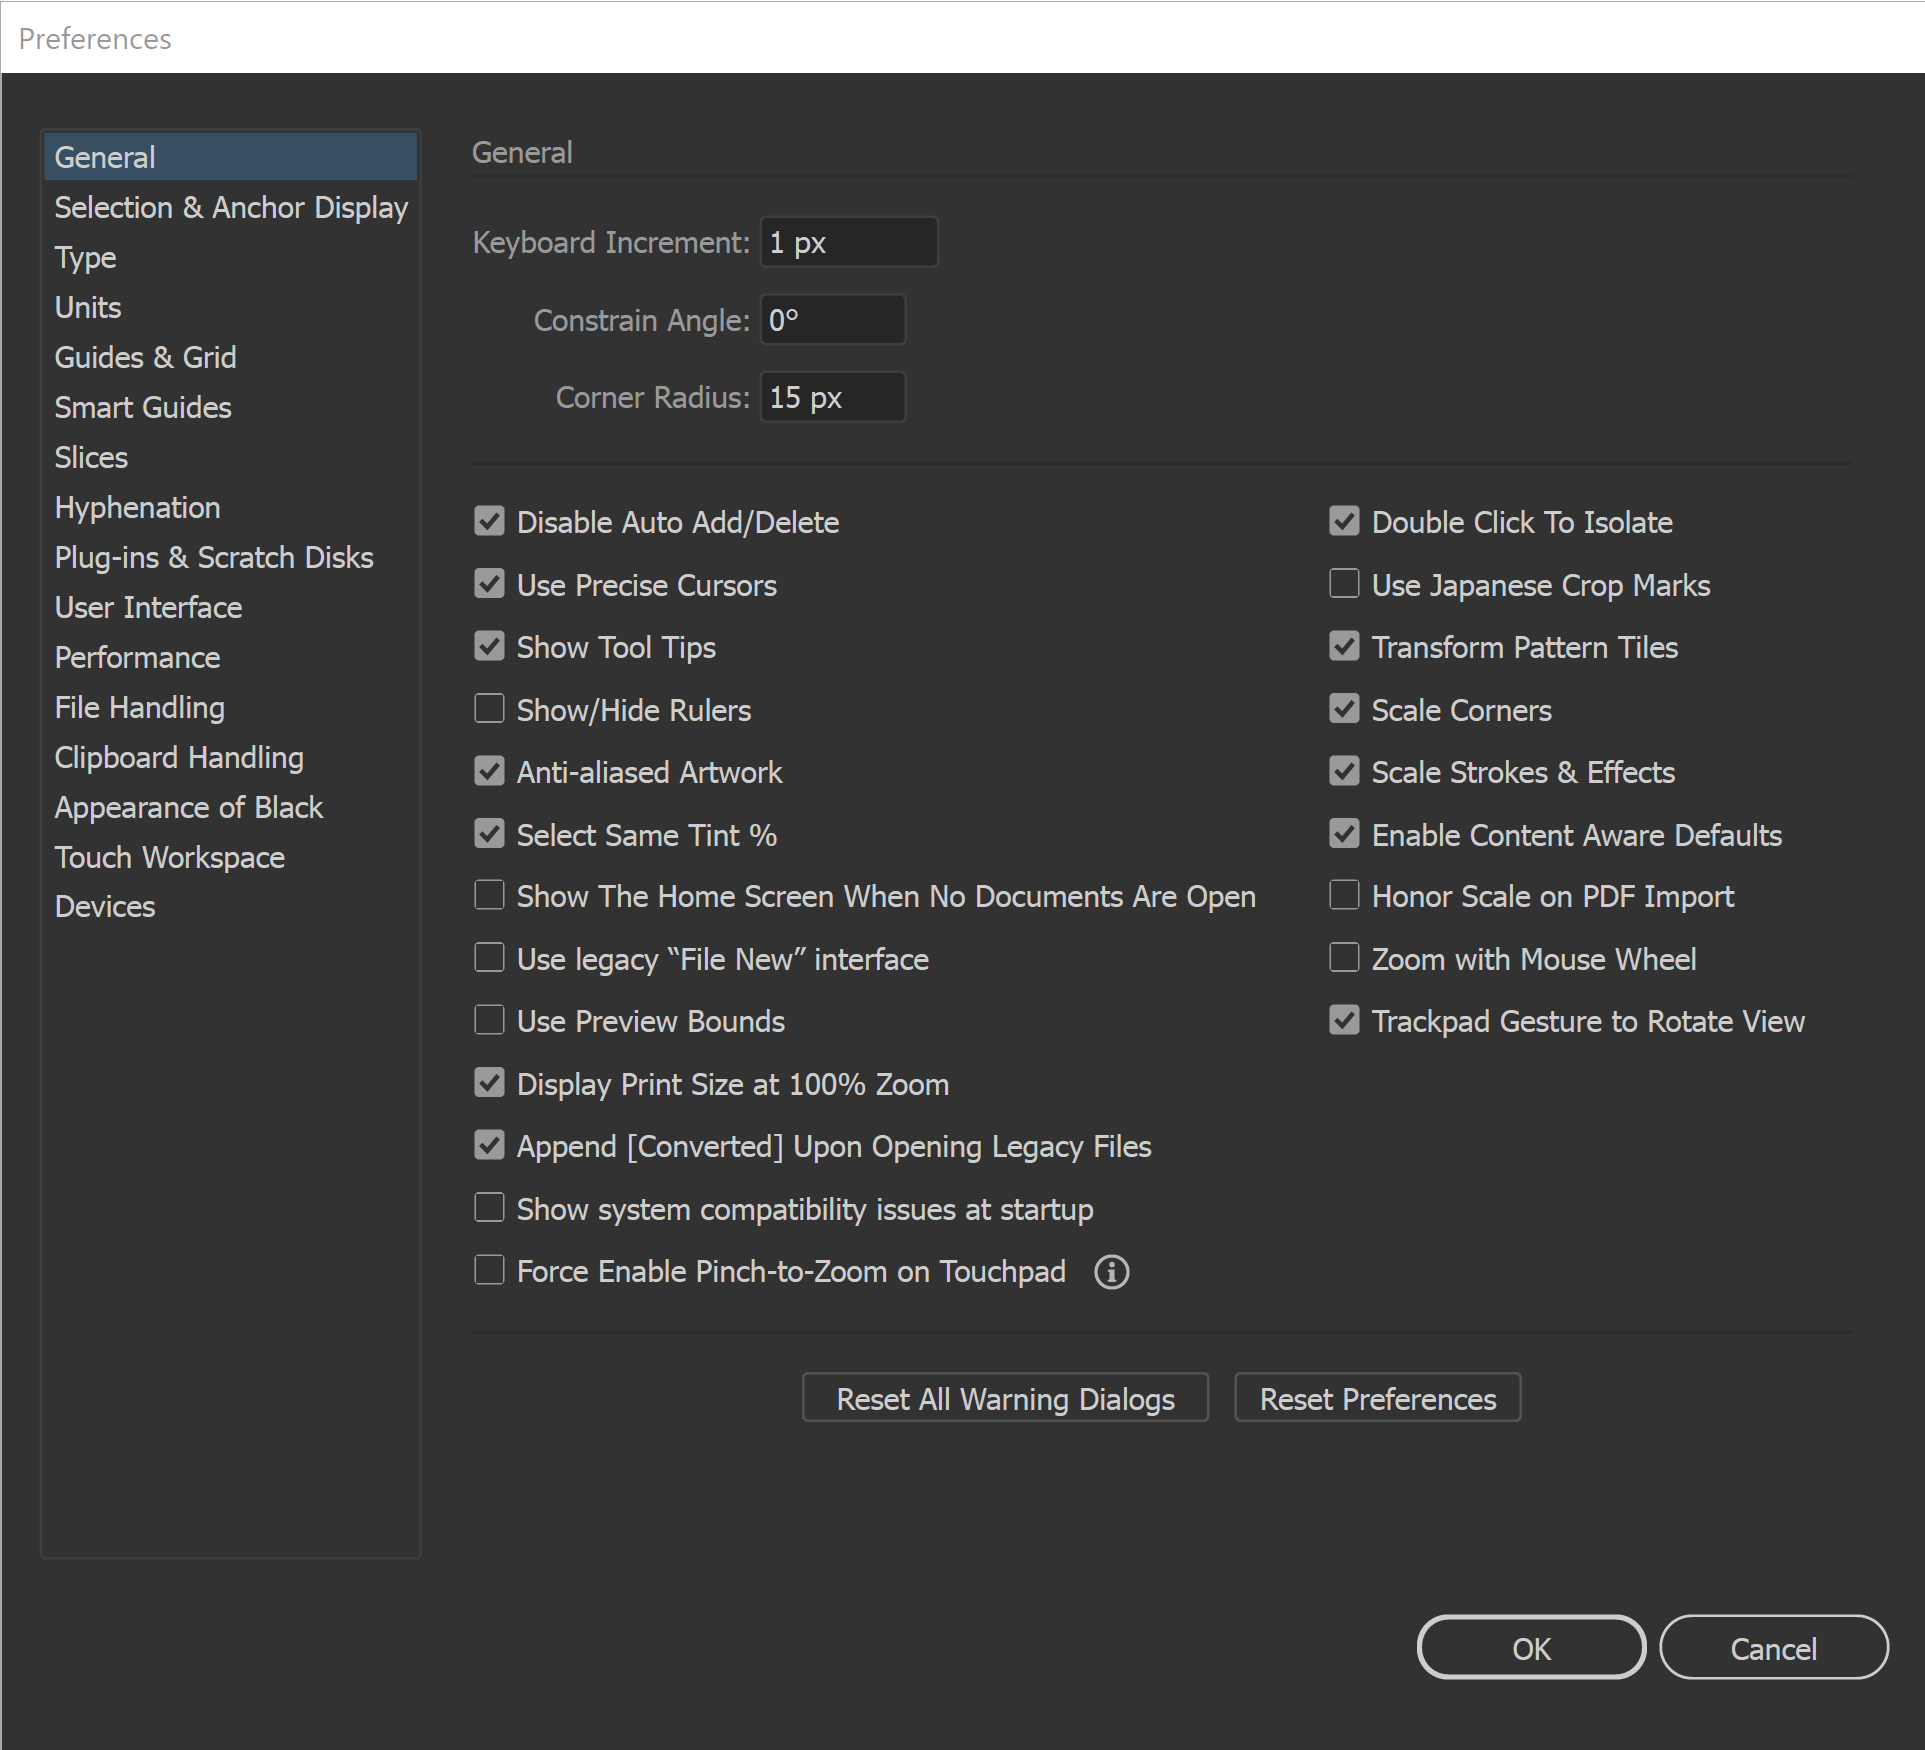
GENERAL PREFERENCES: All of our initial preferences are designed to gain more control over what you are clicking on. The more you can zoom in and see your anchors and handles the better. You can adjust the size of your Anchors and Handles under Selection and Anchor Display. Under your General Settings, make sure that Disable Auto Add/Delete is Selected.
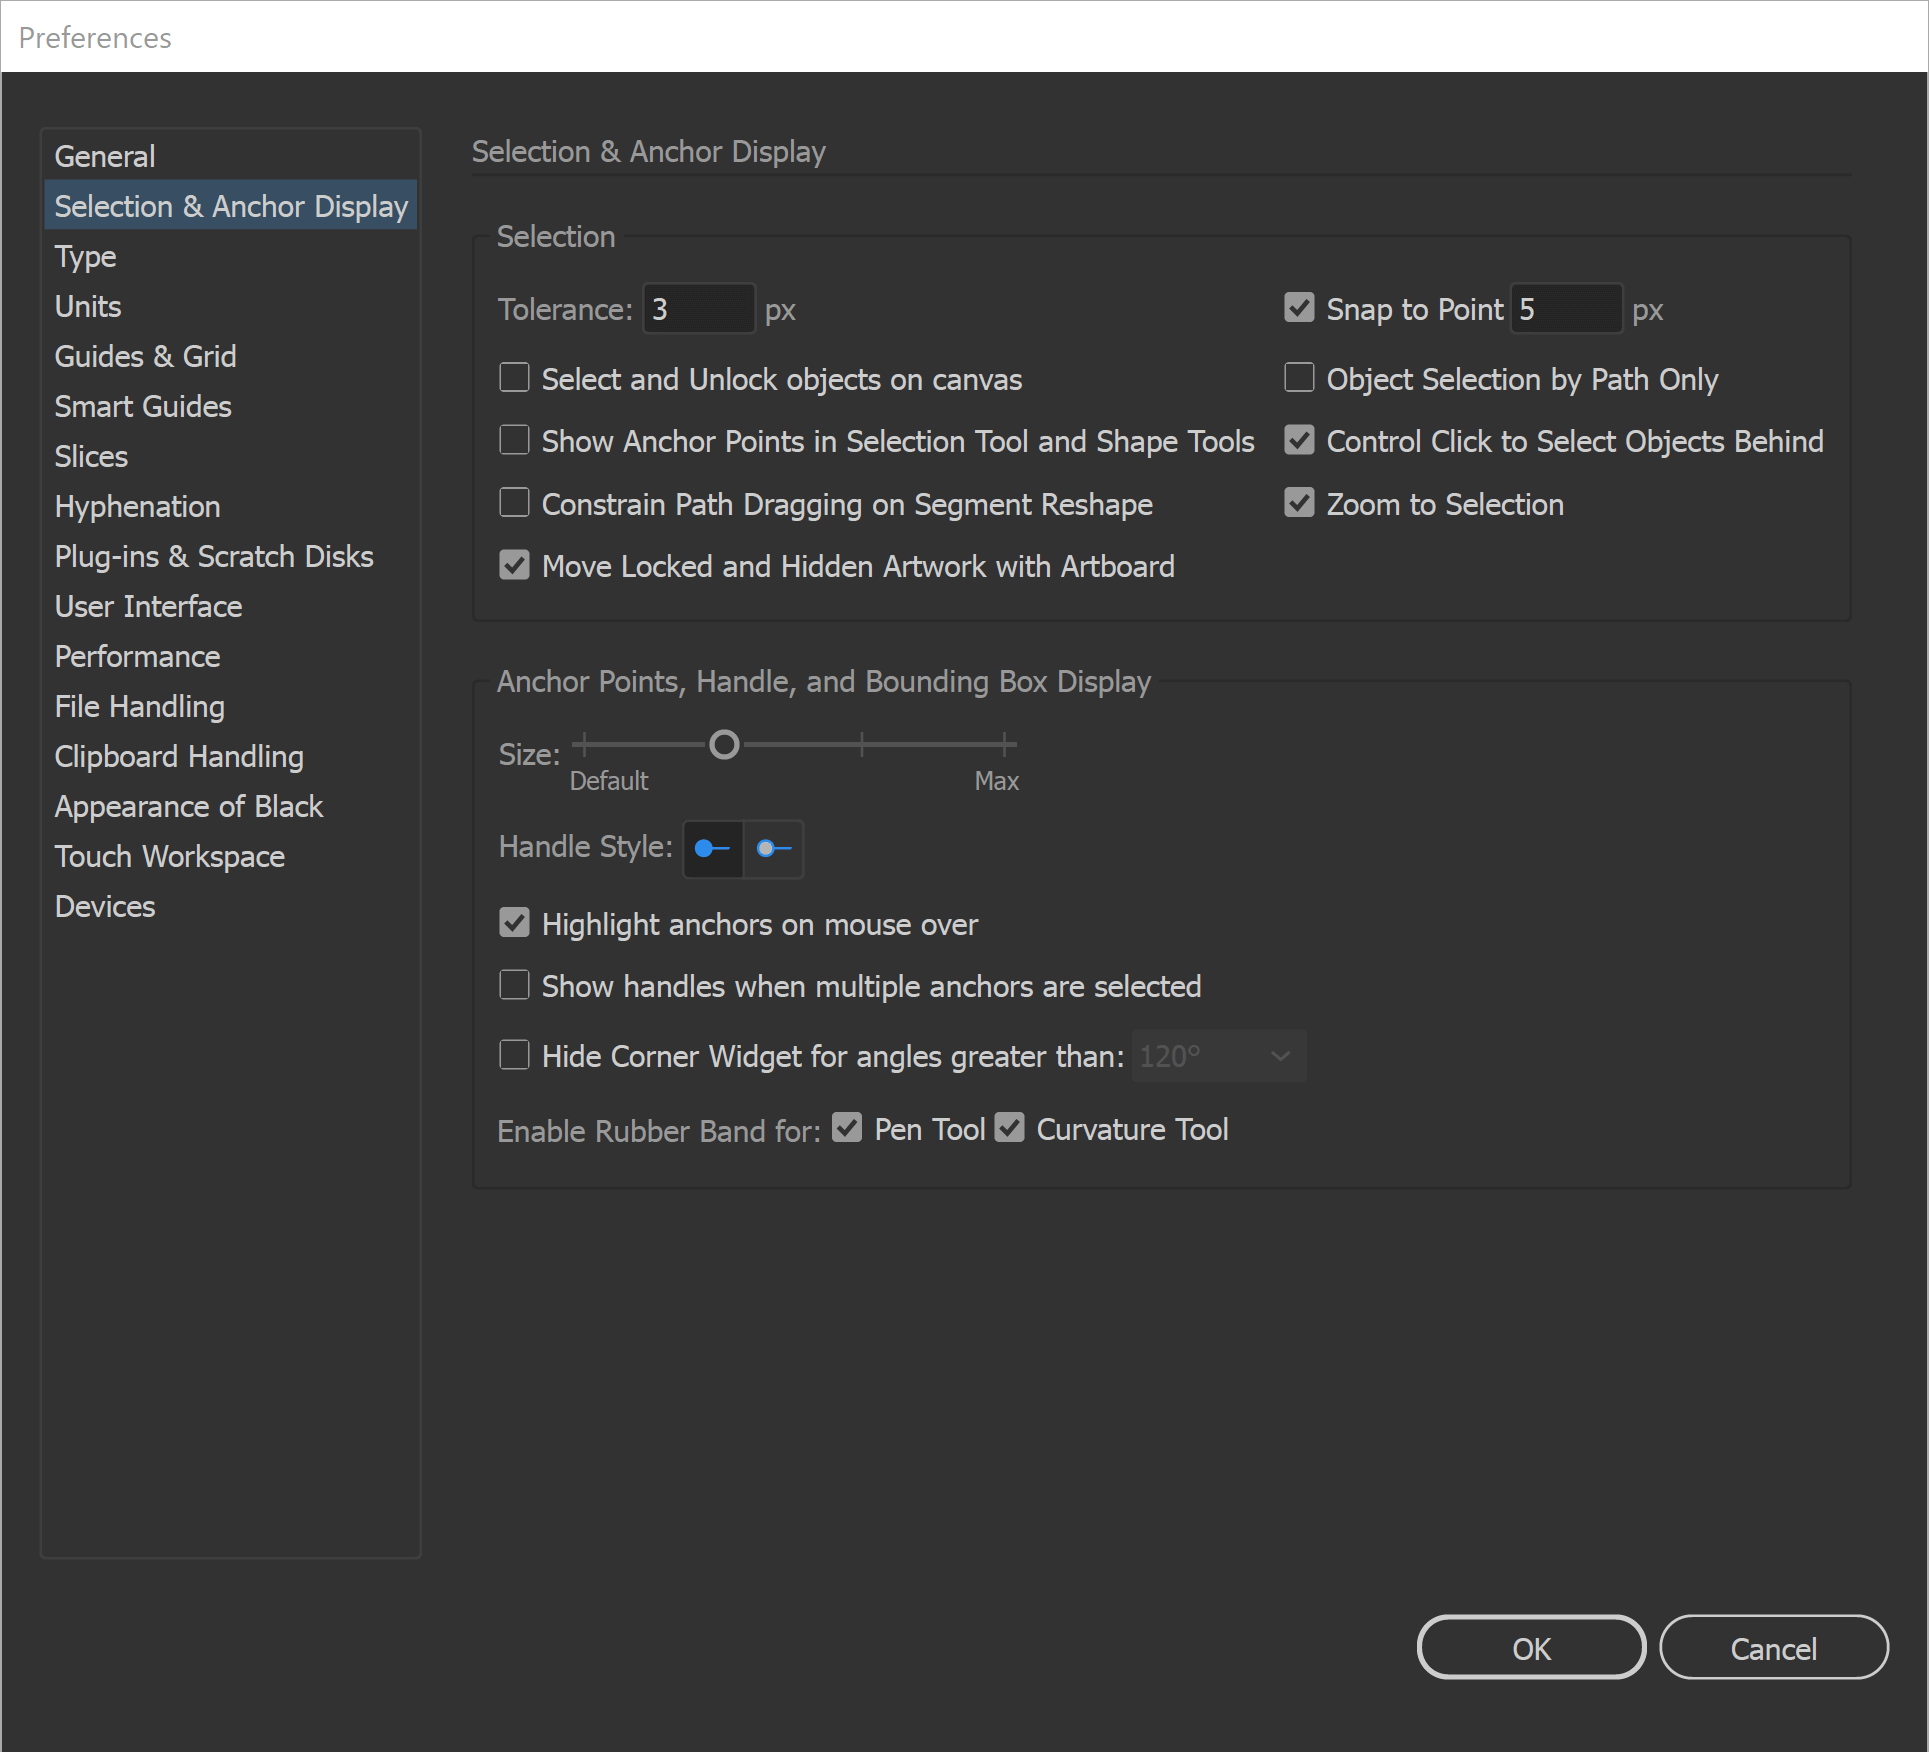
SELECTION TOOLS: The Direct Selection Tool can grab and adjust the Anchors, Handles, and Paths. It is worth having your Smart Guides Path Labels Turned On so you know what the tool is selecting before dragging. The Selection Tool will move and select objects. I like using the Bounding Box for my Transform Tools, Turn On under View. I recommend this for Quick Scaling.
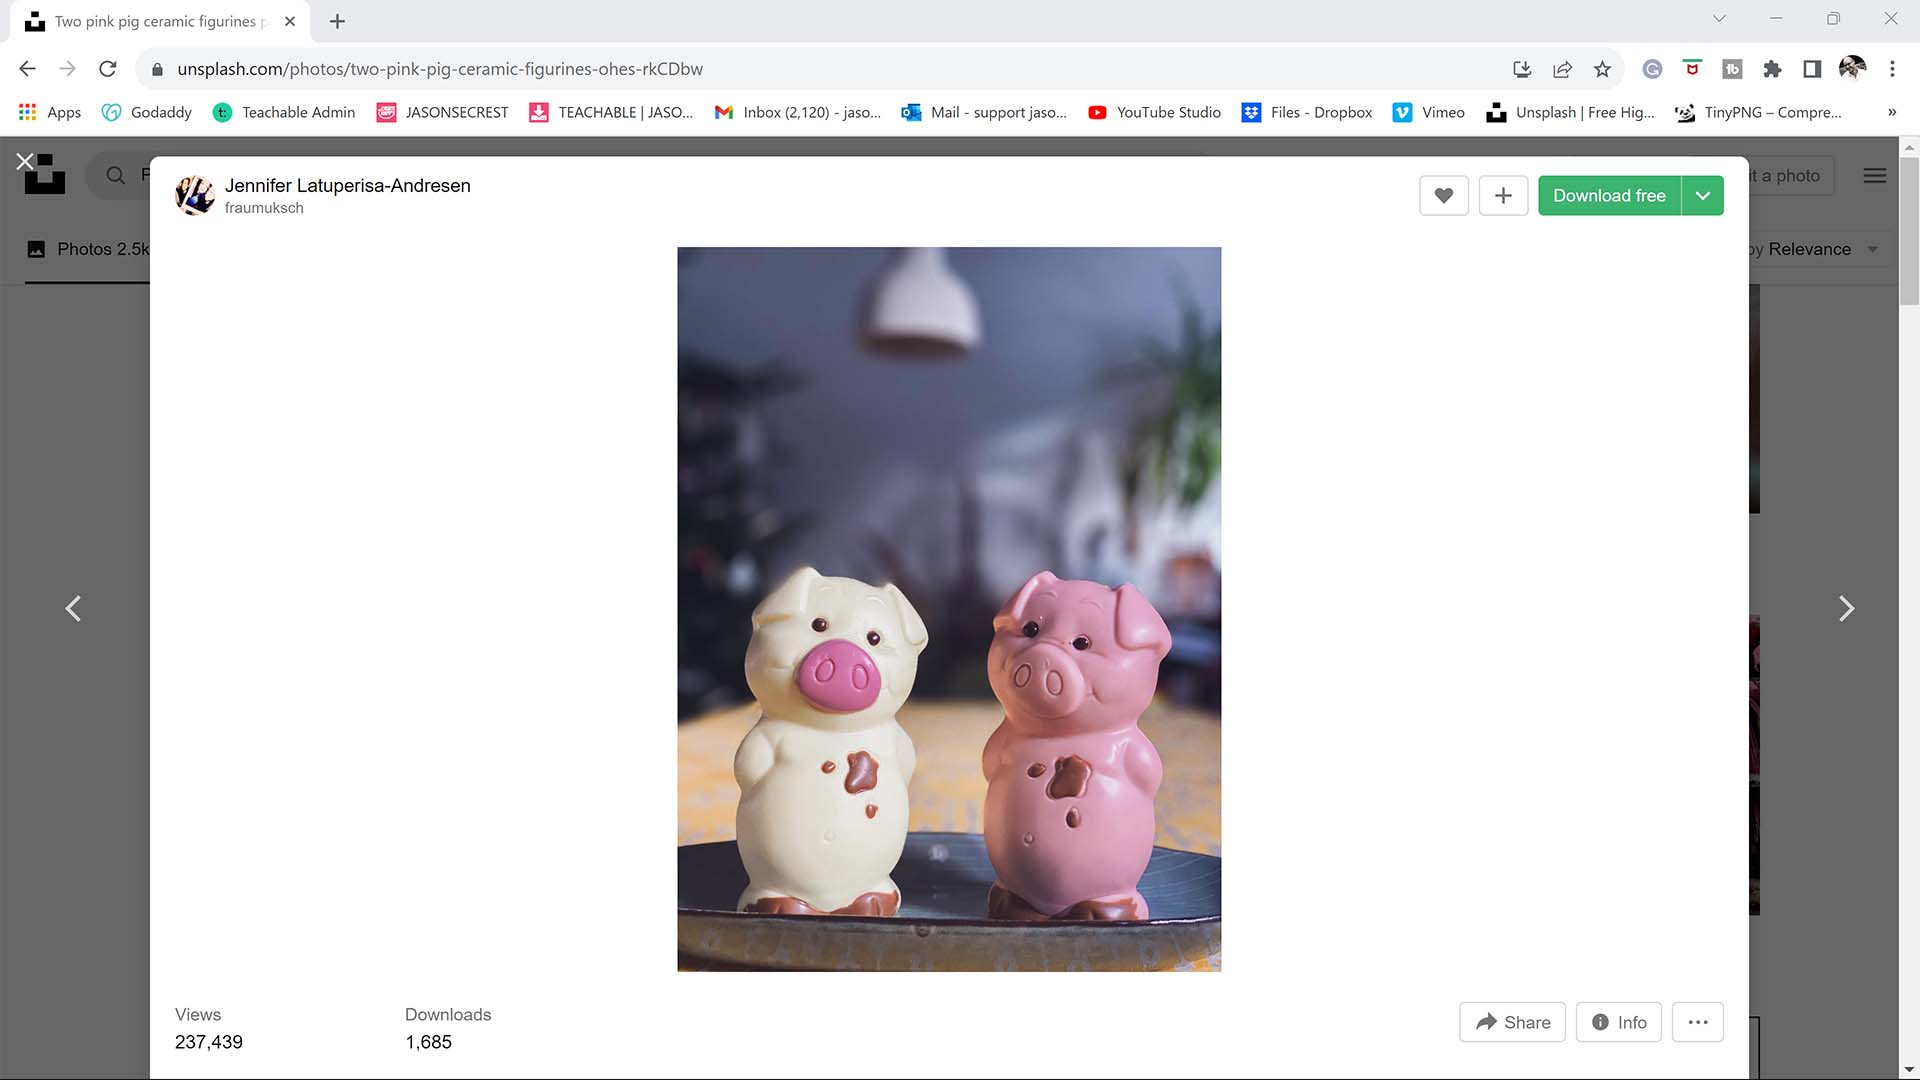
STOCK PHOTOS: 100% of all Free Resources are available Online - no account or login is required. (Stock Photos / Color Swatches / Font Families). When you are creating your own artwork or design projects - I recommend organizing resources within the same project folder on your computer. → FREE RESOURCES → PHOTO TO STYLE PROMPTS
GATHERING PHOTOS: Start with your own photography or a properly licensed stock photo — never a random image pulled from a search engine, since you won't actually know its usage rights. A single, clearly-lit subject with a simple background gives the AI the cleanest signal to work from; a busy, cluttered photo forces it to guess at what in the frame actually matters. Higher-resolution source photos consistently produce better results than anything compressed or blurry, since detail that isn't in your original photo can't be recovered afterward. → FREE RESOURCES → WORKFLOW GUIDES
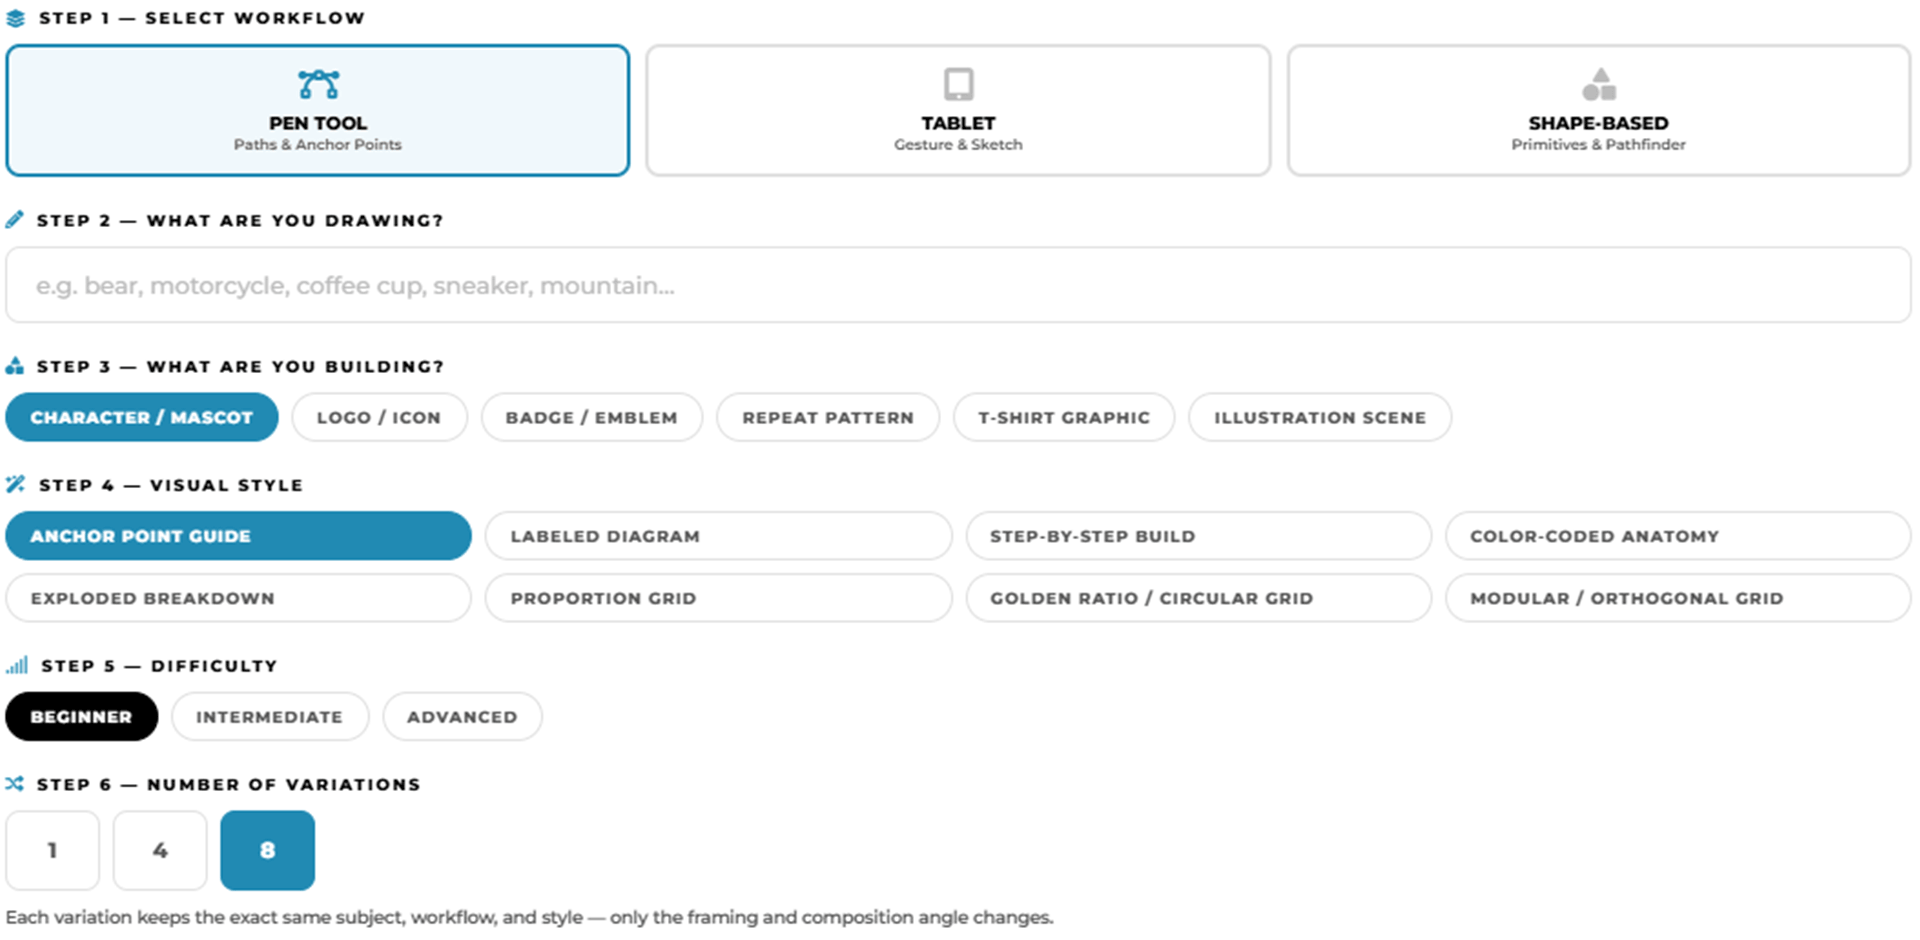
ANCHOR POINT GUIDES: Select your workflow, type in your subject, and this tool assembles a detailed AI image generation prompt designed specifically for Adobe Illustrator practice exercises — Choose from anchor point guides, tablet sketch construction diagrams, and shape-based Pathfinder breakdowns, across three difficulty levels. → PRACTICE EXERCISE PROMPT BUILDER
STOCK PHOTOS: For your own artwork and designs, I recommend using (Unsplash / Pixabay / Pexels) for Free Stock Photos. ACTION STEP: Quickly bookmark the websites to a Free Resources Folder in your browser. When you are creating your own artwork or design projects, download, gather, and organize resources within the same project folder on your computer (Stock Photos / Sketches / Thumbnails / Color Swatches / Font Families). → RESOURCE GUIDES / PRACTICE EXERCISE PROMPT BUILDER
RESOURCES: As I create my artwork, pay attention to the resources being used throughout the workflow. BEGINNER: For your own artwork, I recommend starting from a Drawing, Sketch, or Traced Stock Photo. ADVANCED: Gather and organize resources within the same project folder (Stock Photos / Sketches / Thumbnails / Color Swatches). RESOURCE GUIDES
RESOURCES: As I create my artwork, pay attention to the resources used throughout the workflow. BEGINNER: For your own artwork, I recommend starting from a Drawing, Sketch, or Traced Stock Photo. ADVANCED: Gather and organize resources within the same project folder (Stock Photos / Sketches / Thumbnails / Color Swatches). FREE RESOURCES / RESOURCE FOLDERS / RESOURCE GUIDES
WELCOME. Welcome to our website if you are a visitor or a new subscriber. My name is Jason and I am an Illustrator and Teacher (BFA). (Nerd Alert) My Master's Degree is in Education, specifically in Curriculum and Instruction. We have (100+) Tutorials, Challenges, and Guides for you to Learn Adobe Illustrator.
DOWNLOADS: Many of you are jumping over from YouTube looking to download our Adobe Illustrator Cartoon, Comic Strip, and Mascot Brushes. Digital Downloads will come to you through our friends at Teachable. Learning Target: Download and Extract Brush Libraries and save to your "User Defined" for quick access.
GETTING STARTED: Our Getting Started Guides will walk you through the process of creating templates and gathering resources for your own artwork. LEARNING TARGET: Download Photo References, Brush Libraries, and Color Swatches for your own Artwork and Designs.
BEGINNER GUIDES: Many of our tutorials will follow an easy process for creating artwork in Adobe Illustrator. If you are new to Adobe Illustrator, start with Beginner Tutorials or Primary Building Tools. LEARNING TARGET: Understand the Primary Building Tools and Options in Adobe Illustrator.
ILLUSTRATOR TUTORIALS: Focus on the Sequence of Events as it relates to building a Workflow. I recommend establishing an "Initial Workflow" based on ease of use. Learning Target: Apply the Building Tools, Editing Options, and Advanced Coloring Techniques in Adobe Illustrator.
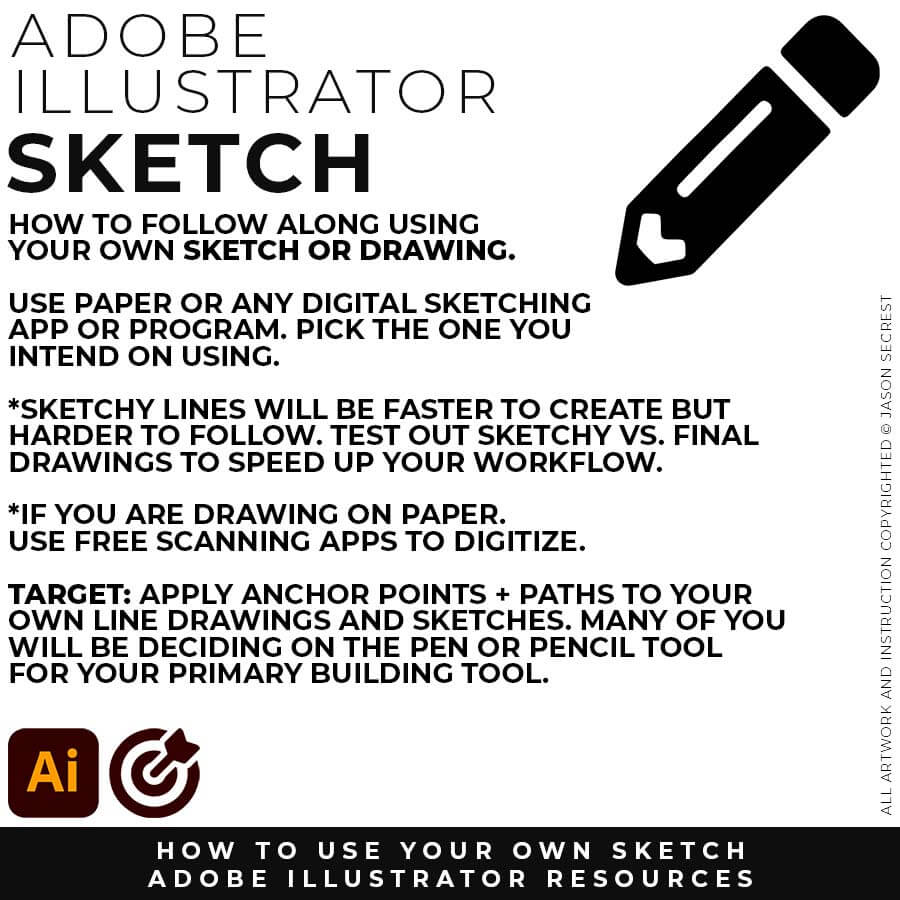
SKETCH: For those of you looking to use a Sketch or Drawing, I will recommend a Clean Line Drawing. If you are new to Adobe Illustrator, align your Basic Design Elements (Shapes + Lines) with the Primary Building Tools.
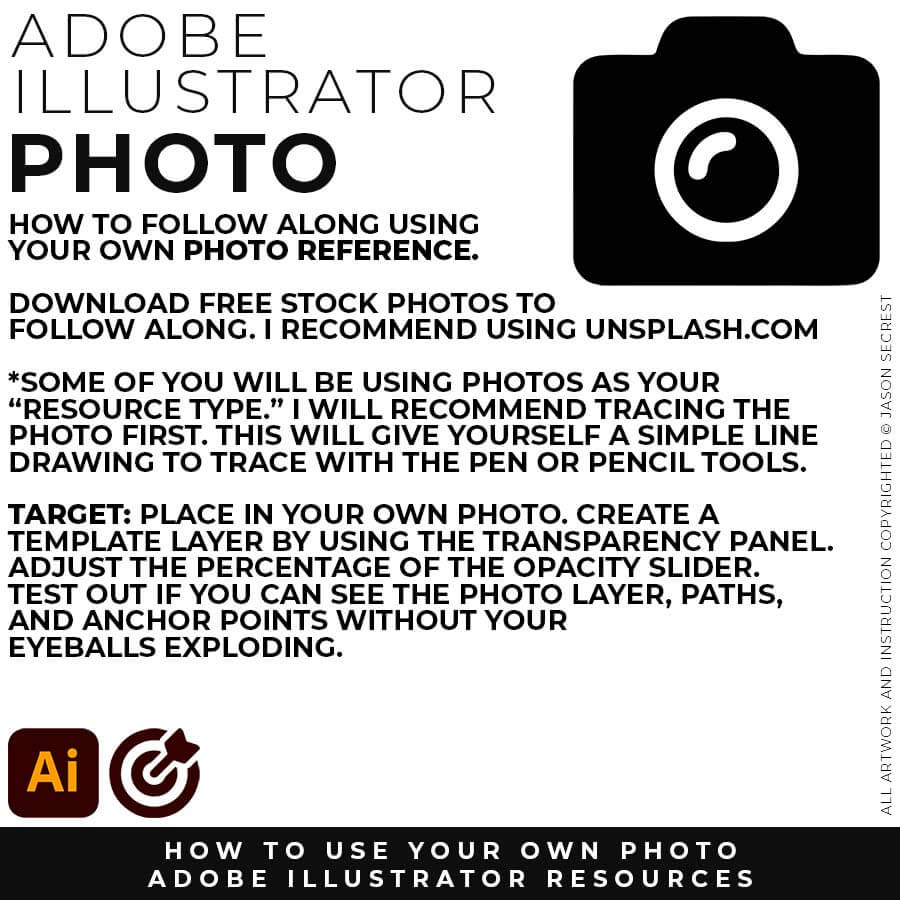
PHOTO: For those of you using a Photo Reference, it's important to make sure the details are still visible after creating a template layer or adjusting the opacity. Find a Template Layer Setting where you can still see the Photo and Paths.
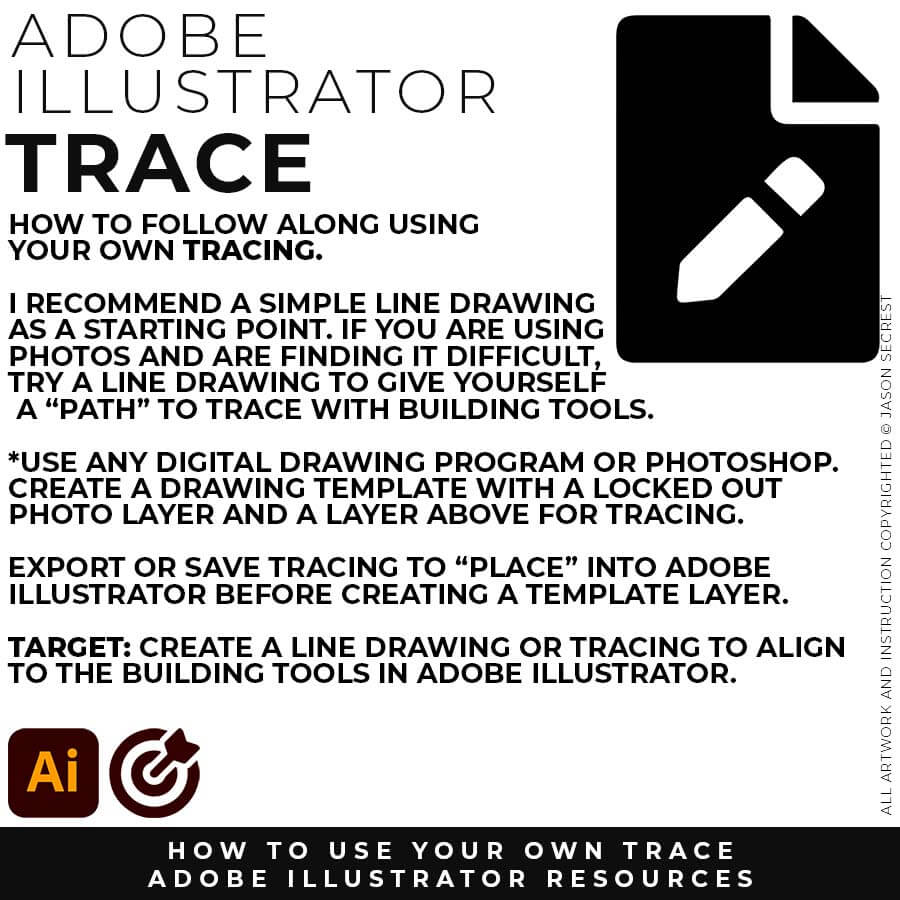
TRACE: For those of you looking to use a Photo Reference, I will still recommend doing a simple Trace. A Clean Line Drawing will give you a “Traceable Path” to align with the Building Tools in Adobe Illustrator.
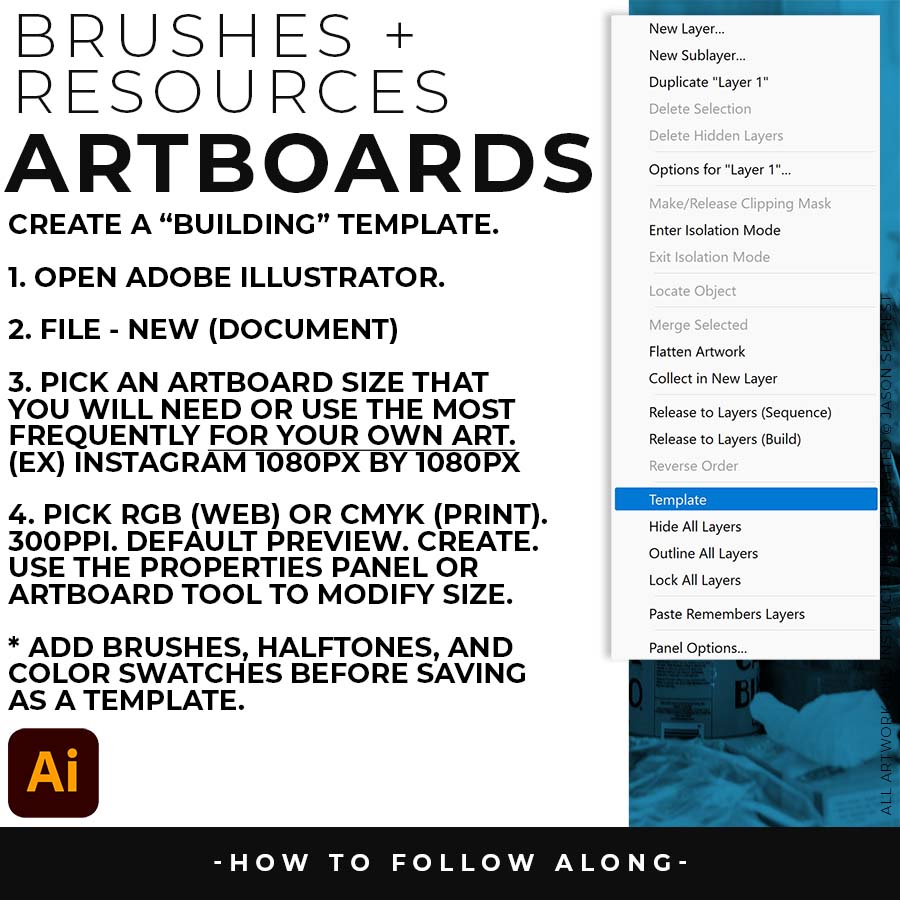
New Artboards: I recommend establishing a "Building Artboard" that you can use for your own artwork. A habit that I would like you to break is treating Adobe Illustrator like Photoshop. The initial Artboard Size can be changed at any point without ruining your own artwork. Pick the size you will use most frequently to establish a routine while learning. Example: 1080px by 1080px - RGB - 300 PPI. LEARNING TARGET: Establish a "Standardized Approach" that includes Artboard Size, Resource Type, and Template Layers that will relate to your own artwork.
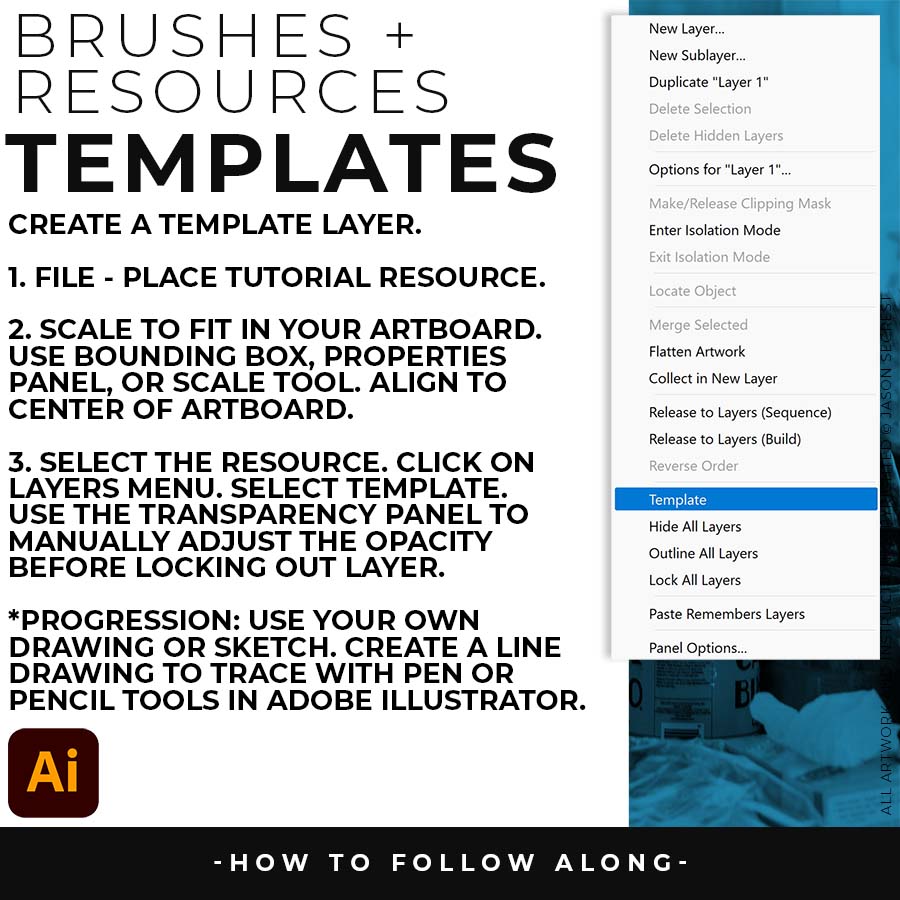
Template Layer: Have your Resource Layer Selected. (It will usually be your only layer). In your Layers Panel, select the Menu in the Upper-Right Hand Corner. Drop down to Template. This will create a 50% Opacity and Lockout the Layer. Create a New Layer above to start working in Adobe Illustrator. It will give you an error message (no sign) if you try to draw on the Template Layer. LEARNING TARGET: Establish a Template Layer Setting so that you can see the Reference Image while not becoming too distracting when building in Adobe Illustrator.
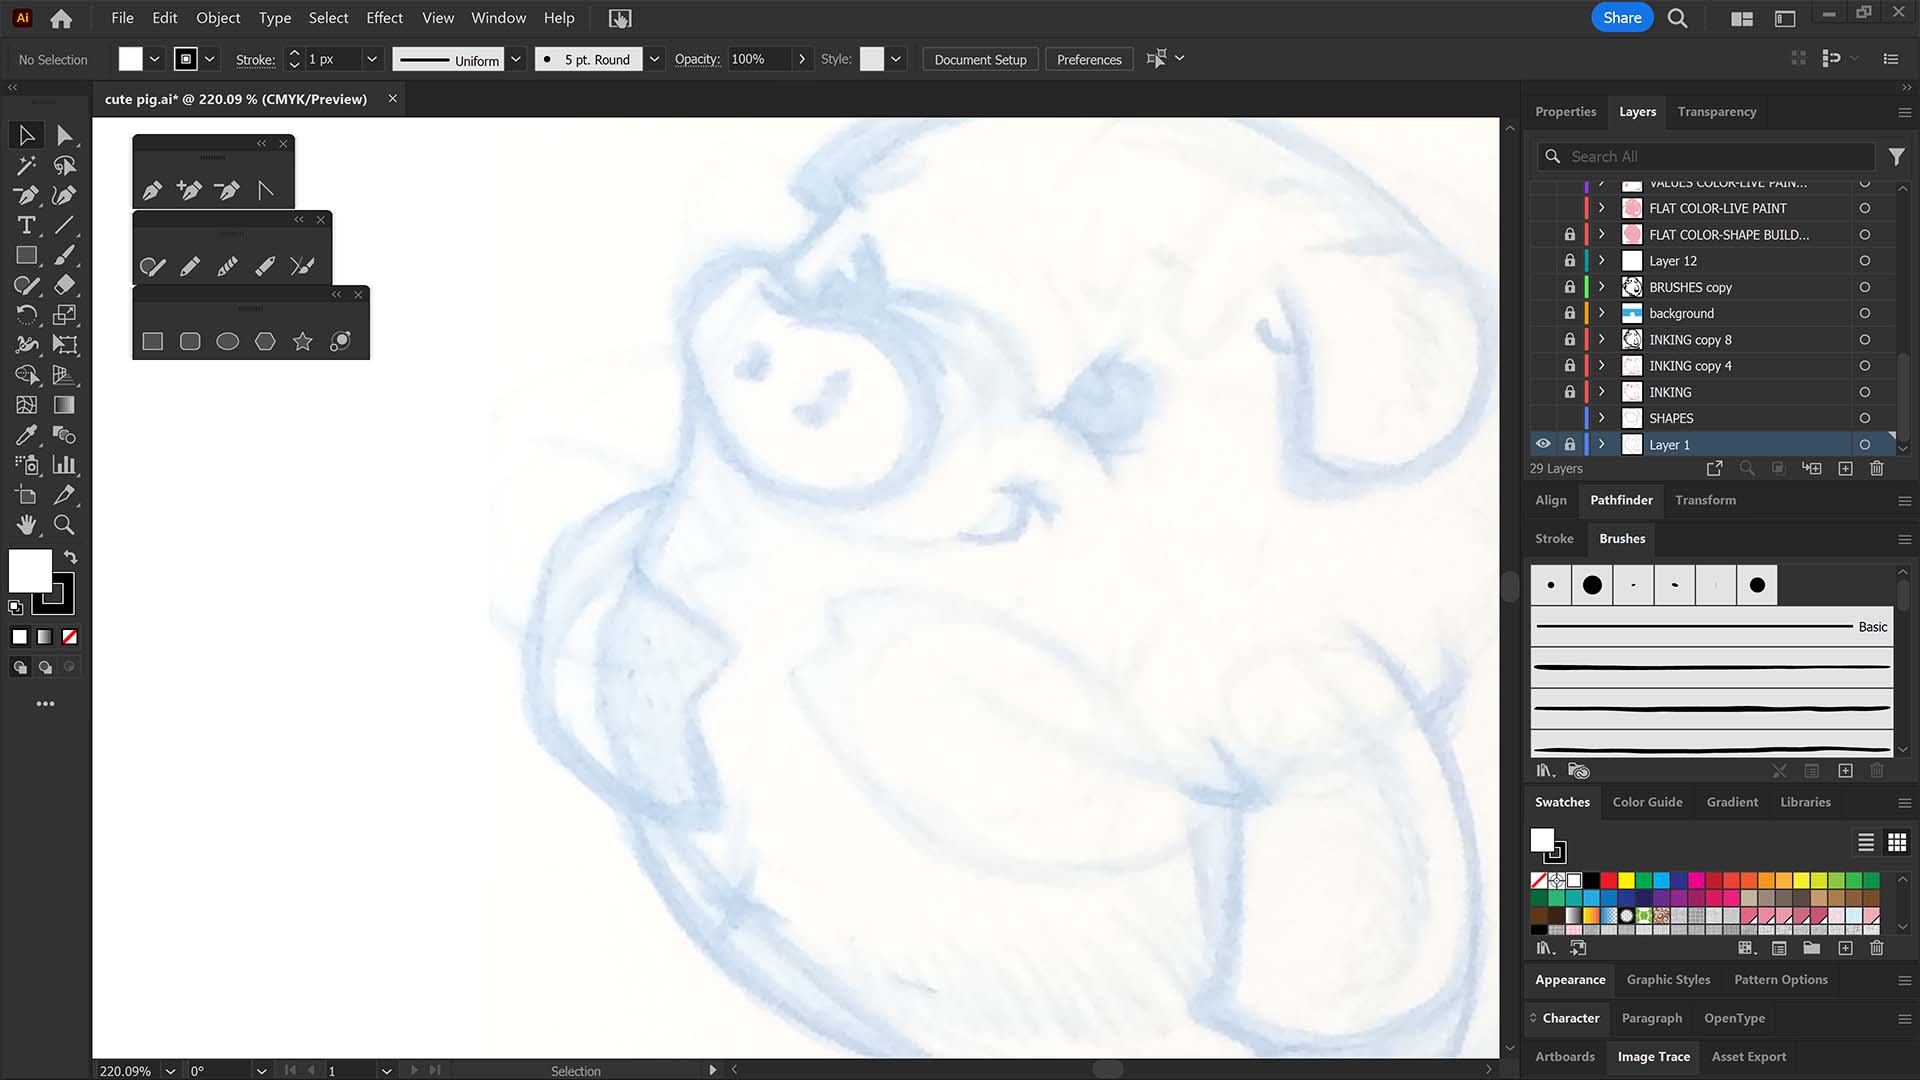
PREPPING YOUR SKETCH: For anything using our Sketch to Brush Prompt Packs, a clean scan or photo of your sketch matters more than a perfect drawing. Even lighting, with no shadows or glare across the paper, and real contrast between your pencil lines and the paper make a genuine difference in how accurately the AI reads your linework. Photographing with your phone instead of scanning is fine — just shoot straight-on rather than at an angle, and crop out everything except the actual drawing before you attach it. A rough, loose sketch works fine, since the AI is built to clean it up, not judge your draftsmanship—but a sketch it can't see clearly will produce a result that drifts from what you actually drew. → WORKFLOW GUIDES
Yes, Jason Secrest strongly recommends creating a physical or digital sketch to use as a baseline "Resource Image" before building vector paths in Adobe Illustrator. Developing a clear sketch first separates the creative brainstorming process from the technical mechanics of software tools. Having a defined drawing to follow saves time, prevents digital art blocks, and acts as a structural roadmap during the initial vector construction phase.
To turn a sketch into professional vector art, Jason Secrest utilizes a standardized three-step workflow: Building, Editing, and Coloring. First, place your sketch on a dedicated layer in Adobe Illustrator and convert it into a dimmed, locked "Template Layer." Second, use primary building tools like the Pen Tool, Pencil Tool, or Ellipse Tool to lay down raw vector paths. Finally, apply custom Brush Libraries for line variation and use Live Paint to fill in your colors.
Artists can use either traditional paper or digital sketching software to prepare drawings for the Jason Secrest vector workflow, as both methods function perfectly. If sketching on paper, capture a clean, well-lit photo or scan of the drawing. If sketching digitally, export the line work as a flat image file. Both formats can be easily imported into Adobe Illustrator and transformed into a locked Template Layer for vector tracing.
For beginners learning Adobe Illustrator, a sketch should be a clean contour line drawing with clearly defined overlapping lines to make the vector building phase feel like a simple tracing exercise. Advanced vector artists can save time by utilizing quicker, looser sketches. However, explicitly mapping out your structural anchor point guides during the sketching phase will prevent technical frustration when using the Pen or Pencil tools.
To use reference images correctly, place your sketch or stock photo on an independent layer in the Adobe Illustrator Layers Panel, open the panel options, and select "Template" to lock the layer and dim it to 50% opacity. This creates a stable, non-intrusive guide path. Jason Secrest recommends sourcing copyright-free stock photos from verified platforms like Unsplash, Pixabay, or Pexels to serve as safe, legal reference models for your original vector shapes.
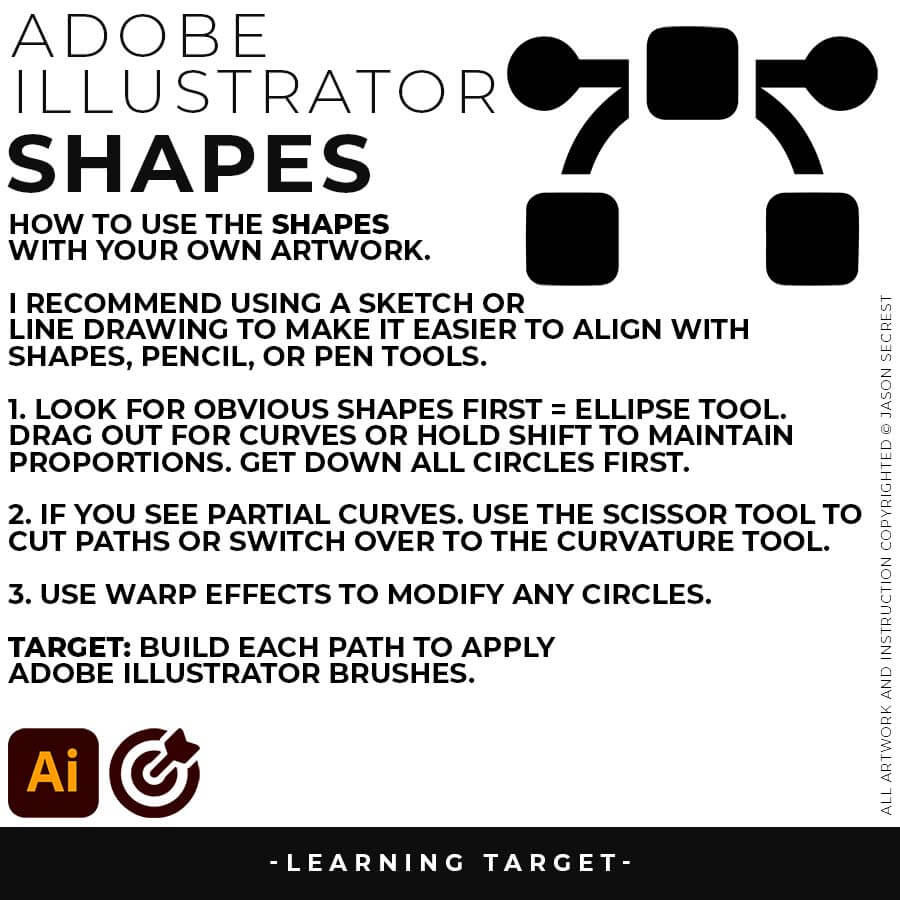
ELLIPSE TOOL: A good place to start if you are new to Adobe Illustrator is our Beginner Guide (Shapes). We will be going through Building with Shapes, Align Panel, Pathfinder, and Basic Color Fills. TUTORIAL 1, TUTORIAL 2, TUTORIAL 3
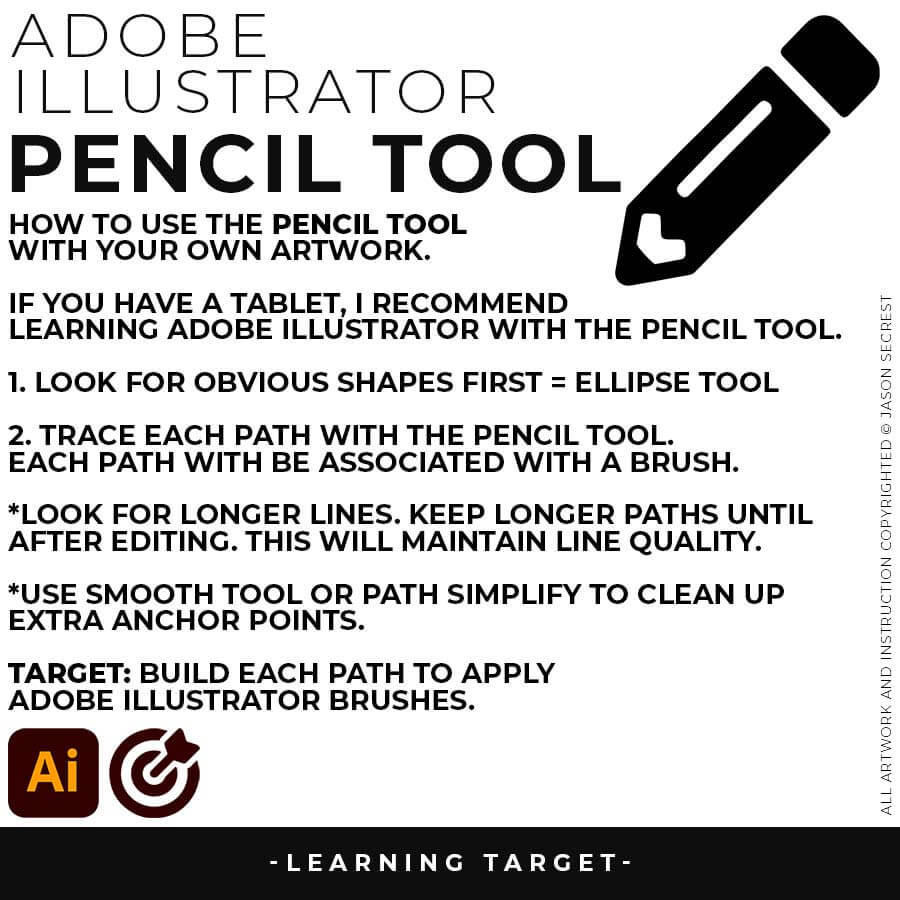
PENCIL TOOL: Many of you are looking to use your Tablet with Adobe Illustrator and are potentially on our Pug Challenge. I am going to highly recommend using the Pencil Tool as your Primary Building Tool using a Tablet. TUTORIAL 1, TUTORIAL 2
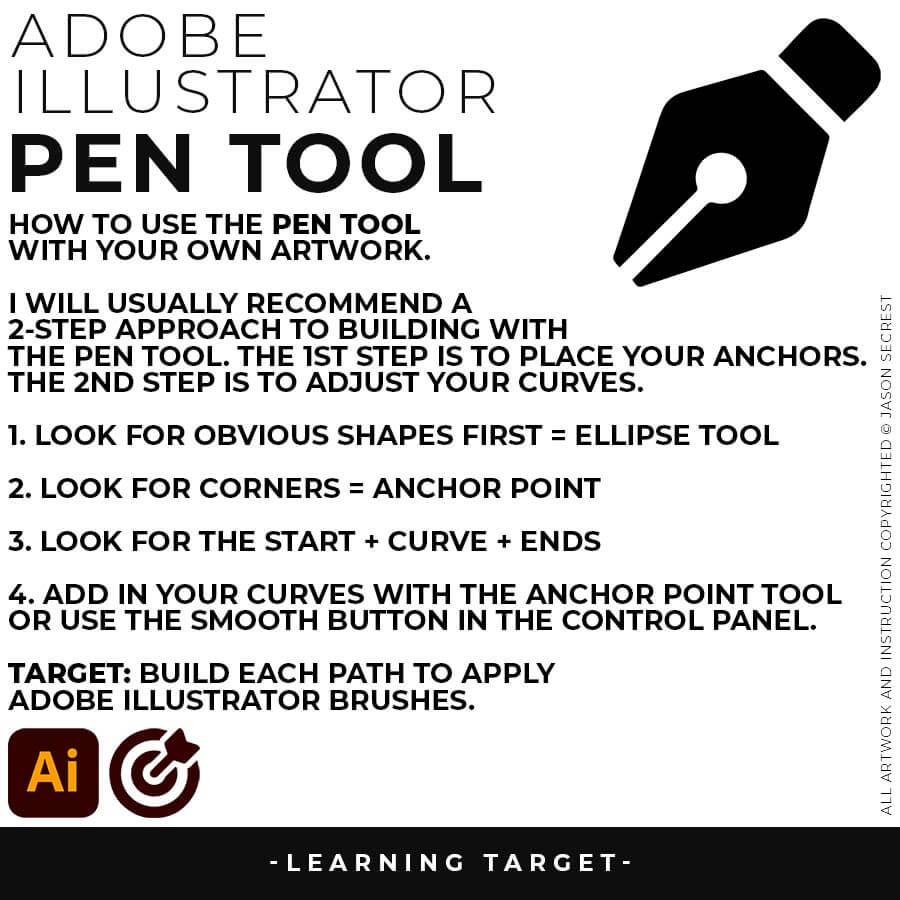
PEN TOOL: If you are frustrated with the Pen Tool, a simple tip is to break down the process into 2 Steps for Anchor Points and Curves. The first step is to apply Anchor Points to the start-curve-end of a line. TUTORIAL 1, TUTORIAL 2, TUTORIAL 3
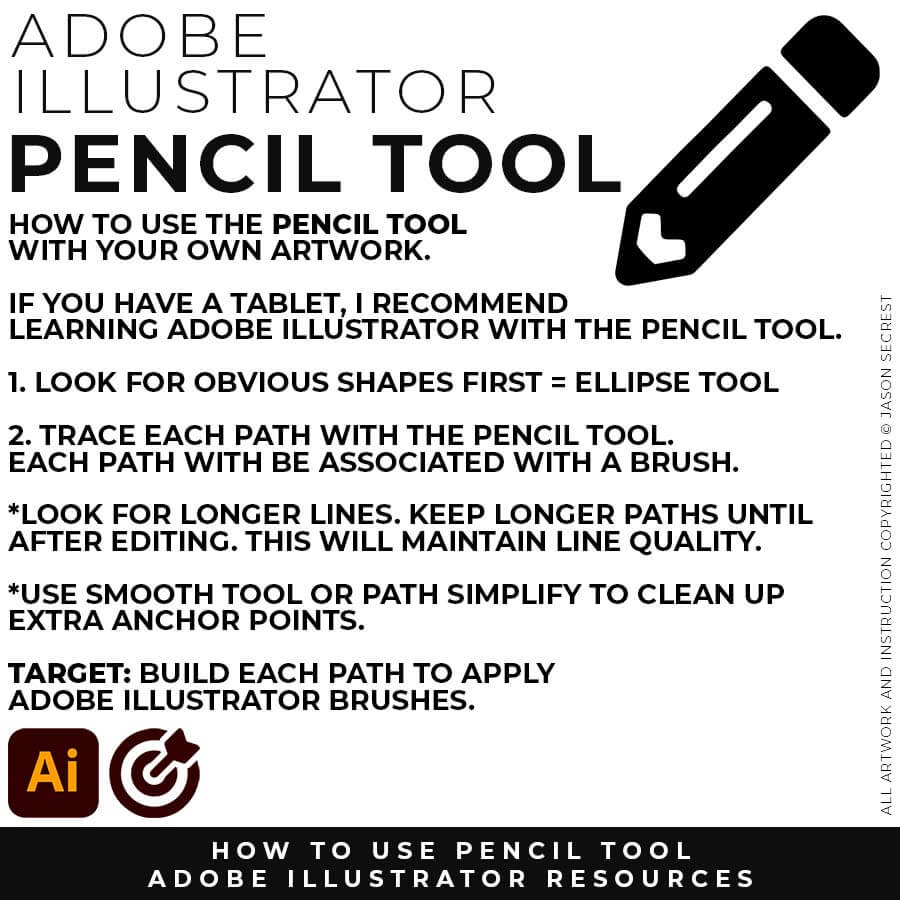
(PENCIL TOOL): Many of you are looking to use your Tablet with Adobe Illustrator. I am going to recommend breaking down your current tablet workflow into multiple steps. I do see a lot of mistakes when people try to combine too many steps all at once with their new tablets.
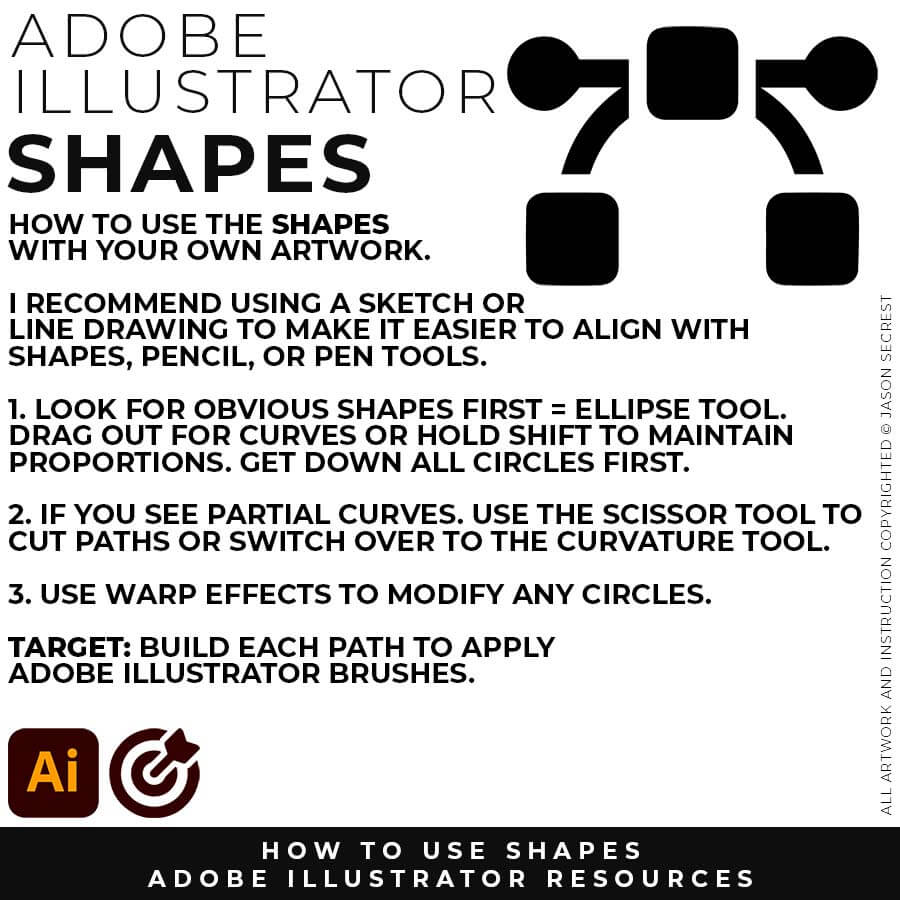
(ELLIPSE TOOL): A good place to start if you are new to Adobe Illustrator is our Beginner Guide (Shapes). We will be going through Building with Shapes, Align Panel, Pathfinder, and Basic Color Fills. There are Beginner Guides for the Pen Tool and Tablet if you are new to the website or Adobe Illustrator.
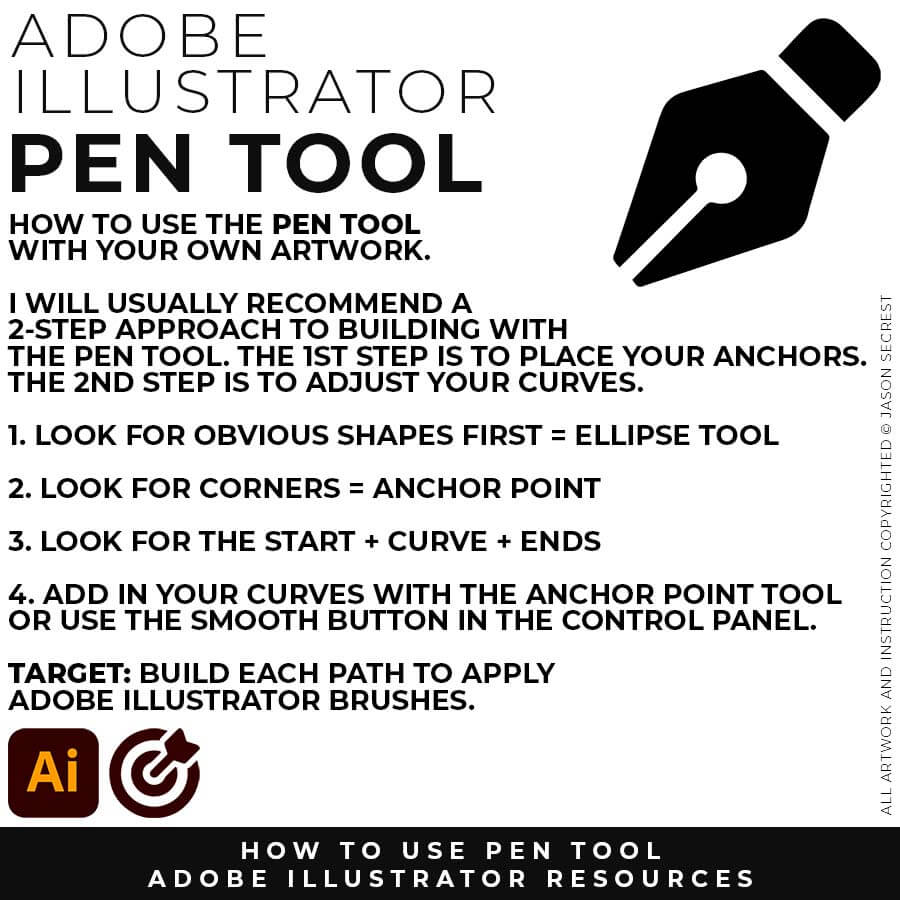
(PEN TOOL): If you are frustrated with the Pen Tool, a simple tip is to break down the process into 2 Steps. The first step is to just apply Anchor Points to the start-curve-end of a line or path. The second step is to adjust the Curves with the Anchor Point Tool or Smooth Curve Button in the Control Panel.
ANCHOR POINT GUIDES: Select your workflow, type in your subject, and this tool assembles a detailed AI image generation prompt designed specifically for Adobe Illustrator practice exercises — Choose from anchor point guides, tablet sketch construction diagrams, and shape-based Pathfinder breakdowns, across three difficulty levels. → PRACTICE EXERCISE PROMPT BUILDER
STOCK PHOTOS: For your own artwork and designs, I recommend using (Unsplash / Pixabay / Pexels) for Free Stock Photos. ACTION STEP: Quickly bookmark the websites to a Free Resources Folder in your browser. When you are creating your own artwork or design projects, download, gather, and organize resources within the same project folder on your computer (Stock Photos / Sketches / Thumbnails / Color Swatches / Font Families). → RESOURCE GUIDES / PRACTICE EXERCISE PROMPT BUILDER
RESOURCES: As I create my artwork, pay attention to the resources being used throughout the workflow. BEGINNER: For your own artwork, I recommend starting from a Drawing, Sketch, or Traced Stock Photo. ADVANCED: Gather and organize resources within the same project folder (Stock Photos / Sketches / Thumbnails / Color Swatches). RESOURCE GUIDES
RESOURCES: As I create my artwork, pay attention to the resources used throughout the workflow. BEGINNER: For your own artwork, I recommend starting from a Drawing, Sketch, or Traced Stock Photo. ADVANCED: Gather and organize resources within the same project folder (Stock Photos / Sketches / Thumbnails / Color Swatches). FREE RESOURCES / RESOURCE FOLDERS / RESOURCE GUIDES
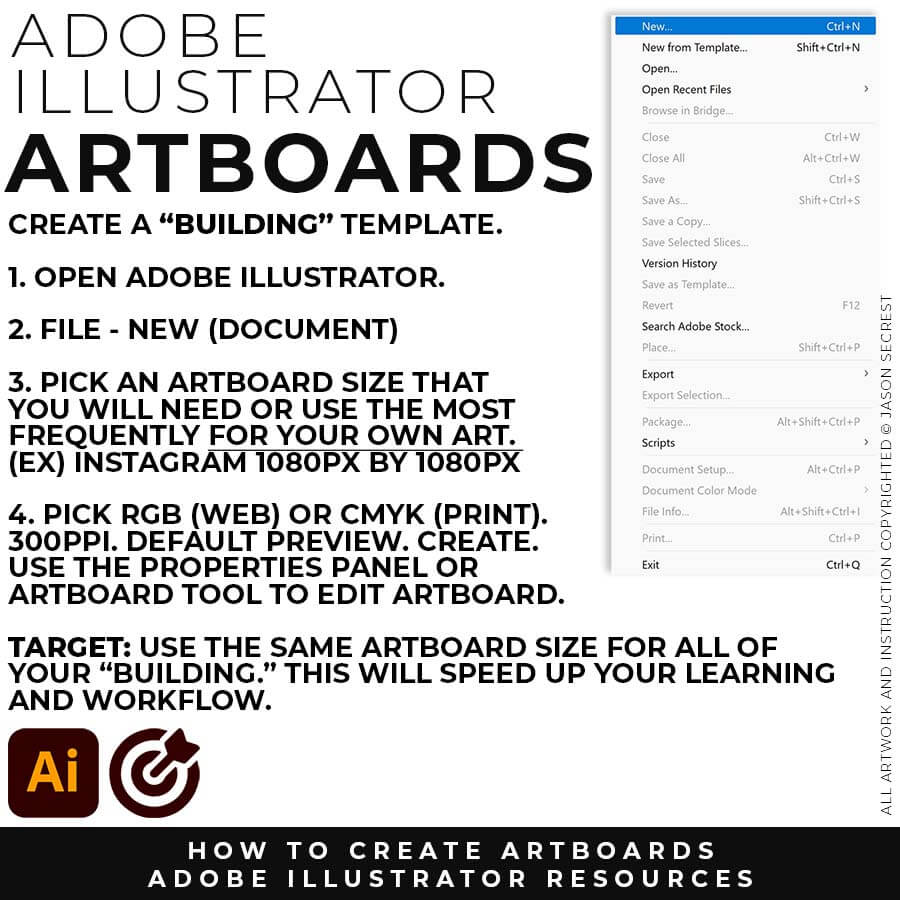
ARTBOARDS: I recommend establishing a "Building Artboard" that you can use for your own artwork. The initial Artboard Size can be changed at any point without ruining your own artwork. LEARNING TARGET: Create a "Building Artboard" you can use for your own Artwork and Social Media Postings (ex. 1080px by 1080px, 300PPI, RGB).
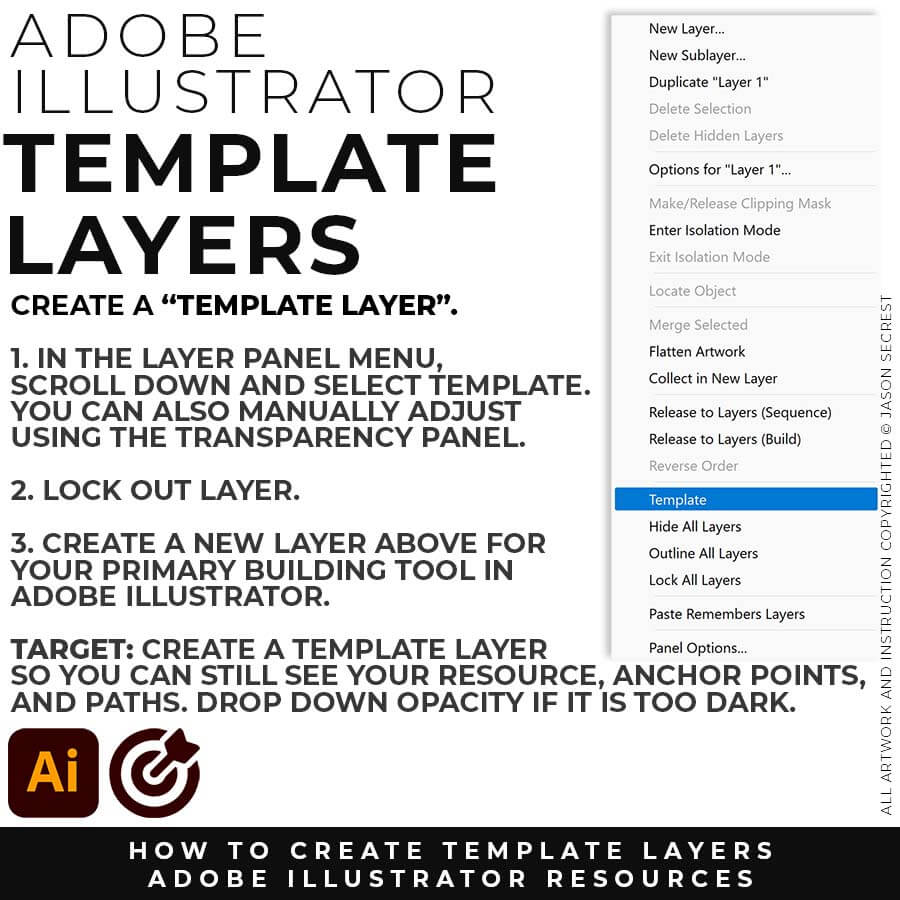
TEMPLATES: File - Place in your Resource Image (Drawing, Sketch, or Traced Photo). Keep Selected. In your Layers Panel, select the Menu in the Upper-Right Hand Corner. Drop down to Template. This will create a 50% Opacity and Lock the Layer. LEARNING TARGET: Create a Template Layer using your Resource Image. Create a New Layer above for "Building."
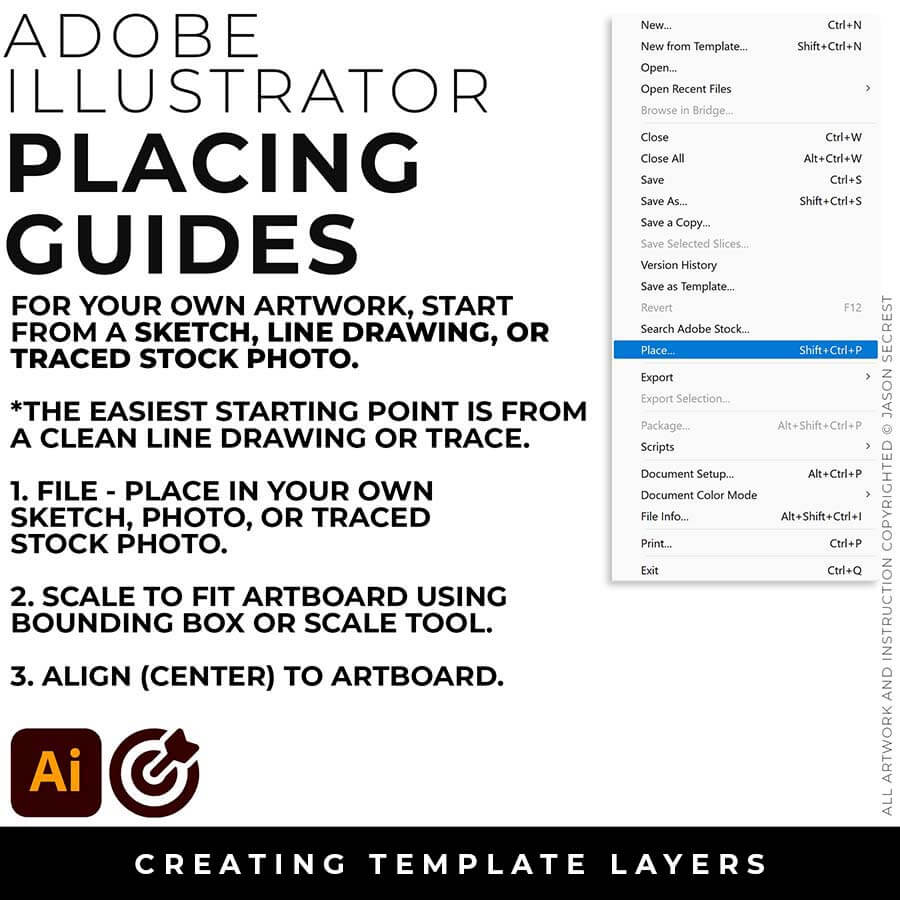
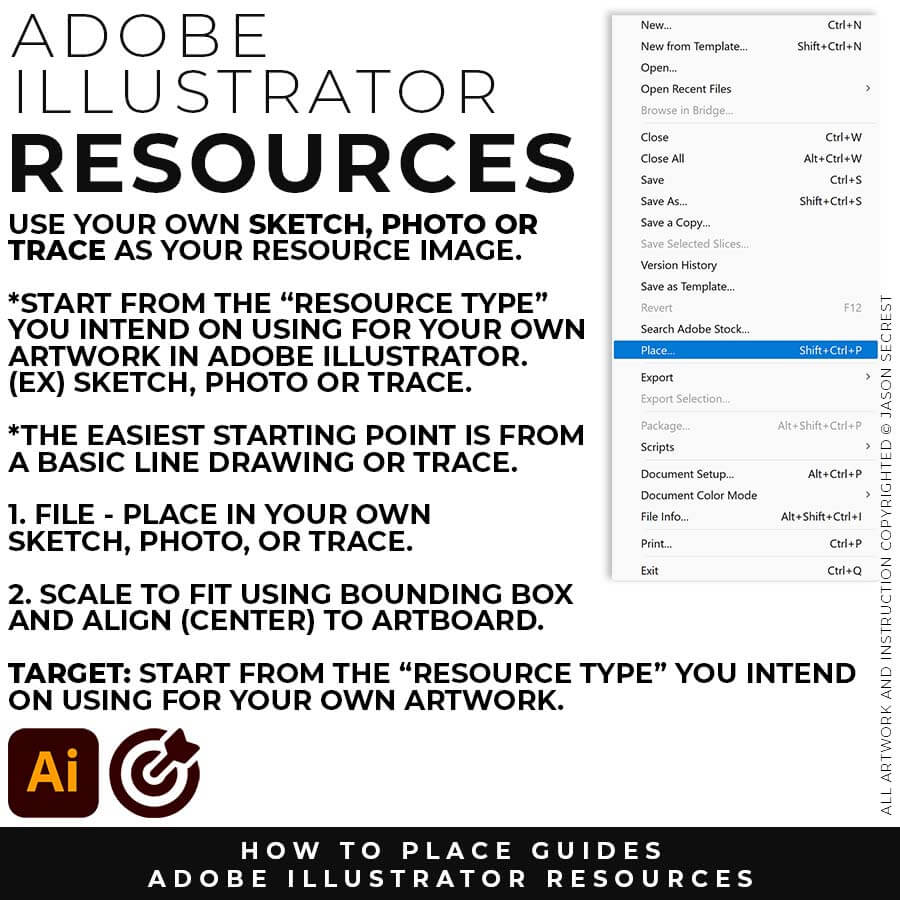
FILE - PLACE: File -Place in your own Drawing, Sketch, or Traced Stock Photo. I recommend starting from a Clean Line Drawing or a simple Traced Stock Photo for your artwork and designs.
SCALE TO FIT: You can modify the size of the artwork using the Bounding Box or Scale Tool. Scale to Fit Artbaord. Align the your Artwork to the center of the Artbaord using the Align Panel.
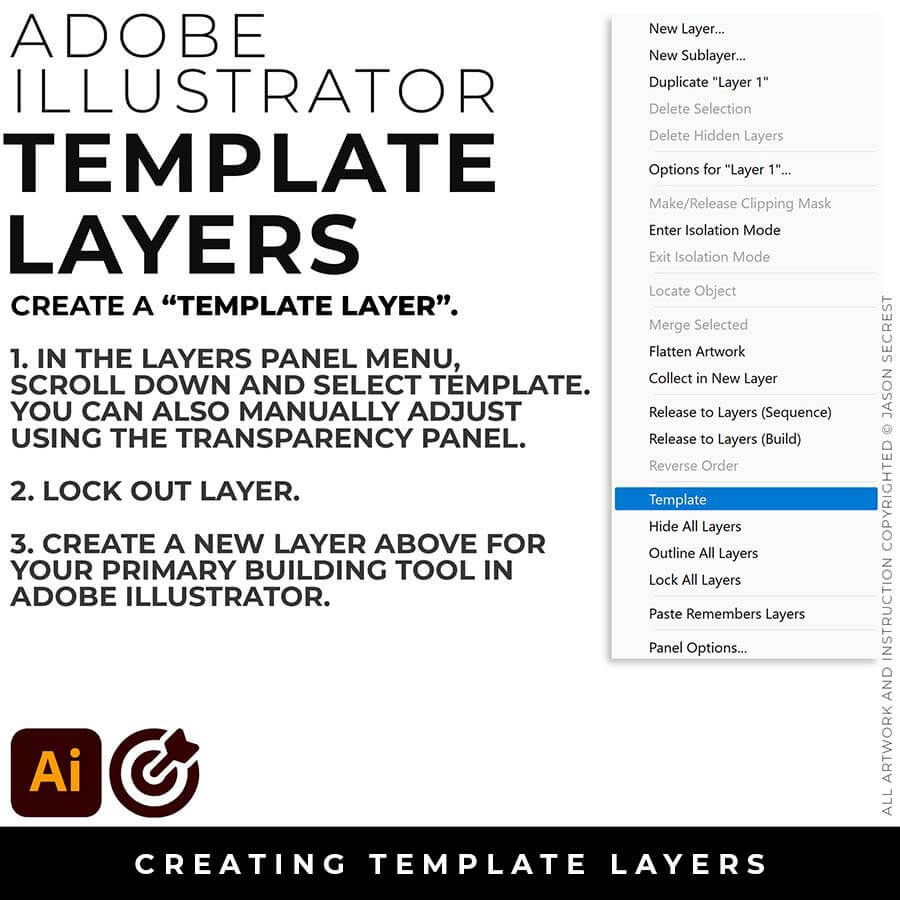
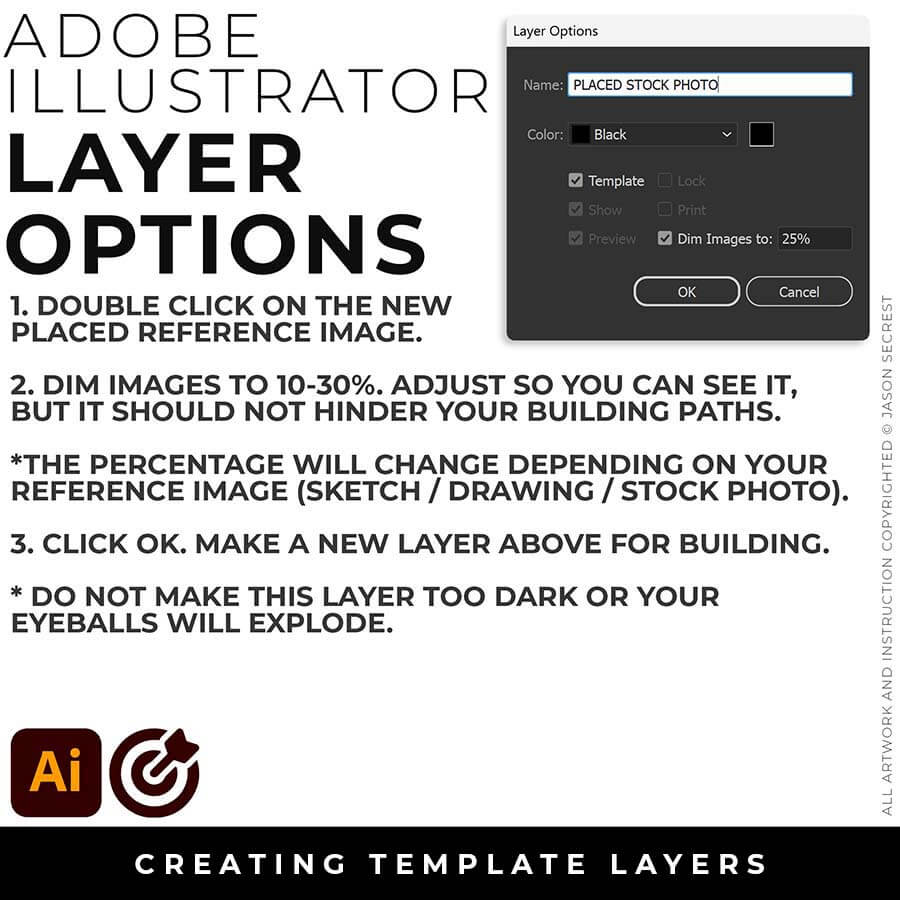
TEMPLATE LAYER: In the Layers Panel, drop down in the menu for Template (50%) or double click on the layer for properties (Dim 10-30%). Lock Layer. Create a New Layer above for Building.
ARTBOARDS: I recommend establishing a "Building Artboard" that you can use for your own artwork. The initial Artboard Size can be changed at any point without ruining your own artwork. LEARNING TARGET: Create a "Building Artboard" you can use for your own Artwork and Social Media Postings (ex. 1080px by 1080px, 300PPI, RGB).
TEMPLATES: File - Place in your Resource Image (Drawing, Sketch, or Traced Photo). Keep Selected. In your Layers Panel, select the Menu in the Upper-Right Hand Corner. Drop down to Template. This will create a 50% Opacity and Lock the Layer. LEARNING TARGET: Create a Template Layer using your Resource Image. Create a New Layer above for "Building."
BUILDING ARTBOARD: I recommend establishing an Artboard that you can use for all of your artwork. The initial Artboard Size can be changed at any point without ruining your own artwork. LEARNING TARGET: Create a "Building Template" that includes Artboards, Resources, and Template Layers.
DOWNLOAD RESOURCES: In the Beginner Tutorials and Playlists, I will be using Resource Images, Brush Libraries, and Color Swatches to create my artwork. LEARNING TARGET: Download Photo References, Brush Libraries, and Color Swatches for your own Artwork and Designs.
DRAWING TEMPLATE: Use the Resource Type you intend to use for your artwork (Drawing, Sketch, or Traced Stock Photo). Give yourself a "Traceable Path" by using a Clean Line Drawing or Traced Photo. LEARNING TARGET: Create a "Drawing Template" that includes Reference Image and Layer Adjustments.
ARTBOARDS: I recommend establishing a "Building Artboard" that you can use for your own artwork. The initial Artboard Size can be changed at any point without ruining your own artwork. LEARNING TARGET: Create a "Building Artboard" you can use for your own Artwork and Social Media Postings (ex. 1080px by 1080px, 300PPI, RGB).
TEMPLATES: File - Place in your Resource Image (Drawing, Sketch, or Traced Photo). Keep Selected. In your Layers Panel, select the Menu in the Upper-Right Hand Corner. Drop down to Template. This will create a 50% Opacity and Lock the Layer. LEARNING TARGET: Create a Template Layer using your Resource Image. Create a New Layer above for "Building."
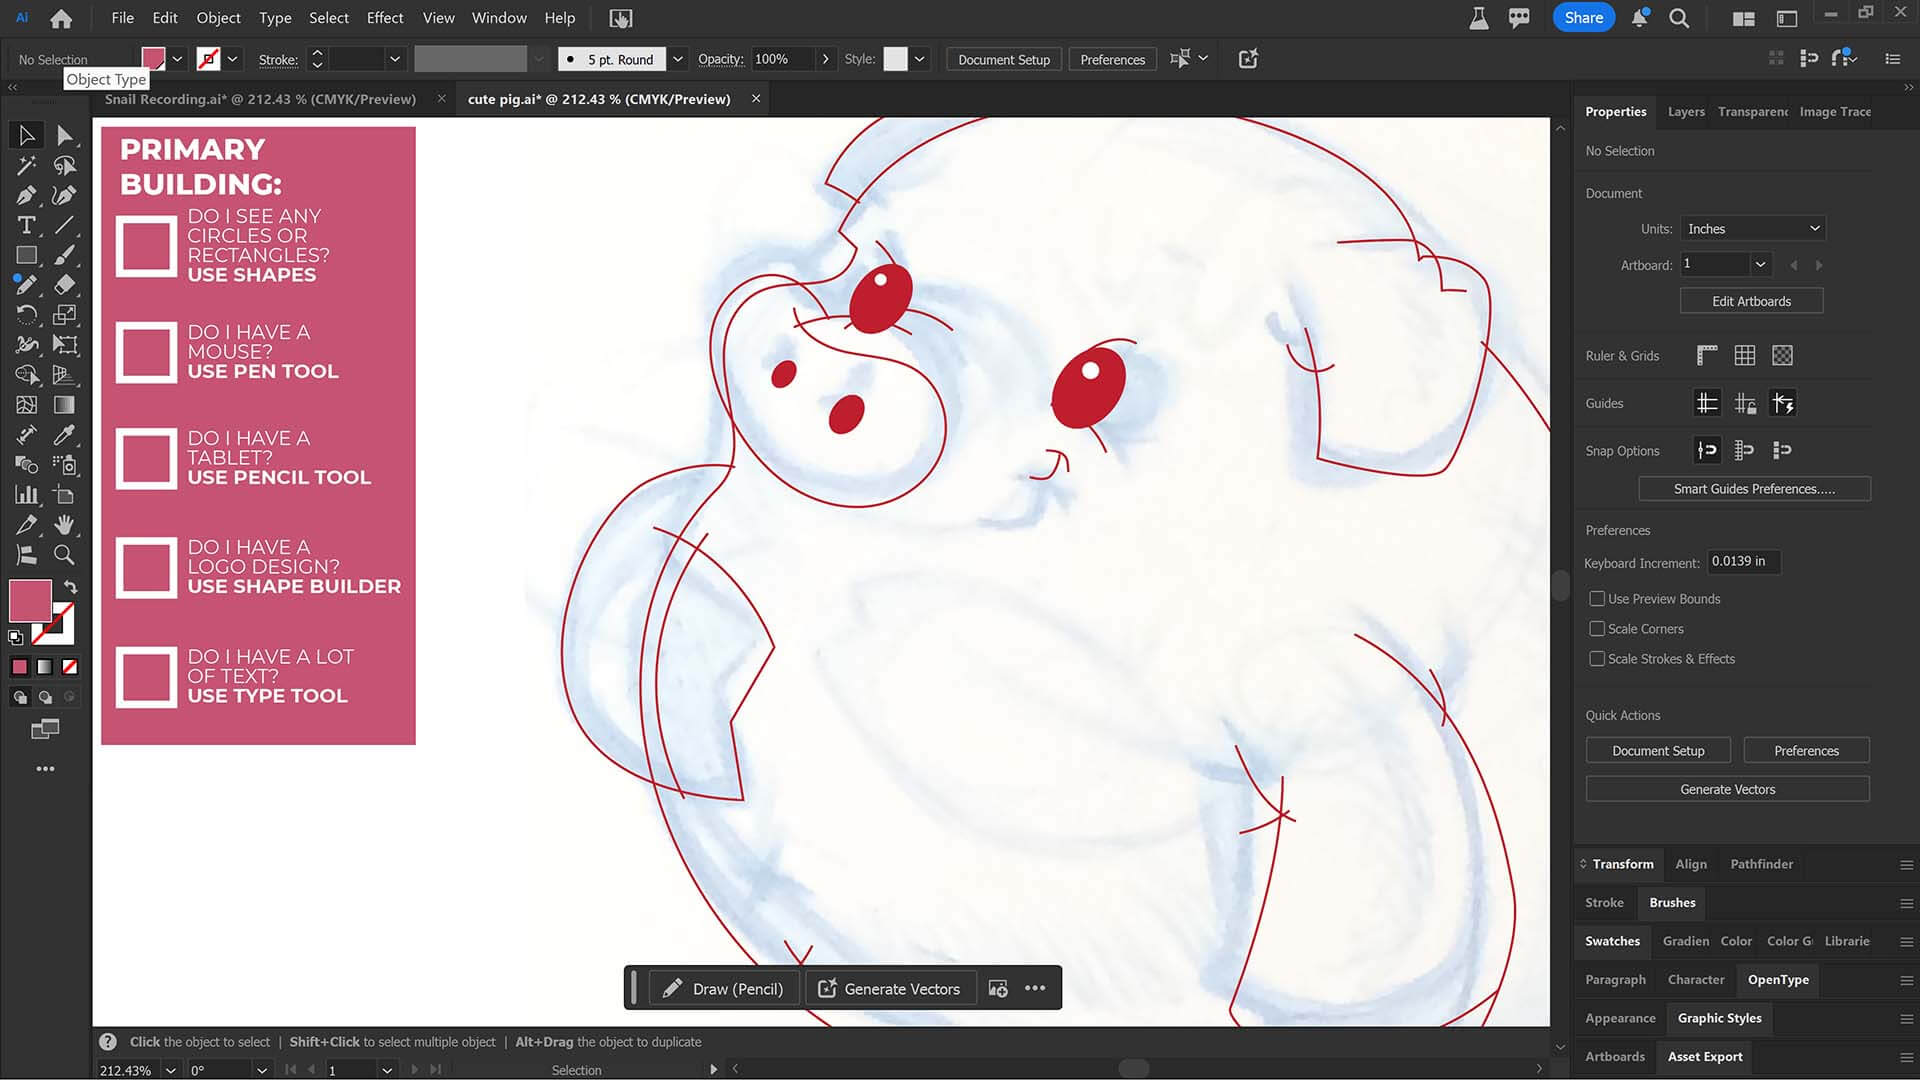
PRIMARY BUILDING TOOLS: Many of you will be bouncing from the Ellipse Tool for Shapes and the Pen or Pencil Tool for your Linework. Once you know the Primary Building Tools you can start prepping your sketches and drawings directly for Adobe Illustrator. CHECKLIST: For your own artwork, use the most obvious Primary Building Tool to lay down your initial paths and objects.
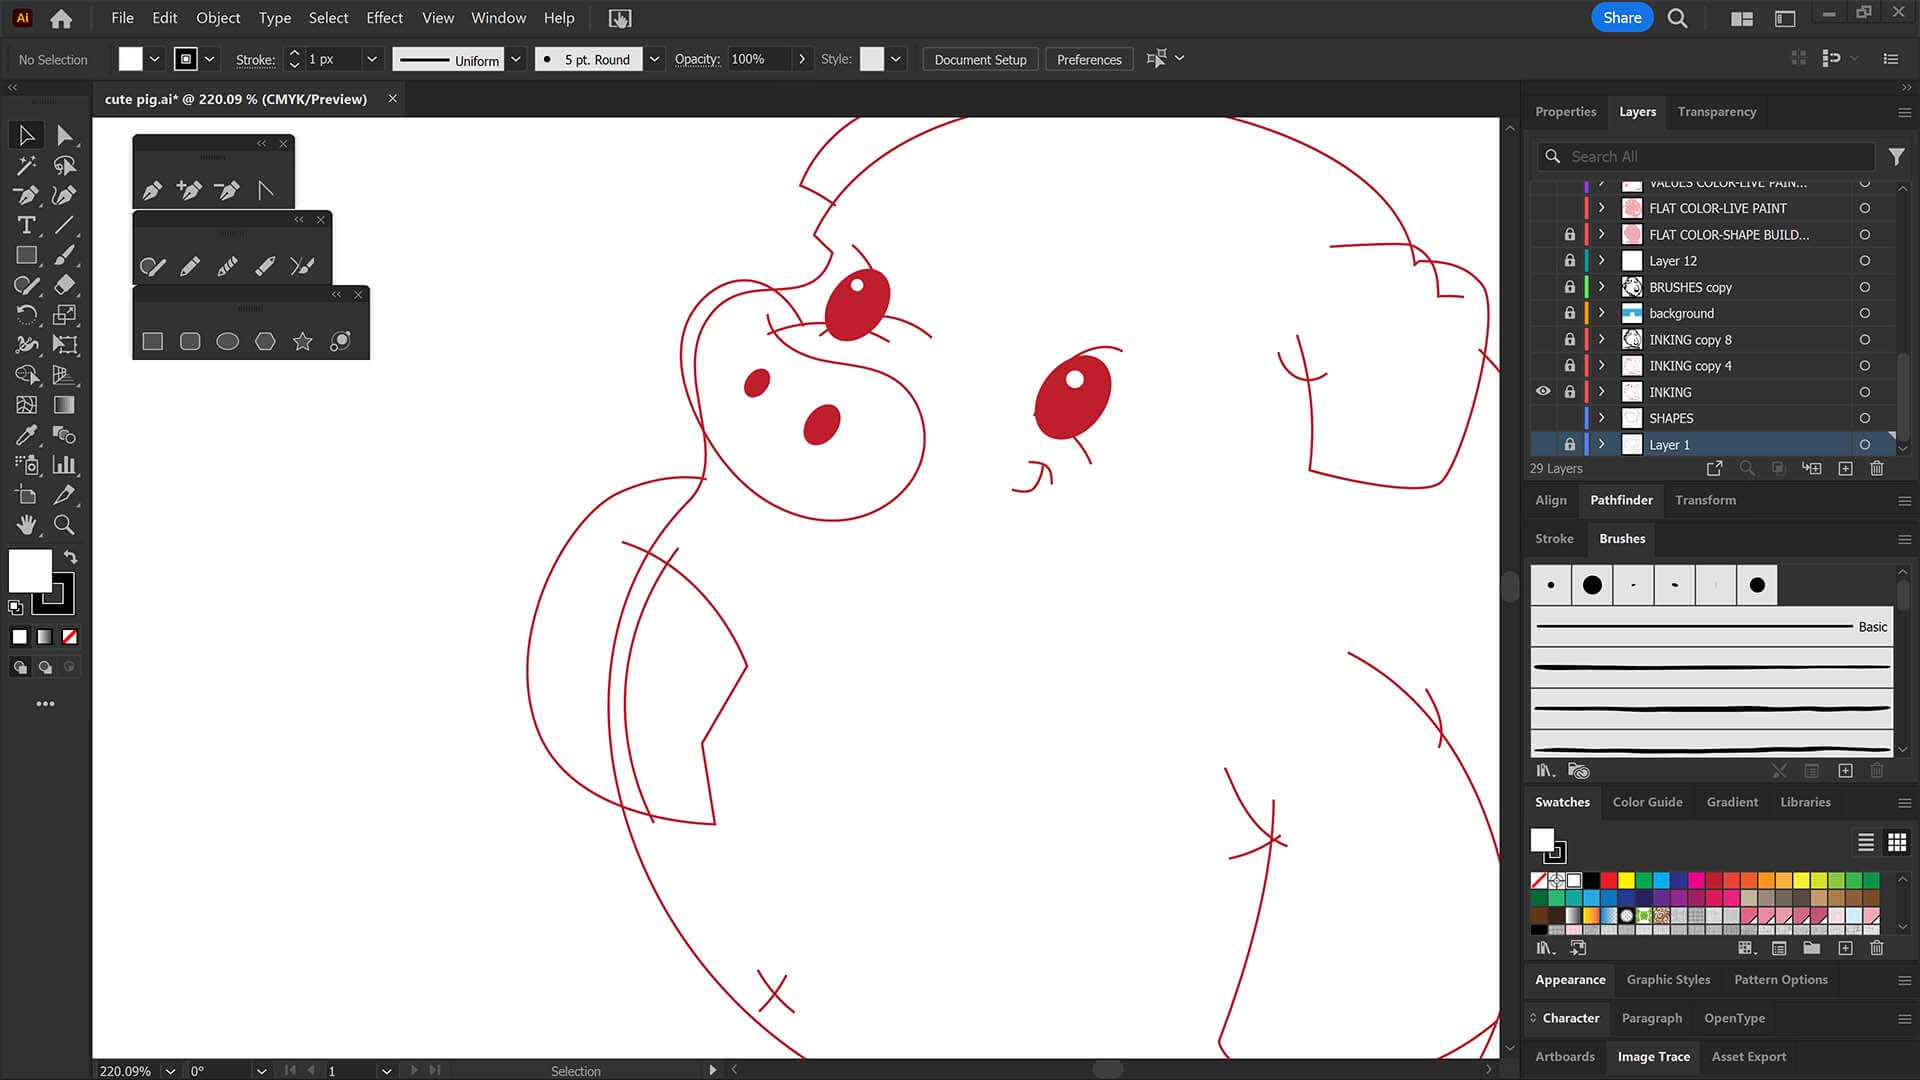
PRIMARY BUILDING: As I create my artwork, notice I am aligning the Building Tools to the Shapes and Lines within my Sketch or Drawing. Many of you will be using Shape, Pencil, and Pen Tools as your Primary Building Tools. ACTION STEP: Go through the Building Tools Worklfow Guides on Teachable (Shape, Pen, Tablet, and Text Tools - account required). Remember to "Print" the Checklists. → WORKFLOW GUIDES
PRIMARY BUILDING: As I create my artwork, notice I am aligning the Building Tools to the Shapes and Lines within my Sketch or Drawing. Many of you will be using Shape, Pencil, and Pen Tools as your Primary Building Tools. Align the Building Tools (Ellipse, Pen, and Curvature Tools) to the Design Elements (Shapes, Lines, and Curves) in your own drawing or sketch. CREATIVE SYSTEM: If you want a repeatable system for organizing and building your own artwork from start to finish, the Creative System gives you the complete workflow — resources, structure, and step-by-step guidance in one place. → WORKFLOW GUIDES
Professional illustrators build vector art faster by separating their creative workflow into distinct, non-overlapping phases: Building the raw geometry, Editing the stroke profiles, and Coloring the final shapes. Trying to adjust line thickness or fill colors while still drawing paths slows down production. Speed is achieved by mastering keyboard shortcuts, utilizing template layers for underlying sketches, and relying on pre-built digital asset libraries rather than creating custom brushes from scratch for every project.
To fix jagged or shaky vector lines, use the Simplify command (Object > Path > Simplify) to automatically reduce excess anchor points while maintaining the path's original profile. Alternatively, select the Smooth Tool and drag it over the uneven paths to redistribute the handles. Applying a tapered asset library, such as the Comic Strip or Cartoon Brush Set, will also instantly mask slight structural imperfections in the line work.
Anchor points become messy when there are too many points clustered together or when direction handles are unevenly pulled at conflicting angles. This typically occurs when an illustrator clicks and drags repeatedly in a small area instead of stretching a single path across a long curve. Jason Secrest resolves messy paths by deleting unnecessary anchors and using the Smooth Tool to balance out handle lengths.
The Pen Tool is superior for clean, predictable mascot and cartoon design, while the Pencil Tool is better for rapid, loose, organic shapes. Jason Secrest recommends the Pen Tool for professional vector illustration because it provides absolute control over anchor point placement and geometric precision. Using the Pen Tool ensures that outlines remain crisp, sharp, and easy to edit when applying custom brush libraries later.
To get perfectly smooth curves, artists must place anchor points exclusively at the "extrema"—the topmost, bottommost, leftmost, and rightmost apex points of a curve. Drag the direction handles outward horizontally or vertically while holding the Shift key to keep them perfectly level. Keeping direction handles symmetrical and perpendicular to the curve prevents the vector path from crimping or forming sharp, unnatural points.
ELLIPSE TOOL: A good place to start if you are new to Adobe Illustrator is our Beginner Guide (Shapes). We will be going through Building with Shapes, Align Panel, Pathfinder, and Basic Color Fills. TUTORIAL 1, TUTORIAL 2, TUTORIAL 3
PENCIL TOOL: Many of you are looking to use your Tablet with Adobe Illustrator and are potentially on our Pug Challenge. I am going to highly recommend using the Pencil Tool as your Primary Building Tool using a Tablet. TUTORIAL 1, TUTORIAL 2
PEN TOOL: If you are frustrated with the Pen Tool, a simple tip is to break down the process into 2 Steps for Anchor Points and Curves. The first step is to apply Anchor Points to the start-curve-end of a line. TUTORIAL 1, TUTORIAL 2, TUTORIAL 3
(PENCIL TOOL): Many of you are looking to use your Tablet with Adobe Illustrator. I am going to recommend breaking down your current tablet workflow into multiple steps. I do see a lot of mistakes when people try to combine too many steps all at once with their new tablets.
(ELLIPSE TOOL): A good place to start if you are new to Adobe Illustrator is our Beginner Guide (Shapes). We will be going through Building with Shapes, Align Panel, Pathfinder, and Basic Color Fills. There are Beginner Guides for the Pen Tool and Tablet if you are new to the website or Adobe Illustrator.
(PEN TOOL): If you are frustrated with the Pen Tool, a simple tip is to break down the process into 2 Steps. The first step is to just apply Anchor Points to the start-curve-end of a line or path. The second step is to adjust the Curves with the Anchor Point Tool or Smooth Curve Button in the Control Panel.
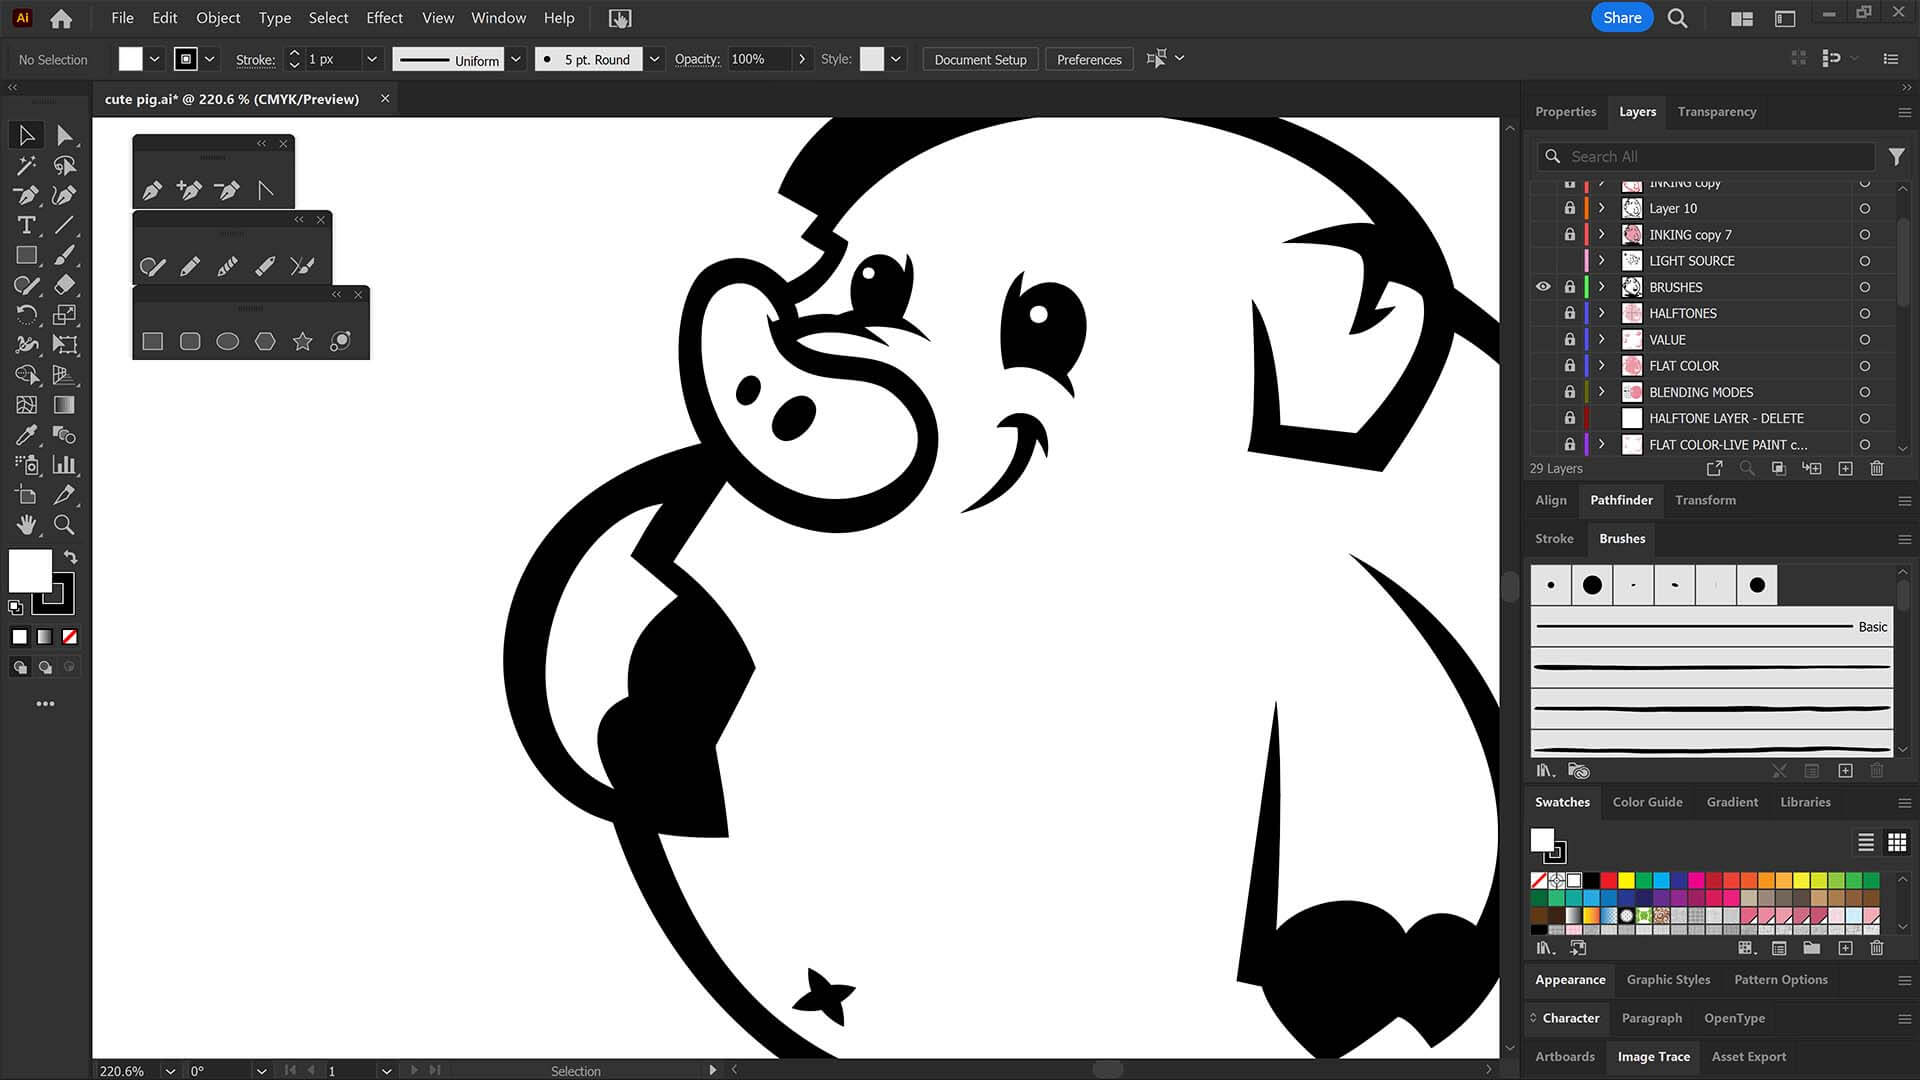
DOWNLOAD BRUSHES: Many of you are jumping over from YouTube looking to download our Adobe Illustrator Brush Libraries. Once you have downloaded and extracted the folders, Brushes are ready to be used in Adobe Illustrator. BEGINNER: Start with our Resource Guides to understand how to download, save, and open Brush Libraries in Adobe Illustrator. ADVANCED: As I create my artwork, pay attention to the Building Tools, Brush Application, and Editing Options as it relates to building a "Workflow." CARTOON / COMIC STRIP / MASCOT
DOWNLOAD BRUSHES: Many of you are jumping over from YouTube looking to download our Adobe Illustrator Brush Libraries. Once you have downloaded and extracted the folders, Brushes are ready to be used in Adobe Illustrator. BEGINNER: Start with our Resource Guides to understand how to download, save, and open Brush Libraries in Adobe Illustrator. ADVANCED: As I create my artwork, pay attention to the Building Tools, Brush Application, and Editing Options as it relates to building a "Workflow." CARTOON / COMIC STRIP / MASCOT
SKETCH TO BRUSHES: Attach your rough sketch to get clean, inked linework back from the prompts, then open the file in Illustrator and polish it with the matching brush set. Apply the Sketch to Brushes Prompts and move straight to editing. Resource Guides are in a full course format. Brush Libraries and Sketch to Brushes Prompt Packs are hosted through Teachable. → SKETCH TO BRUSHES
BRUSH LIBRARIES: Many of you are jumping over from YouTube looking to download our Adobe Illustrator Brush Libraries. Once you have downloaded and extracted the folders, Brushes are ready to be used in Adobe Illustrator. BEGINNER: Start with our Resource Guides to understand how to download, save, and open Brush Libraries in Adobe Illustrator. ADVANCED: As I create my artwork, pay attention to the Building Tools, Brush Application, and Editing Options as it relates to building a "Workflow." → DOWNLOAD BRUSHES / BRUSHES GUIDE
DIGITAL DOWNLOADS: Many of you are jumping over from YouTube looking to download our Adobe Illustrator Brushes and Resource Folders. Once you have downloaded and extracted the folders, Digital Downloads are ready to use in Adobe Illustrator. BEGINNER: Start with our Resource Guides, Illustrator Tutorials, or YouTube Playlists to understand how to apply resources in Adobe Illustrator. ADVANCED: As I create my artwork, pay attention to the Building Tools, Brush Application, and Editing Options as it relates to building a "Workflow." BRUSH LIBRARIES / COMIC HALFTONES / T-SHIRT TEXTURES / RESOURCE BUNDLE
DIGITAL DOWNLOADS: Many of you are jumping over from YouTube looking to download our Adobe Illustrator Brushes and Resource Folders. Once you have downloaded and extracted the folders, Digital Downloads are ready to use in Adobe Illustrator. BEGINNER: Start with our Resource Guides, Illustrator Tutorials, or YouTube Playlists to understand how to apply resources in Adobe Illustrator. ADVANCED: As I create my artwork, pay attention to the Building Tools, Brush Application, and Editing Options as it relates to building a "Workflow." BRUSH LIBRARIES / COMIC HALFTONES / T-SHIRT TEXTURES / RESOURCE BUNDLE
DIGITAL DOWNLOADS: Many of you are jumping over from YouTube looking to download our Adobe Illustrator Brushes and Resource Folders. Once you have downloaded and extracted the folders, Digital Downloads are ready to use in Adobe Illustrator. BEGINNER: Start with our Resource Guides, Illustrator Tutorials, or YouTube Playlists to understand how to apply resources in Adobe Illustrator. ADVANCED: As I create my artwork, pay attention to the Building Tools, Brush Application, and Editing Options as it relates to building a "Workflow." BRUSH LIBRARIES / COMIC HALFTONES / T-SHIRT TEXTURES / RESOURCE BUNDLE
DIGITAL DOWNLOADS: Many of you are jumping over from YouTube looking to download our Adobe Illustrator Brushes and Resource Folders. Once you have downloaded and extracted the folders, Digital Downloads are ready to use in Adobe Illustrator. BEGINNER: Start with our Resource Guides, Illustrator Tutorials, or YouTube Playlists to understand how to apply resources in Adobe Illustrator. DOWNLOAD BRUSHES / DOWNLOAD FOLDERS / DOWNLOAD BUNDLES
DIGITAL DOWNLOADS: Many of you are jumping over from YouTube looking to download our Adobe Illustrator Brushes and Resource Folders. Once you have downloaded and extracted the folders, Digital Downloads are ready to use in Adobe Illustrator. BEGINNER: Start with our Resource Guides, Illustrator Tutorials, or YouTube Playlists to understand how to apply resources in Adobe Illustrator. DOWNLOAD BRUSHES / DIGITAL DOWNLOADS
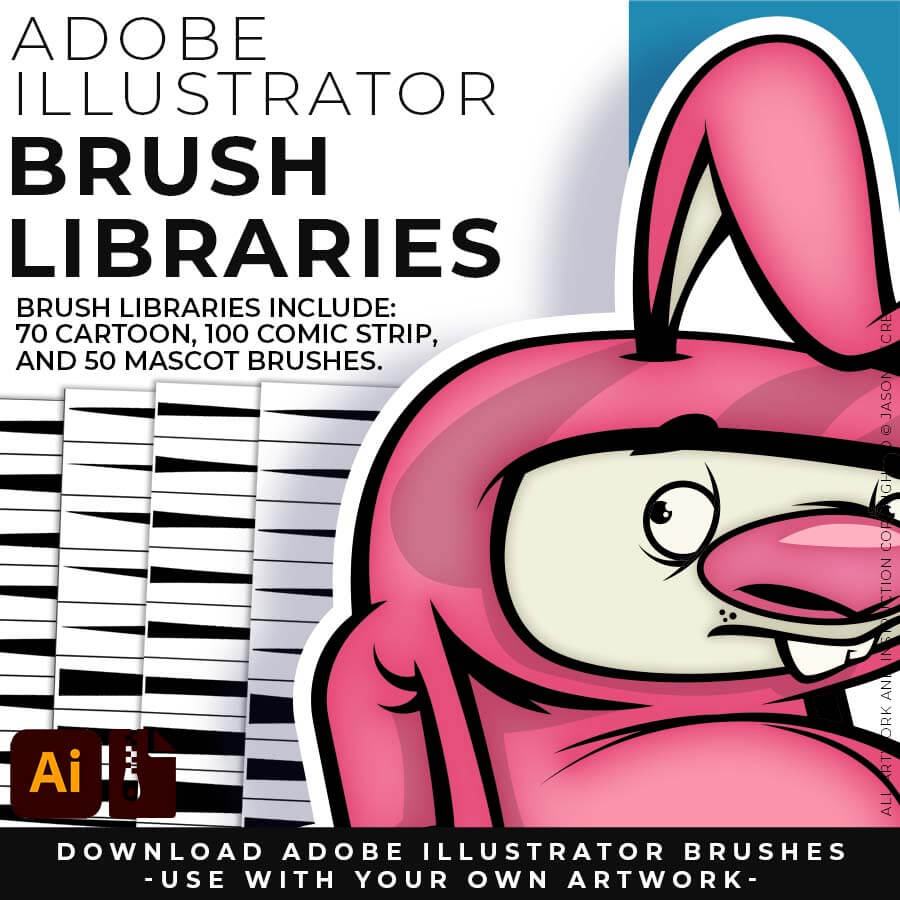
200 ADOBE ILLUSTRATOR BRUSHES. Brush Libraries are specifically designed for Illustrators and Cartoonists to speed up their workflow. Brush Libraries are compatible with Adobe Illustrator CC through CS. Mac or PC. Brush Libraries include 70 Cartoon, 100 Comic Strip, and 50 Vintage Mascot Brushes.
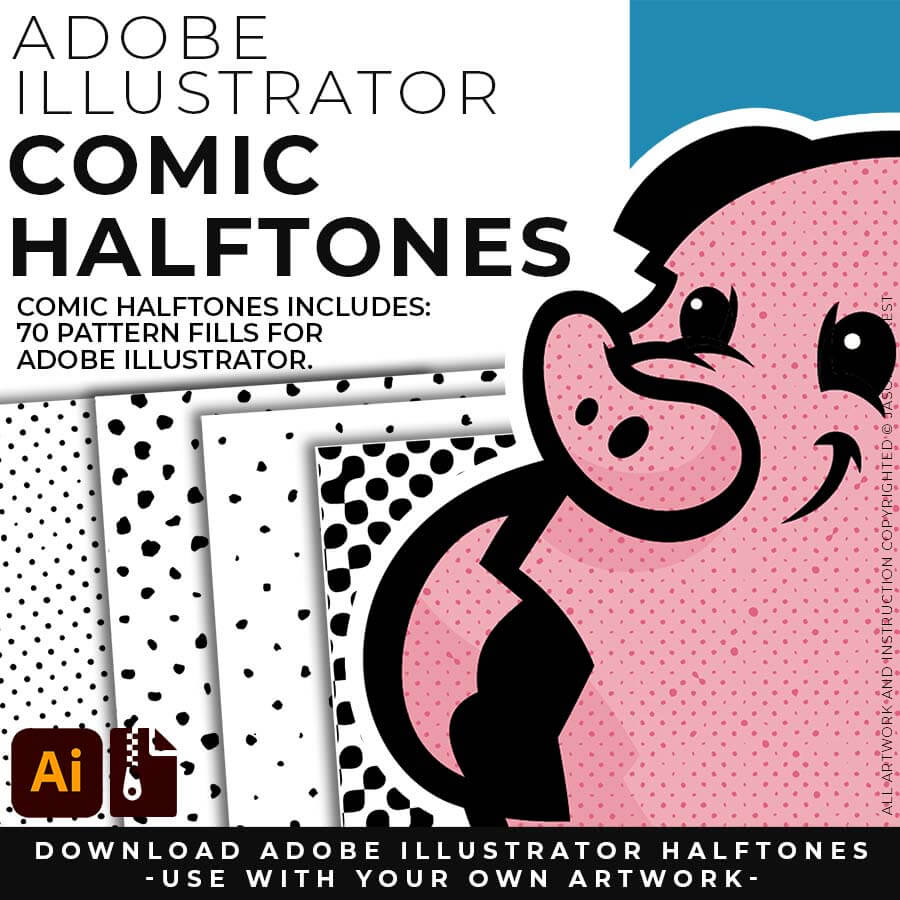
70 ADOBE ILLUSTRATOR HALFTONES. Halftone Patterns Fills are designed for easy application even if you are new to Adobe Illustrator. Halftone Fills behave the same as a Color Swatch so you can apply them quickly using the Blob Brush, Live Paint, or Basic Fills. Halftones include 70 Comic Strip Halftone Pattern Fills.
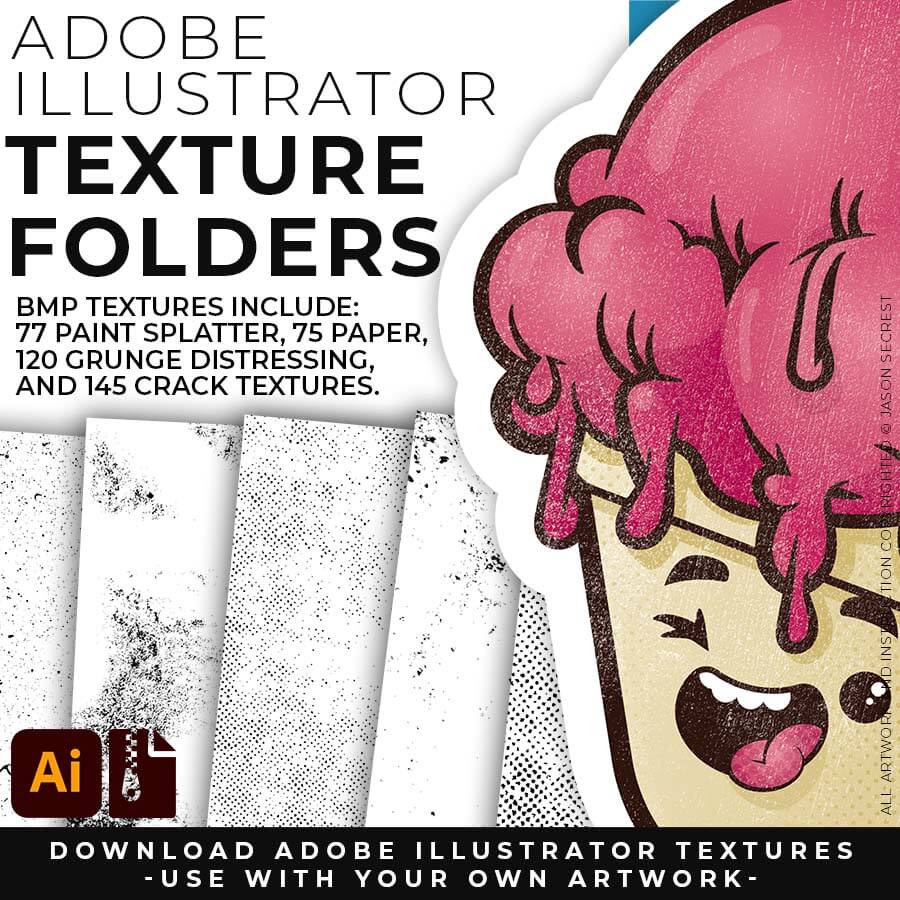
400 ADOBE ILLUSTRATOR BMP TEXTURES. BMP Textures are extremely easy to use even if you are a beginner to Adobe Illustrator. Use BMP Textures along with Opacity Masks in the Transparency Panel for T-Shirt Distressing. BMP Textures include 145 Cracks, 120 Grunge, 75 Paper, and 77 Paint Textures.
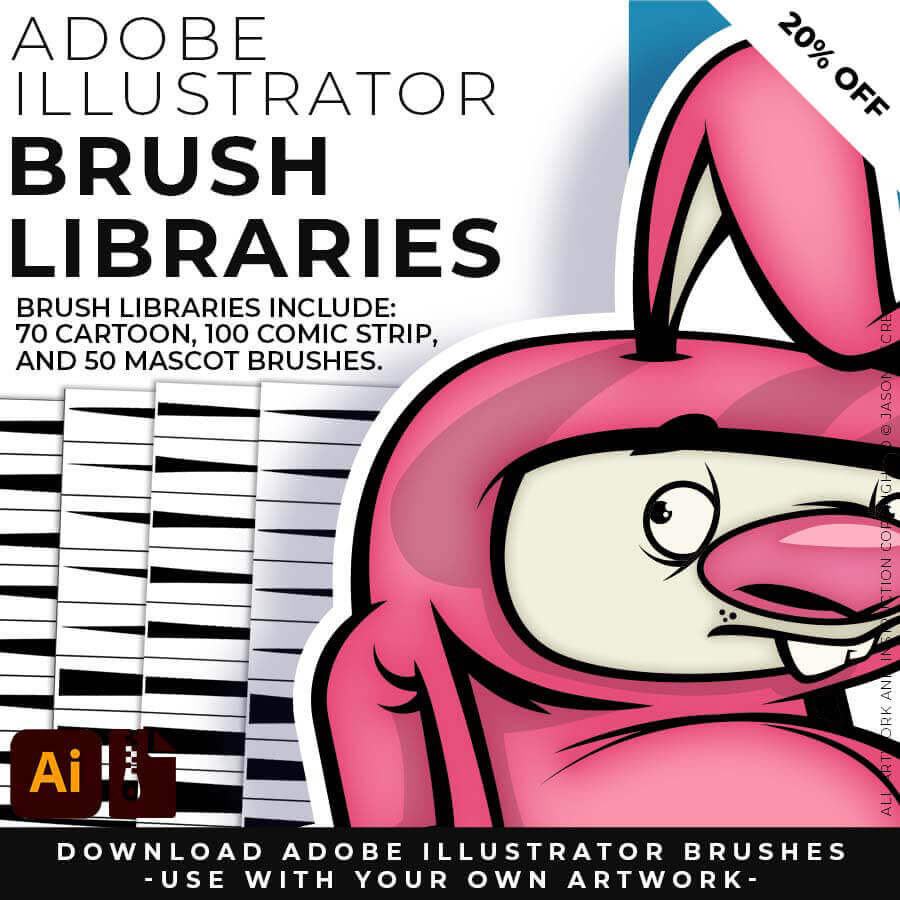
200 ADOBE ILLUSTRATOR BRUSHES. Brush Libraries are specifically designed for Illustrators and Cartoonists to speed up their workflow. Brush Libraries are compatible with Adobe Illustrator CC through CS. Mac or PC. Brush Libraries include 70 Cartoon, 100 Comic Strip, and 50 Vintage Mascot Brushes.
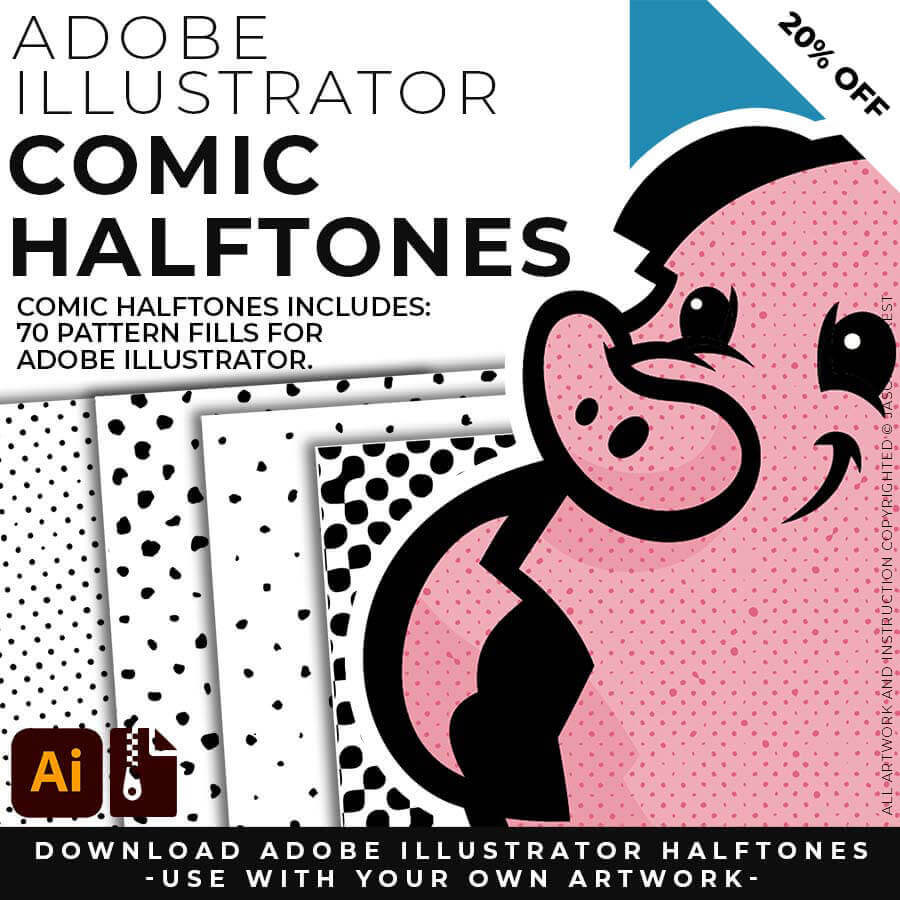
70 ADOBE ILLUSTRATOR HALFTONES. Halftone Patterns Fills are designed for easy application even if you are new to Adobe Illustrator. Halftone Fills behave the same as a Color Swatch so you can apply them quickly using the Blob Brush, Live Paint, or Basic Fills. Halftones include 70 Comic Strip Halftone Pattern Fills.
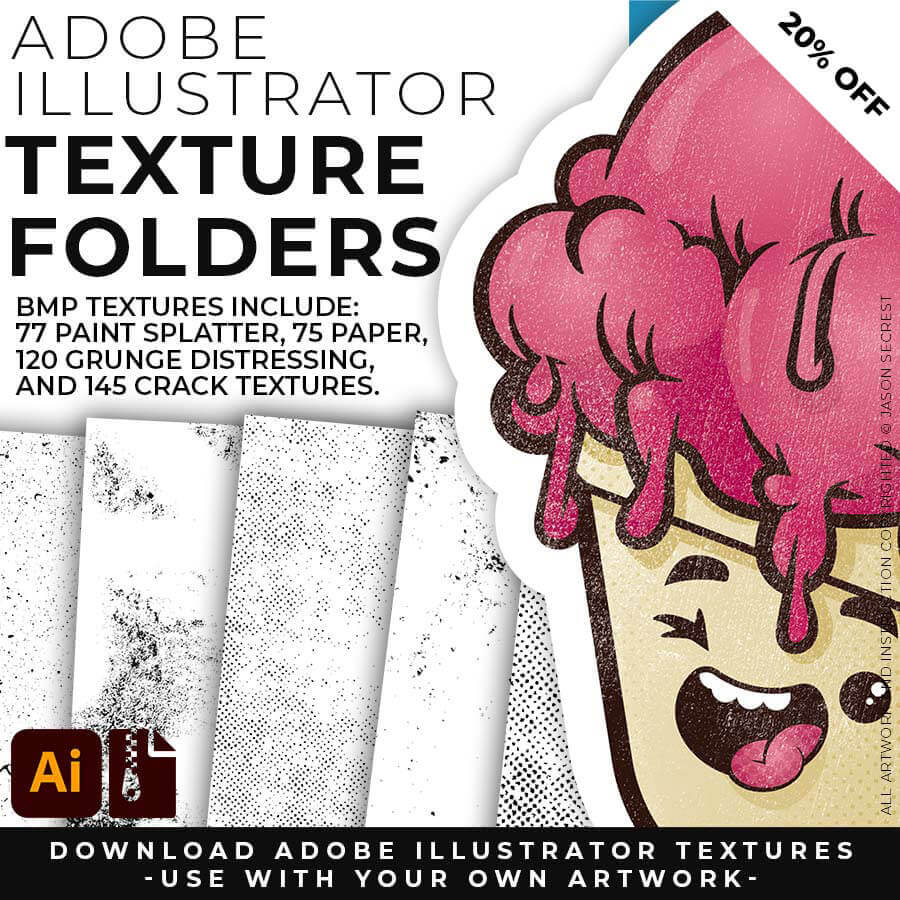
400 ADOBE ILLUSTRATOR BMP TEXTURES. BMP Textures are extremely easy to use even if you are a beginner to Adobe Illustrator. Use BMP Textures along with Opacity Masks in the Transparency Panel for T-Shirt Distressing. BMP Textures include 145 Cracks, 120 Grunge, 75 Paper, and 77 Paint Textures.
200 ADOBE ILLUSTRATOR BRUSHES. Brush Libraries are specifically designed for Illustrators and Cartoonists to speed up their workflow. Brush Libraries are compatible with Adobe Illustrator CC through CS. Mac or PC. Brush Libraries include 70 Cartoon, 100 Comic Strip, and 50 Vintage Mascot Brushes.
70 ADOBE ILLUSTRATOR HALFTONES. Halftone Patterns Fills are designed for easy application even if you are new to Adobe Illustrator. Halftone Fills behave the same as a Color Swatch so you can apply them quickly using the Blob Brush, Live Paint, or Basic Fills. Halftones include 70 Comic Strip Halftone Pattern Fills.
400 ADOBE ILLUSTRATOR BMP TEXTURES. BMP Textures are extremely easy to use even if you are a beginner to Adobe Illustrator. Use BMP Textures along with Opacity Masks in the Transparency Panel for T-Shirt Distressing. BMP Textures include 145 Cracks, 120 Grunge, 75 Paper, and 77 Paint Textures.
200 ADOBE ILLUSTRATOR BRUSHES. Brush Libraries are specifically designed for Illustrators and Cartoonists to speed up their workflow. Brush Libraries are compatible with Adobe Illustrator CC through CS. Mac or PC. Brush Libraries include 70 Cartoon, 100 Comic Strip, and 50 Vintage Mascot Brushes.
70 ADOBE ILLUSTRATOR HALFTONES. Halftone Patterns Fills are designed for easy application even if you are new to Adobe Illustrator. Halftone Fills behave the same as a Color Swatch so you can apply them quickly using the Blob Brush, Live Paint, or Basic Fills. Halftones include 70 Comic Strip Halftone Pattern Fills.
400 ADOBE ILLUSTRATOR BMP TEXTURES. BMP Textures are extremely easy to use even if you are a beginner to Adobe Illustrator. Use BMP Textures along with Opacity Masks in the Transparency Panel for T-Shirt Distressing. BMP Textures include 145 Cracks, 120 Grunge, 75 Paper, and 77 Paint Textures.
200 ADOBE ILLUSTRATOR BRUSHES. Brush Libraries are specifically designed for Illustrators and Cartoonists to speed up their workflow. Brush Libraries are compatible with Adobe Illustrator CC through CS. Mac or PC. Brush Libraries include 70 Cartoon, 100 Comic Strip, and 50 Vintage Mascot Brushes.
70 ADOBE ILLUSTRATOR HALFTONES. Halftone Patterns Fills are designed for easy application even if you are new to Adobe Illustrator. Halftone Fills behave the same as a Color Swatch so you can apply them quickly using the Blob Brush, Live Paint, or Basic Fills. Halftones include 70 Comic Strip Halftone Pattern Fills.
400 ADOBE ILLUSTRATOR BMP TEXTURES. BMP Textures are extremely easy to use even if you are a beginner to Adobe Illustrator. Use BMP Textures along with Opacity Masks in the Transparency Panel for T-Shirt Distressing. BMP Textures include 145 Cracks, 120 Grunge, 75 Paper, and 77 Paint Textures.
ADOBE ILLUSTRATOR
DIGITAL DOWNLOADS
DIGITAL DOWNLOADS
ADOBE ILLUSTRATOR
RESOURCE BUNDLE
RESOURCE BUNDLE
ADOBE ILLUSTRATOR
RESOURCE BUNDLE
RESOURCE BUNDLE
ADOBE ILLUSTRATOR
RESOURCE BUNDLE
RESOURCE BUNDLE
DOWNLOAD BUNDLE
20% OFF
200 ADOBE ILLUSTRATOR BRUSHES. Brush Libraries are specifically designed for Illustrators and Cartoonists to speed up their workflow. Brush Libraries are compatible with Adobe Illustrator CC through CS. Mac or PC. Brush Libraries include 70 Cartoon, 100 Comic Strip, and 50 Vintage Mascot Brushes.
70 ADOBE ILLUSTRATOR HALFTONES. Halftone Patterns Fills are designed for easy application even if you are new to Adobe Illustrator. Halftone Fills behave the same as a Color Swatch so you can apply them quickly using the Blob Brush, Live Paint, or Basic Fills. Halftones include 70 Comic Strip Halftone Pattern Fills.
400 ADOBE ILLUSTRATOR BMP TEXTURES. BMP Textures are extremely easy to use even if you are a beginner to Adobe Illustrator. Use BMP Textures along with Opacity Masks in the Transparency Panel for T-Shirt Distressing. BMP Textures include 145 Cracks, 120 Grunge, 75 Paper, and 77 Paint Textures.
200 ADOBE ILLUSTRATOR BRUSHES. Brush Libraries are specifically designed for Illustrators and Cartoonists to speed up their workflow. Brush Libraries are compatible with Adobe Illustrator CC through CS. Mac or PC. Brush Libraries include 70 Cartoon, 100 Comic Strip, and 50 Vintage Mascot Brushes.
70 ADOBE ILLUSTRATOR HALFTONES. Halftone Patterns Fills are designed for easy application even if you are new to Adobe Illustrator. Halftone Fills behave the same as a Color Swatch so you can apply them quickly using the Blob Brush, Live Paint, or Basic Fills. Halftones include 70 Comic Strip Halftone Pattern Fills.
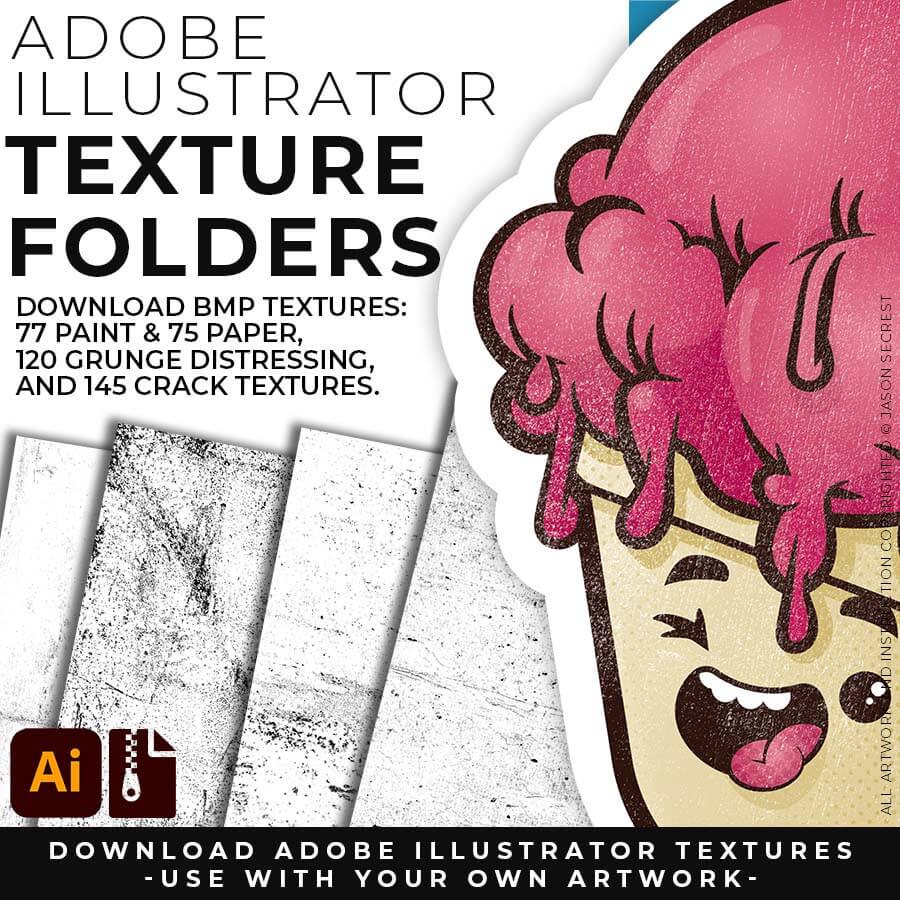
400 ADOBE ILLUSTRATOR BMP TEXTURES. BMP Textures are extremely easy to use even if you are a beginner to Adobe Illustrator. Use BMP Textures along with Opacity Masks in the Transparency Panel for T-Shirt Distressing. BMP Textures include 145 Cracks, 120 Grunge, 75 Paper, and 77 Paint Textures.
200 ADOBE ILLUSTRATOR BRUSHES. Brush Libraries are specifically designed for Illustrators and Cartoonists to speed up their workflow. Brush Libraries are compatible with Adobe Illustrator CC through CS. Mac or PC. Brush Libraries include 70 Cartoon, 100 Comic Strip, and 50 Vintage Mascot Brushes.
70 ADOBE ILLUSTRATOR HALFTONES. Halftone Patterns Fills are designed for easy application even if you are new to Adobe Illustrator. Halftone Fills behave the same as a Color Swatch so you can apply them quickly using the Blob Brush, Live Paint, or Basic Fills. Halftones include 70 Comic Strip Halftone Pattern Fills.
400 ADOBE ILLUSTRATOR BMP TEXTURES. BMP Textures are extremely easy to use even if you are a beginner to Adobe Illustrator. Use BMP Textures along with Opacity Masks in the Transparency Panel for T-Shirt Distressing. BMP Textures include 145 Cracks, 120 Grunge, 75 Paper, and 77 Paint Textures.
ADOBE ILLUSTRATOR
DIGITAL DOWNLOADS
DIGITAL DOWNLOADS
ADOBE ILLUSTRATOR
RESOURCE BUNDLE
RESOURCE BUNDLE
ADOBE ILLUSTRATOR
RESOURCE BUNDLE
RESOURCE BUNDLE
ADOBE ILLUSTRATOR
RESOURCE BUNDLE
RESOURCE BUNDLE
DOWNLOAD BUNDLE
20% OFF
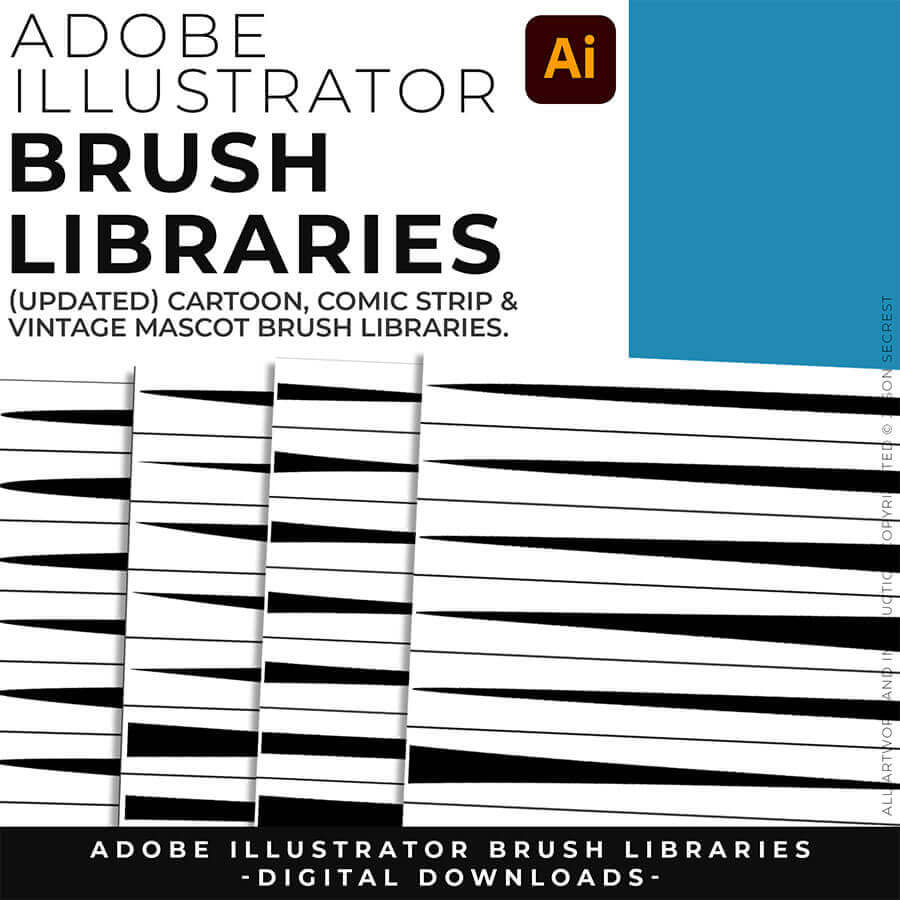
200 ADOBE ILLUSTRATOR BRUSHES. Brush Libraries are specifically designed for Illustrators and Cartoonists to speed up their workflow. Brush Libraries are compatible with Adobe Illustrator CC through CS. Mac or PC. Brush Libraries include 70 Cartoon, 100 Comic Strip, and 50 Vintage Mascot Brushes.
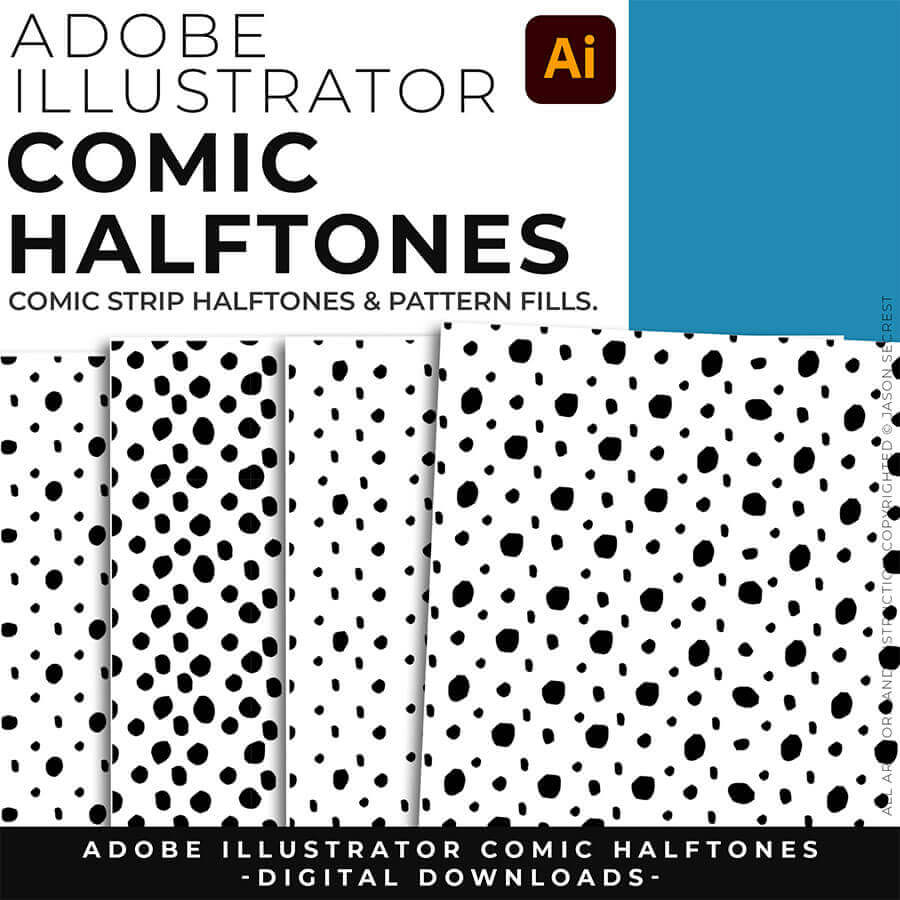
70 ADOBE ILLUSTRATOR HALFTONES. Halftone Patterns Fills are designed for easy application even if you are new to Adobe Illustrator. Halftone Fills behave the same as a Color Swatch so you can apply them quickly using the Blob Brush, Live Paint, or Basic Fills. Halftones include 70 Comic Strip Halftone Pattern Fills.
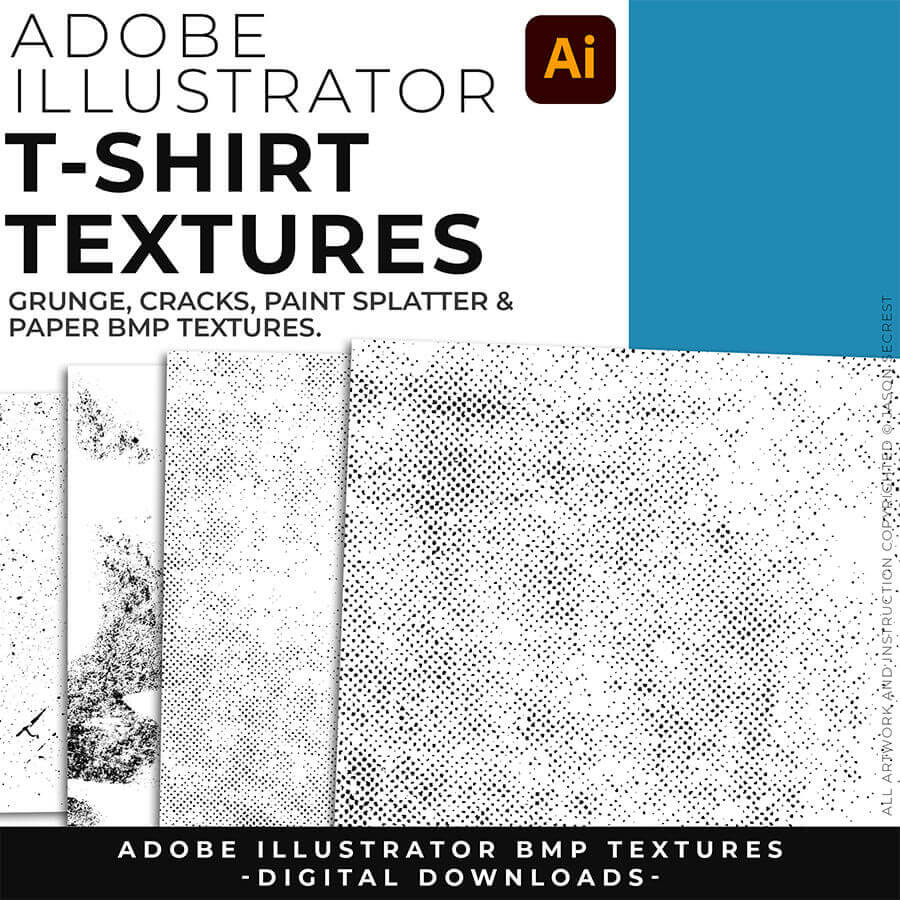
400 ADOBE ILLUSTRATOR BMP TEXTURES. BMP Textures are extremely easy to use even if you are a beginner to Adobe Illustrator. Use BMP Textures along with Opacity Masks in the Transparency Panel for T-Shirt Distressing. BMP Textures include 145 Cracks, 120 Grunge, 75 Paper, and 77 Paint Textures.
200 ADOBE ILLUSTRATOR BRUSHES. Brush Libraries are specifically designed for Illustrators and Cartoonists to speed up their workflow. Brush Libraries are compatible with Adobe Illustrator CC through CS. Mac or PC. Brush Libraries include 70 Cartoon, 100 Comic Strip, and 50 Vintage Mascot Brushes.
70 ADOBE ILLUSTRATOR HALFTONES. Halftone Patterns Fills are designed for easy application even if you are new to Adobe Illustrator. Halftone Fills behave the same as a Color Swatch so you can apply them quickly using the Blob Brush, Live Paint, or Basic Fills. Halftones include 70 Comic Strip Halftone Pattern Fills.
400 ADOBE ILLUSTRATOR BMP TEXTURES. BMP Textures are extremely easy to use even if you are a beginner to Adobe Illustrator. Use BMP Textures along with Opacity Masks in the Transparency Panel for T-Shirt Distressing. BMP Textures include 145 Cracks, 120 Grunge, 75 Paper, and 77 Paint Textures.
200 ADOBE ILLUSTRATOR BRUSHES. Brush Libraries are specifically designed for Illustrators and Cartoonists to speed up their workflow. Brush Libraries are compatible with Adobe Illustrator CC through CS. Mac or PC. Brush Libraries include 70 Cartoon, 100 Comic Strip, and 50 Vintage Mascot Brushes.
70 ADOBE ILLUSTRATOR HALFTONES. Halftone Patterns Fills are designed for easy application even if you are new to Adobe Illustrator. Halftone Fills behave the same as a Color Swatch so you can apply them quickly using the Blob Brush, Live Paint, or Basic Fills. Halftones include 70 Comic Strip Halftone Pattern Fills.
400 ADOBE ILLUSTRATOR BMP TEXTURES. BMP Textures are extremely easy to use even if you are a beginner to Adobe Illustrator. Use BMP Textures along with Opacity Masks in the Transparency Panel for T-Shirt Distressing. BMP Textures include 145 Cracks, 120 Grunge, 75 Paper, and 77 Paint Textures.
ADOBE ILLUSTRATOR
DIGITAL DOWNLOADS
DIGITAL DOWNLOADS
ADOBE ILLUSTRATOR
RESOURCE BUNDLE
RESOURCE BUNDLE
ADOBE ILLUSTRATOR
RESOURCE BUNDLE
RESOURCE BUNDLE
ADOBE ILLUSTRATOR
RESOURCE BUNDLE
RESOURCE BUNDLE
DOWNLOAD BUNDLE
20% OFF
DOWNLOAD BRUSHES: Many of you are jumping over from YouTube looking to download our Adobe Illustrator Brush Libraries. Once you have downloaded and extracted the folders, Brushes are ready to be used in Adobe Illustrator. BEGINNER: Start with our Resource Guides to understand how to download, save, and open Brush Libraries in Adobe Illustrator. ADVANCED: As I create my artwork, pay attention to the Building Tools, Brush Application, and Editing Options as it relates to building a "Workflow." CARTOON / COMIC STRIP / MASCOT
DOWNLOAD BRUSHES: Many of you are jumping over from YouTube looking to download our Adobe Illustrator Brush Libraries. Once you have downloaded and extracted the folders, Brushes are ready to be used in Adobe Illustrator. BEGINNER: Start with our Resource Guides to understand how to download, save, and open Brush Libraries in Adobe Illustrator. ADVANCED: As I create my artwork, pay attention to the Building Tools, Brush Application, and Editing Options as it relates to building a "Workflow." CARTOON / COMIC STRIP / MASCOT
SKETCH TO BRUSHES: Attach your rough sketch to get clean, inked linework back from the prompts, then open the file in Illustrator and polish it with the matching brush set. Apply the Sketch to Brushes Prompts and move straight to editing. Resource Guides are in a full course format. Brush Libraries and Sketch to Brushes Prompt Packs are hosted through Teachable. → SKETCH TO BRUSHES
BRUSH LIBRARIES: Many of you are jumping over from YouTube looking to download our Adobe Illustrator Brush Libraries. Once you have downloaded and extracted the folders, Brushes are ready to be used in Adobe Illustrator. BEGINNER: Start with our Resource Guides to understand how to download, save, and open Brush Libraries in Adobe Illustrator. ADVANCED: As I create my artwork, pay attention to the Building Tools, Brush Application, and Editing Options as it relates to building a "Workflow." → DOWNLOAD BRUSHES / BRUSHES GUIDE
DIGITAL DOWNLOADS: Many of you are jumping over from YouTube looking to download our Adobe Illustrator Brushes and Resource Folders. Once you have downloaded and extracted the folders, Digital Downloads are ready to use in Adobe Illustrator. BEGINNER: Start with our Resource Guides, Illustrator Tutorials, or YouTube Playlists to understand how to apply resources in Adobe Illustrator. ADVANCED: As I create my artwork, pay attention to the Building Tools, Brush Application, and Editing Options as it relates to building a "Workflow." BRUSH LIBRARIES / COMIC HALFTONES / T-SHIRT TEXTURES / RESOURCE BUNDLE
DIGITAL DOWNLOADS: Many of you are jumping over from YouTube looking to download our Adobe Illustrator Brushes and Resource Folders. Once you have downloaded and extracted the folders, Digital Downloads are ready to use in Adobe Illustrator. BEGINNER: Start with our Resource Guides, Illustrator Tutorials, or YouTube Playlists to understand how to apply resources in Adobe Illustrator. ADVANCED: As I create my artwork, pay attention to the Building Tools, Brush Application, and Editing Options as it relates to building a "Workflow." BRUSH LIBRARIES / COMIC HALFTONES / T-SHIRT TEXTURES / RESOURCE BUNDLE
DIGITAL DOWNLOADS: Many of you are jumping over from YouTube looking to download our Adobe Illustrator Brushes and Resource Folders. Once you have downloaded and extracted the folders, Digital Downloads are ready to use in Adobe Illustrator. BEGINNER: Start with our Resource Guides, Illustrator Tutorials, or YouTube Playlists to understand how to apply resources in Adobe Illustrator. ADVANCED: As I create my artwork, pay attention to the Building Tools, Brush Application, and Editing Options as it relates to building a "Workflow." BRUSH LIBRARIES / COMIC HALFTONES / T-SHIRT TEXTURES / RESOURCE BUNDLE
DIGITAL DOWNLOADS: Many of you are jumping over from YouTube looking to download our Adobe Illustrator Brushes and Resource Folders. Once you have downloaded and extracted the folders, Digital Downloads are ready to use in Adobe Illustrator. BEGINNER: Start with our Resource Guides, Illustrator Tutorials, or YouTube Playlists to understand how to apply resources in Adobe Illustrator. DOWNLOAD BRUSHES / DOWNLOAD FOLDERS / DOWNLOAD BUNDLES
DIGITAL DOWNLOADS: Many of you are jumping over from YouTube looking to download our Adobe Illustrator Brushes and Resource Folders. Once you have downloaded and extracted the folders, Digital Downloads are ready to use in Adobe Illustrator. BEGINNER: Start with our Resource Guides, Illustrator Tutorials, or YouTube Playlists to understand how to apply resources in Adobe Illustrator. DOWNLOAD BRUSHES / DIGITAL DOWNLOADS
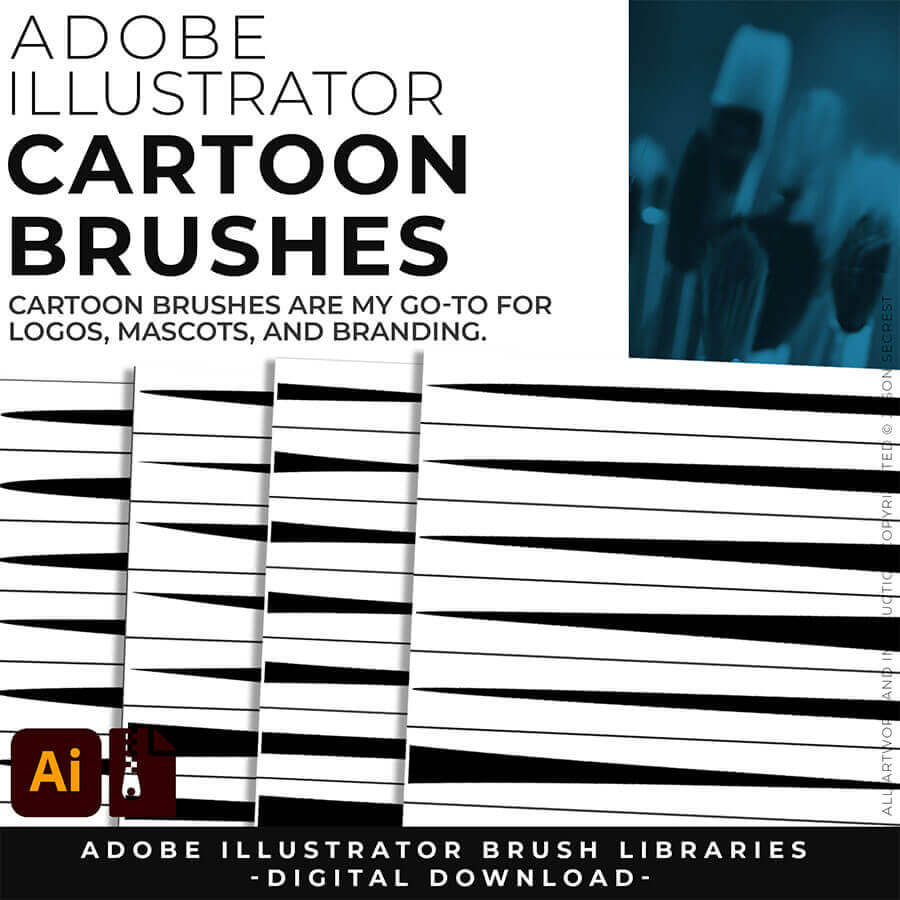
CARTOON BRUSHES: Cartoon Brushes are my go-to for Professional Logos, Cartoons, Mascots, and Branding. Use Cartoon Illustrator Brushes with the Pen, Pencil, or Paint Brush Tools to Apply different Line Variation to your Vector Artwork. Download Cartoon, Cartoon 2, and Original Cartoon Brush Libraries.
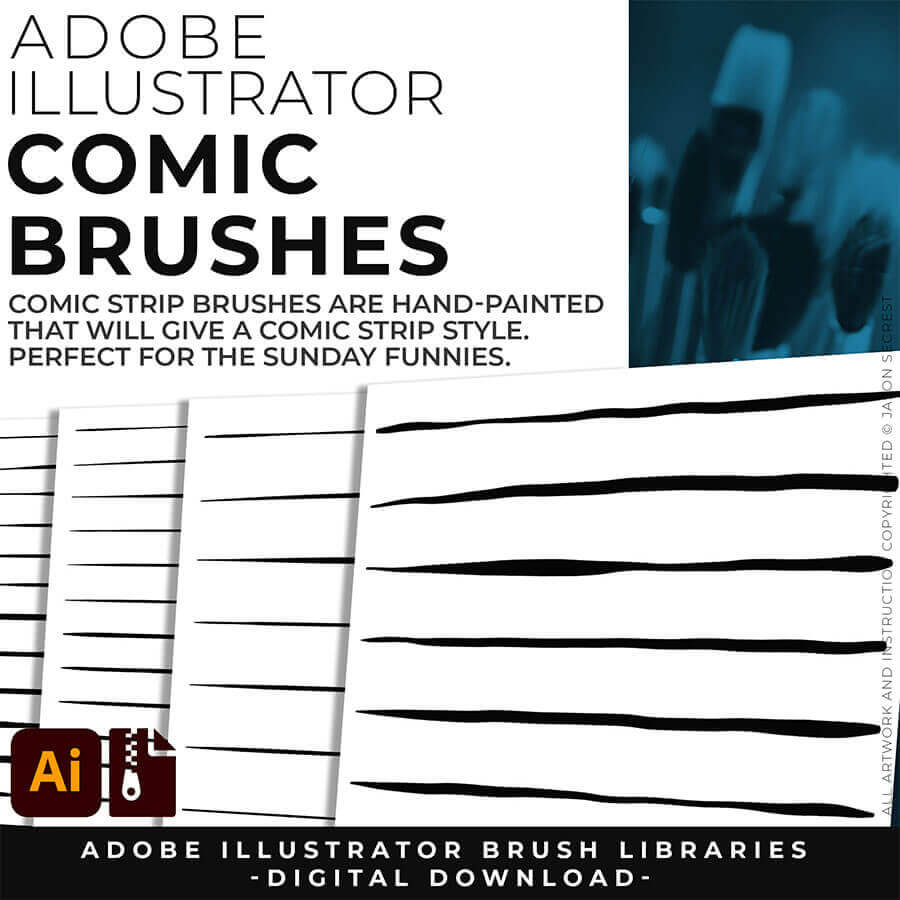
COMIC STRIP BRUSHES: Hand Painted + Comic Strip Brushes to get a lived in feel back into your Vector Art. Comic Strips and Hand Painted are painted based on some of my favorite artists and cartoonists. These brushes are designed to look ready for the Sunday Paper. Download Comic Strip, Hand-Painted, Paintbrush, and Fine Liner Brush Libraries.
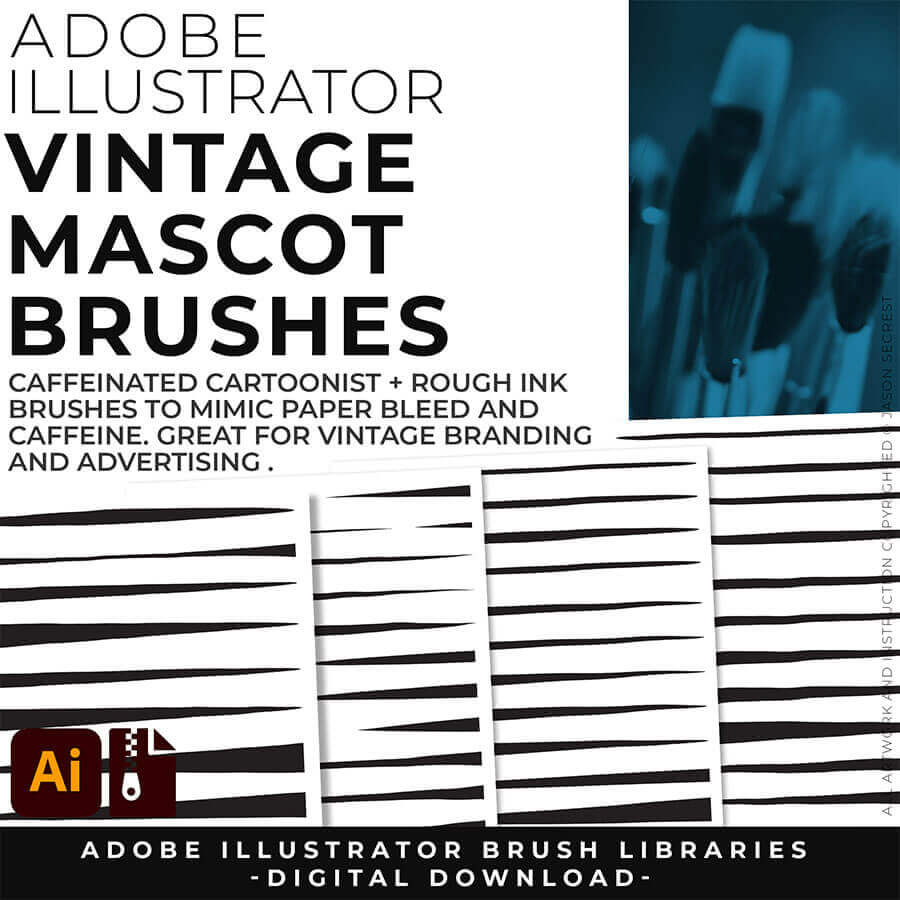
MASCOT BRUSHES: Jittery Hand, Caffeinated Cartoonist + Rough Ink Brushes to Mimic Paper Bleed and Caffeine. Designed to be a little less stiff with your vector art. Use these Brush Libraries to get more of a distressed look or ink bleed back in your own Vector Artwork. Download Caffeinated Cartoonist, Rough Ink, and Jittery Hand Brush Libraries.
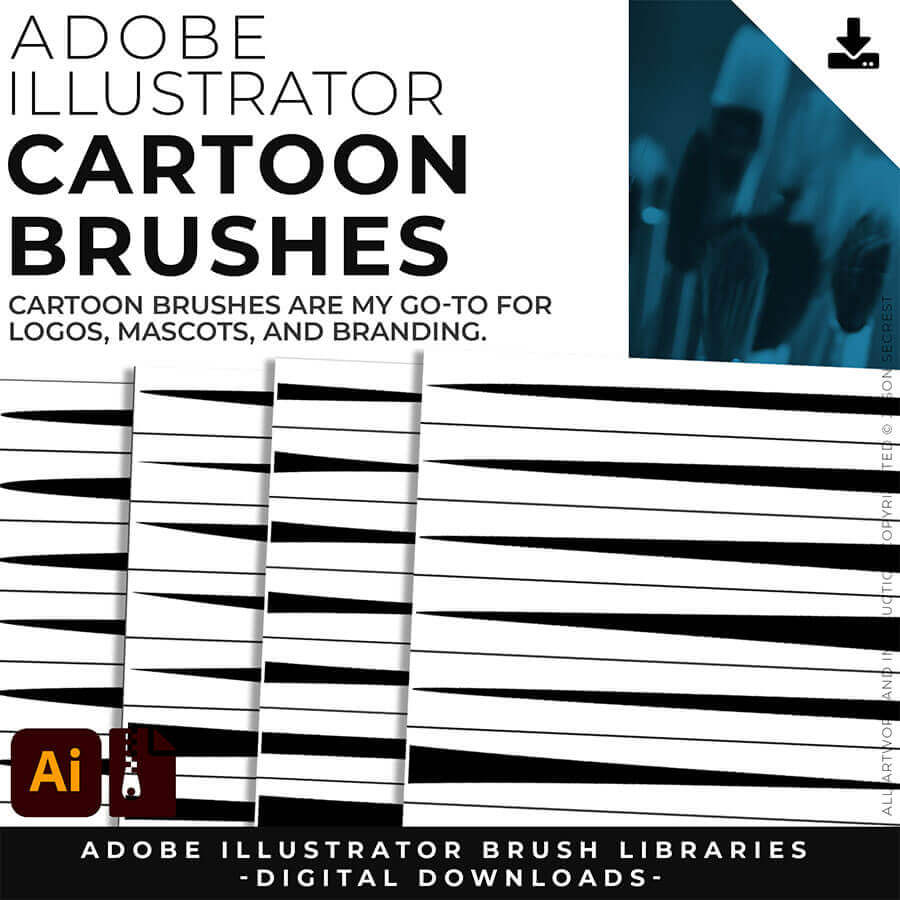
CARTOON BRUSHES: Cartoon Brushes are my go-to for Professional Logos, Cartoons, Mascots, and Branding. Use Cartoon Illustrator Brushes with the Pen, Pencil or Paint Brush Tools to Apply different Line Variation to your Vector Artwork. Includes (Updated) Cartoon, Cartoon 2, and Original Cartoon Brush Libraries. DIGITAL DOWNLOAD: CARTOON BRUSHES
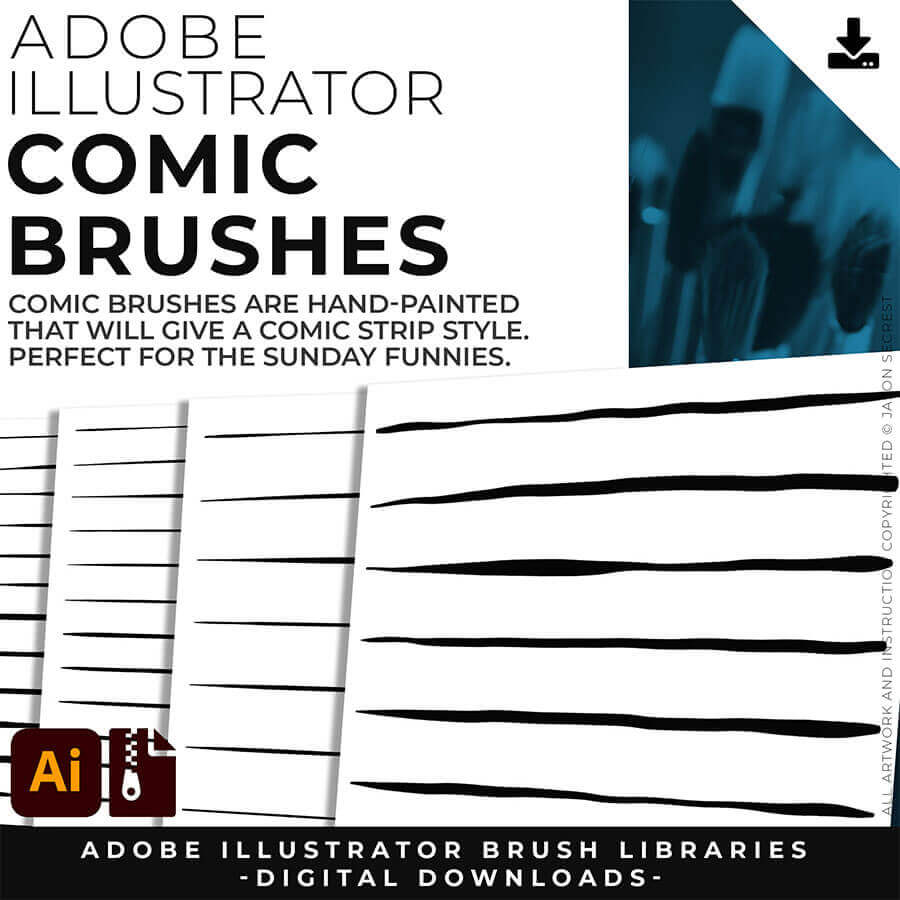
COMIC STRIP BRUSHES: Hand Painted + Comic Strip Brushes get a lived-in feel back into your Vector Art. Comic Strips and Hand Painted are painted based on some of my favorite artists and cartoonists. These brushes are designed to look ready for the Sunday Paper. Includes (Updated) Comic Strip, Hand-Painted, Paintbrush, and Fine Liner Brush Libraries. DIGITAL DOWNLOAD: COMIC BRUSHES
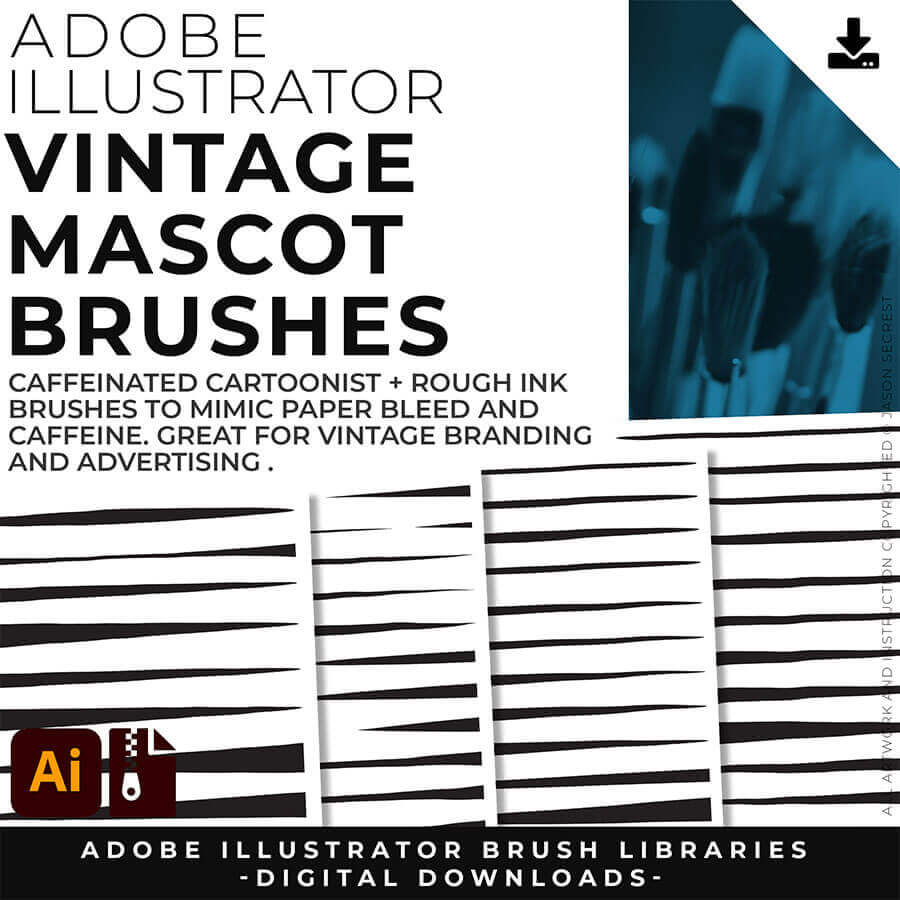
MASCOT BRUSHES: Jittery Hand, Caffeinated Cartoonist + Rough Ink Brushes to Mimic Paper Bleed and Caffeine. Designed to be a little less stiff with your vector art. Use these Brush Libraries to get more of a distressed look or ink bleed back in your own Vector Artwork. Includes (Updated) Caffeinated Cartoonist, Rough Ink, and Jittery Hand Brush Libraries. DIGITAL DOWNLOAD: MASCOT BRUSHES
CARTOON BRUSHES: Cartoon Brushes are my go-to for Professional Logos, Cartoons, Mascots, and Branding. Use Cartoon Illustrator Brushes with the Pen, Pencil or Paint Brush Tools to Apply different Line Variation to your Vector Artwork. Download Cartoon, Cartoon 2, and Original Cartoon Brush Libraries.
COMIC BRUSHES: Hand Painted + Comic Strip Brushes get a lived-in feel back into your Vector Art. Comic Strips and Hand Painted are painted based on some of my favorite artists and cartoonists. These brushes are designed to look ready for the Sunday Paper. Download Comic Strip, Hand-Painted, Paintbrush, and Fine Liner Brush Libraries.
MASCOT BRUSHES: Jittery Hand, Caffeinated Cartoonist + Rough Ink Brushes to Mimic Paper Bleed and Caffeine. Designed to be a little less stiff with your vector art. Use these Brush Libraries to get more of a distressed look or ink bleed back in your own Vector Artwork. Download Caffeinated Cartoonist, Rough Ink, and Jittery Hand Brush Libraries.
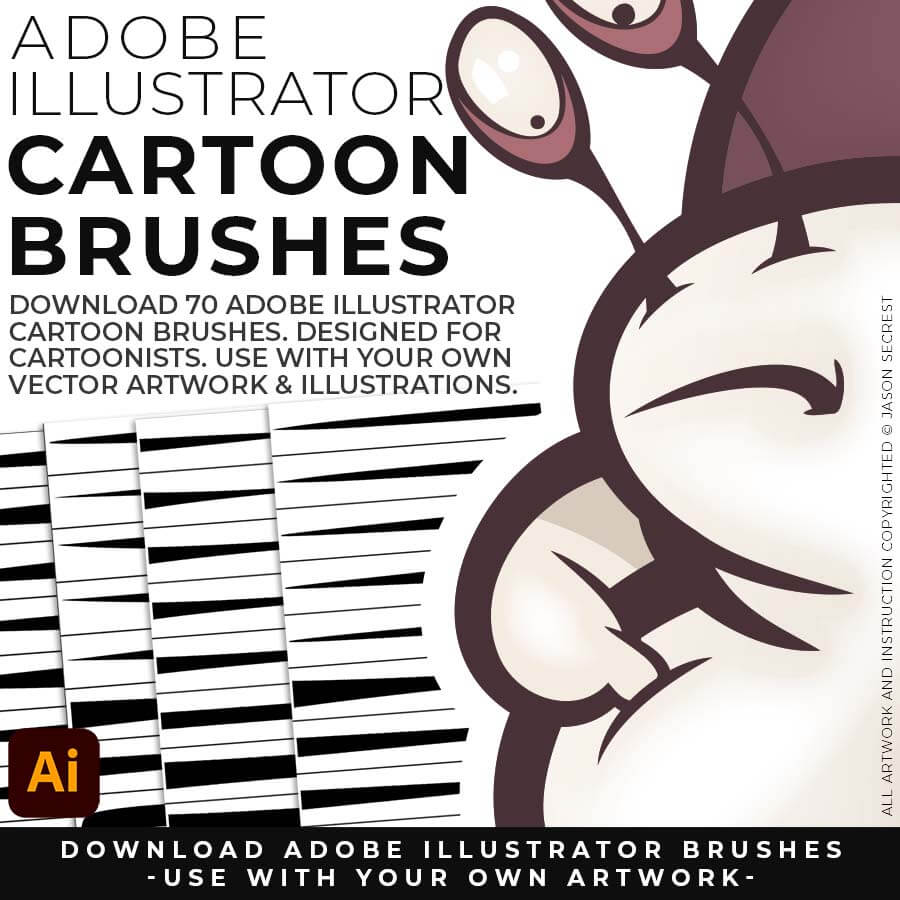
CARTOON BRUSHES: Cartoon Brushes are my go-to for Professional Logos, Cartoons, Mascots, and Branding. Use Cartoon Illustrator Brushes with the Pen, Pencil or Paint Brush Tools to Apply different Line Variation to your Vector Artwork. Download Cartoon, Cartoon 2, and Original Cartoon Brush Libraries.
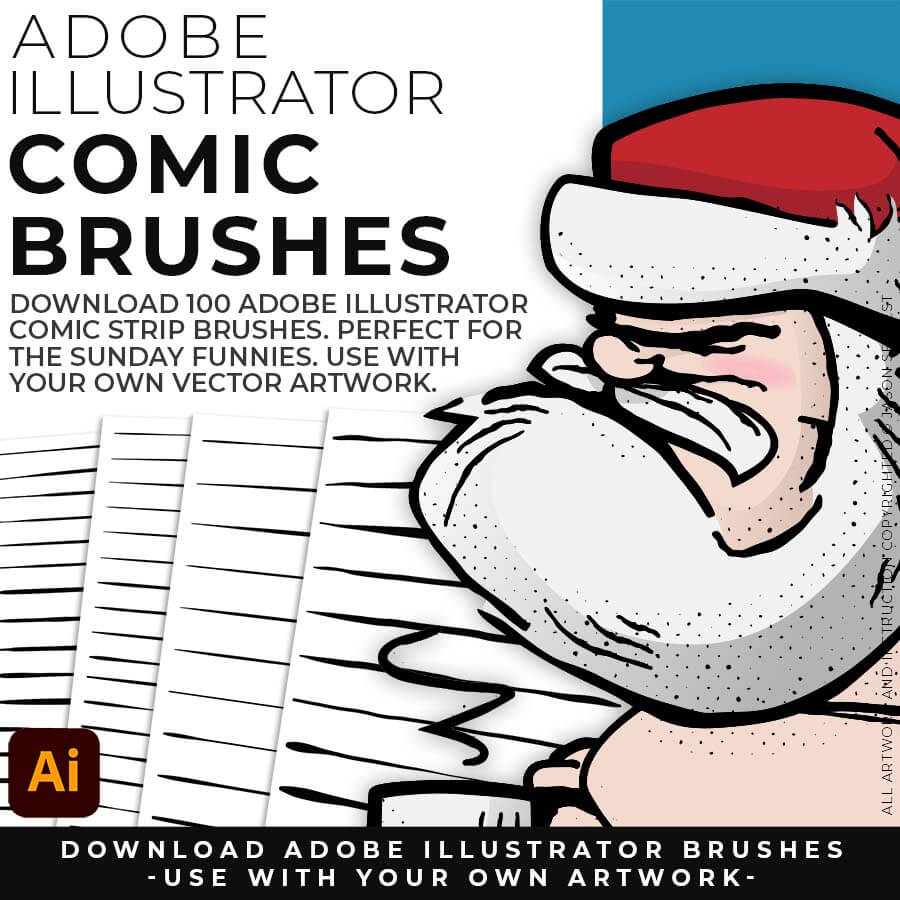
COMIC BRUSHES: Hand Painted + Comic Strip Brushes get a lived-in feel back into your Vector Art. Comic Strips and Hand Painted are painted based on some of my favorite artists and cartoonists. These brushes are designed to look ready for the Sunday Paper. Download Comic Strip, Hand-Painted, Paintbrush, and Fine Liner Brush Libraries.
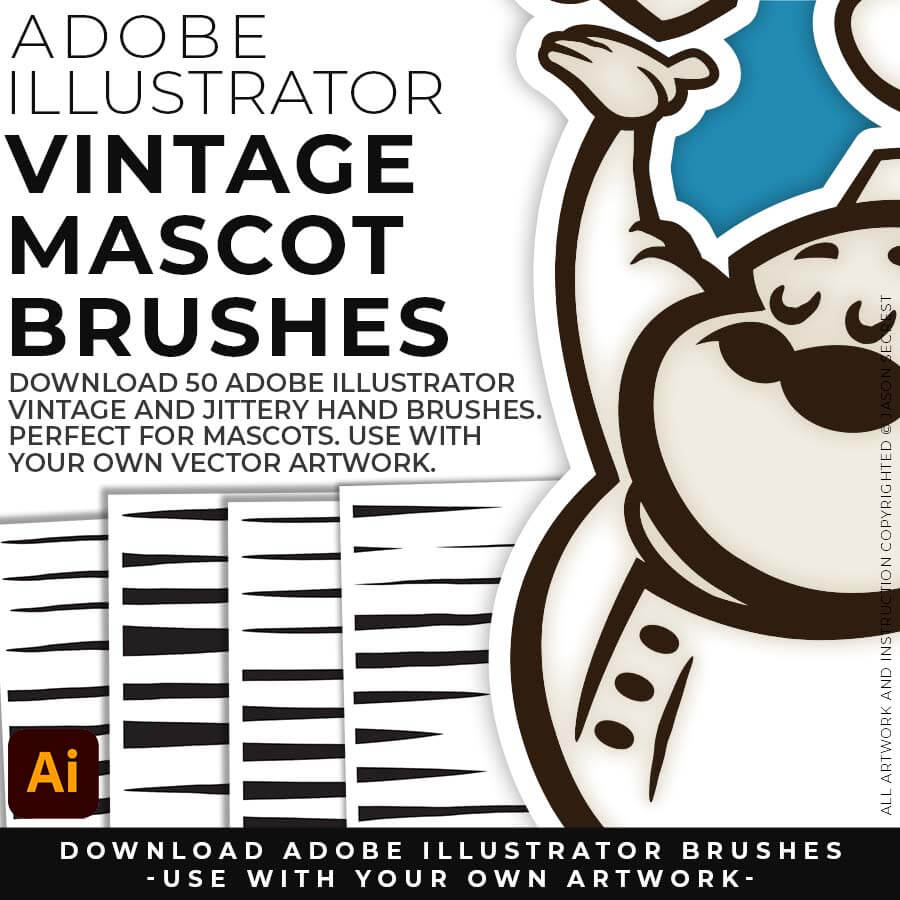
MASCOT BRUSHES: Jittery Hand, Caffeinated Cartoonist + Rough Ink Brushes to Mimic Paper Bleed and Caffeine. Designed to be a little less stiff with your vector art. Use these Brush Libraries to get more of a distressed look or ink bleed back in your own Vector Artwork. Download Caffeinated Cartoonist, Rough Ink, and Jittery Hand Brush Libraries.
CARTOON BRUSHES: Cartoon Brushes are my go-to for Professional Logos, Cartoons, Mascots, and Branding. Use Cartoon Illustrator Brushes with the Pen, Pencil, or Paint Brush Tools to Apply different Line Variation to your Vector Artwork. Download Cartoon, Cartoon 2, and Original Cartoon Brush Libraries.
COMIC STRIP BRUSHES: Hand Painted + Comic Strip Brushes to get a lived in feel back into your Vector Art. Comic Strips and Hand Painted are painted based on some of my favorite artists and cartoonists. These brushes are designed to look ready for the Sunday Paper. Download Comic Strip, Hand-Painted, Paintbrush, and Fine Liner Brush Libraries.
MASCOT BRUSHES: Jittery Hand, Caffeinated Cartoonist + Rough Ink Brushes to Mimic Paper Bleed and Caffeine. Designed to be a little less stiff with your vector art. Use these Brush Libraries to get more of a distressed look or ink bleed back in your own Vector Artwork. Download Caffeinated Cartoonist, Rough Ink, and Jittery Hand Brush Libraries.
70 CARTOON BRUSHES: Cartoon Brushes are my go-to for Professional Logos, Cartoons, Mascots, and Branding. Use Cartoon Illustrator Brushes with the Pen, Pencil, or Paint Brush Tools to Apply different Line Variation to your Vector Artwork. (Updated) Cartoon, Cartoon 2, and Original Cartoon Brush Libraries.
100 COMIC STRIP BRUSHES: Hand Painted + Comic Strip Brushes to get a lived in feel back into your Vector Art. Comic Strips and Hand Painted are painted based on some of my favorite artists and cartoonists. These brushes are designed to look ready for the Sunday Paper. (Updated) Comic Strip, Hand-Painted, Paintbrush, and Fine Liner Brush Libraries.
50 MASCOT BRUSHES: Jittery Hand, Caffeinated Cartoonist + Rough Ink Brushes to Mimic Paper Bleed and Caffeine. Designed to be a little less stiff with your vector art. Use these Brush Libraries to get more of a distressed look or ink bleed back in your own Vector Artwork. (Updated) Caffeinated Cartoonist, Rough Ink, and Jittery Hand Brush Libraries.
70 CARTOON BRUSHES: Cartoon Brushes are my go-to for Professional Logos, Cartoons, Mascots, and Branding. Use Cartoon Illustrator Brushes with the Pen, Pencil, or Paint Brush Tools to Apply different Line Variation to your Vector Artwork. (Updated) Cartoon, Cartoon 2, and Original Cartoon Brush Libraries.
100 COMIC STRIP BRUSHES: Hand Painted + Comic Strip Brushes to get a lived in feel back into your Vector Art. Comic Strips and Hand Painted are painted based on some of my favorite artists and cartoonists. These brushes are designed to look ready for the Sunday Paper. (Updated) Comic Strip, Hand-Painted, Paintbrush, and Fine Liner Brush Libraries.
50 MASCOT BRUSHES: Jittery Hand, Caffeinated Cartoonist + Rough Ink Brushes to Mimic Paper Bleed and Caffeine. Designed to be a little less stiff with your vector art. Use these Brush Libraries to get more of a distressed look or ink bleed back in your own Vector Artwork. (Updated) Caffeinated Cartoonist, Rough Ink, and Jittery Hand Brush Libraries.
CARTOON BRUSHES: Cartoon Brushes are my go-to for Professional Logos, Cartoons, Mascots, and Branding. Use Cartoon Illustrator Brushes with the Pen, Pencil or Paint Brush Tools to Apply different Line Variation to your Vector Artwork. Download Cartoon, Cartoon 2, and Original Cartoon Brush Libraries.
COMIC BRUSHES: Hand Painted + Comic Strip Brushes get a lived-in feel back into your Vector Art. Comic Strips and Hand Painted are painted based on some of my favorite artists and cartoonists. These brushes are designed to look ready for the Sunday Paper. Download Comic Strip, Hand-Painted, Paintbrush, and Fine Liner Brush Libraries.
MASCOT BRUSHES: Jittery Hand, Caffeinated Cartoonist + Rough Ink Brushes to Mimic Paper Bleed and Caffeine. Designed to be a little less stiff with your vector art. Use these Brush Libraries to get more of a distressed look or ink bleed back in your own Vector Artwork. Download Caffeinated Cartoonist, Rough Ink, and Jittery Hand Brush Libraries.
CARTOON BRUSHES: Cartoon Brushes are my go-to for Professional Logos, Cartoons, Mascots, and Branding. Use Cartoon Illustrator Brushes with the Pen, Pencil, or Paint Brush Tools to Apply different Line Variation to your Vector Artwork. Download Cartoon, Cartoon 2, and Original Cartoon Brush Libraries.
COMIC STRIP BRUSHES: Hand Painted + Comic Strip Brushes to get a lived in feel back into your Vector Art. Comic Strips and Hand Painted are painted based on some of my favorite artists and cartoonists. These brushes are designed to look ready for the Sunday Paper. Download Comic Strip, Hand-Painted, Paintbrush, and Fine Liner Brush Libraries.
MASCOT BRUSHES: Jittery Hand, Caffeinated Cartoonist + Rough Ink Brushes to Mimic Paper Bleed and Caffeine. Designed to be a little less stiff with your vector art. Use these Brush Libraries to get more of a distressed look or ink bleed back in your own Vector Artwork. Download Caffeinated Cartoonist, Rough Ink, and Jittery Hand Brush Libraries.
CARTOON BRUSHES: Cartoon Brushes are my go-to brushes for Professional Logos, Cartoons, Mascots, and Branding. Use Cartoon Illustrator Brushes with the Pen, Pencil or Paint Brush Tools to Apply different Line Variation to your Vector Artwork. Includes (Updated) Cartoon, Cartoon 2, and Original Cartoon Brush Libraries. DIGITAL DOWNLOAD: CARTOON BRUSHES
COMIC STRIP BRUSHES: Hand Painted + Comic Strip Brushes get a lived-in feel back into your Vector Art. Comic Strips and Hand Painted are painted based on some of my favorite artists and cartoonists. These brushes are designed to look ready for the Sunday Paper. Includes (Updated) Comic Strip, Hand-Painted, Paintbrush, and Fine Liner Brush Libraries. DIGITAL DOWNLOAD: COMIC BRUSHES
MASCOT BRUSHES: Jittery Hand, Caffeinated Cartoonist + Rough Ink Brushes to Mimic Paper Bleed and Caffeine. Designed to be a little less stiff with your vector art. Use these Brush Libraries to get more of a distressed look or ink bleed back in your own Vector Artwork. Includes (Updated) Caffeinated Cartoonist, Rough Ink, and Jittery Hand Brush Libraries. DIGITAL DOWNLOAD: MASCOT BRUSHES
SKETCH TO CARTOON BRUSHES: Most people get stuck at one of two spots — they have a sketch, but can't build and ink it cleanly in Adobe Illustrator. This combo fixes both ends: sixteen AI prompts turn your rough sketch into clean, professional cartoon linework, formatted for Midjourney, Gemini, ChatGPT Images, Kittl, and Canva — then the actual 70-brush library lets you finish and edit it by hand in Illustrator.
SKETCH TO COMIC STRIP BRUSHES: Real comic art has that bold-outline-to-fine-detail depth, and it takes forever to learn by hand. This pack gets you there faster: sixteen AI prompts built around that exact classic hierarchy, formatted for Midjourney, Gemini, ChatGPT Images, Kittl, and Canva, plus the 100-brush download to polish the final linework in Illustrator yourself. AI gets you 90% there, your hand gets you the last 10.
SKETCH TO MASCOT BRUSHES: Mascot work has to hit hard on a T-shirt, not just look good on a screen. Sixteen AI prompts give you that bold, hand-inked mascot energy straight from a rough sketch, formatted for Midjourney, Gemini, ChatGPT Images, Kittl, and Canva, and the matching 50-brush download lets you finish it by hand in Illustrator so it's print-ready. Sketch rough, finish with real brushes.
CARTOON BRUSHES: Cartoon Brushes are my go-to brushes for Professional Logos, Cartoons, Mascots, and Branding. Use Cartoon Illustrator Brushes with the Pen, Pencil or Paint Brush Tools to Apply different Line Variation to your Vector Artwork. Includes (Updated) Cartoon, Cartoon 2, and Original Cartoon Brush Libraries. DIGITAL DOWNLOAD: CARTOON BRUSHES
COMIC STRIP BRUSHES: Hand Painted + Comic Strip Brushes get a lived-in feel back into your Vector Art. Comic Strips and Hand Painted are painted based on some of my favorite artists and cartoonists. These brushes are designed to look ready for the Sunday Paper. Includes (Updated) Comic Strip, Hand-Painted, Paintbrush, and Fine Liner Brush Libraries. DIGITAL DOWNLOAD: COMIC BRUSHES
MASCOT BRUSHES: Jittery Hand, Caffeinated Cartoonist + Rough Ink Brushes to Mimic Paper Bleed and Caffeine. Designed to be a little less stiff with your vector art. Use these Brush Libraries to get more of a distressed look or ink bleed back in your own Vector Artwork. Includes (Updated) Caffeinated Cartoonist, Rough Ink, and Jittery Hand Brush Libraries. DIGITAL DOWNLOAD: MASCOT BRUSHES
CARTOON BRUSHES: Most people get stuck at one of two spots — they have a sketch, but can't build and ink it cleanly in Adobe Illustrator. This combo fixes both ends: sixteen AI prompts turn your rough sketch into clean, professional cartoon linework, formatted for Midjourney, Gemini, ChatGPT Images, Kittl, and Canva — then the actual 70-brush library lets you finish and edit it by hand in Illustrator.
COMIC STRIP BRUSHES: Real comic art has that bold-outline-to-fine-detail depth, and it takes forever to learn by hand. This pack gets you there faster: sixteen AI prompts built around that exact classic hierarchy, formatted for Midjourney, Gemini, ChatGPT Images, Kittl, and Canva, plus the 100-brush download to polish the final linework in Illustrator yourself. AI gets you 90% there, your hand gets you the last 10.
MASCOT BRUSHES: Mascot work has to hit hard on a T-shirt, not just look good on a screen. Sixteen AI prompts give you that bold, hand-inked mascot energy straight from a rough sketch, formatted for Midjourney, Gemini, ChatGPT Images, Kittl, and Canva, and the matching 50-brush download lets you finish it by hand in Illustrator so it's print-ready. Sketch rough, finish with real brushes.
CARTOON BRUSHES: Cartoon Brushes are my go-to brushes for Professional Logos, Cartoons, Mascots, and Branding. Use Cartoon Illustrator Brushes with the Pen, Pencil or Paint Brush Tools to Apply different Line Variation to your Vector Artwork. Includes (Updated) Cartoon, Cartoon 2, and Original Cartoon Brush Libraries. DIGITAL DOWNLOAD: CARTOON BRUSHES
COMIC STRIP BRUSHES: Hand Painted + Comic Strip Brushes get a lived-in feel back into your Vector Art. Comic Strips and Hand Painted are painted based on some of my favorite artists and cartoonists. These brushes are designed to look ready for the Sunday Paper. Includes (Updated) Comic Strip, Hand-Painted, Paintbrush, and Fine Liner Brush Libraries. DIGITAL DOWNLOAD: COMIC BRUSHES
MASCOT BRUSHES: Jittery Hand, Caffeinated Cartoonist + Rough Ink Brushes to Mimic Paper Bleed and Caffeine. Designed to be a little less stiff with your vector art. Use these Brush Libraries to get more of a distressed look or ink bleed back in your own Vector Artwork. Includes (Updated) Caffeinated Cartoonist, Rough Ink, and Jittery Hand Brush Libraries. DIGITAL DOWNLOAD: MASCOT BRUSHES
ADOBE ILLUSTRATOR BRUSHES. Brushes are specifically designed for Illustrators and Cartoonists to speed up their workflow. Brushes Libraries allow for Pressure Sensitivity if you are using a Tablet for Inking your Line Variation. Apply with Pen, Pencil, Shapes, or Paintbrush Tools. Brush Libraries include 70 Cartoon, 100 Comic Strip, and 50 Vintage Mascot Brushes.
ADOBE ILLUSTRATOR HALFTONES. Halftones and Patterns Fills are designed for easy application even if you are new to Adobe Illustrator. Halftone Fills behave the same as a Color Swatch so you can apply them quickly using the Blob Brush, Live Paint, or Basic Fills. Halftones include 70 Comic Strip Halftone Fills and Pattern Fills.
ADOBE ILLUSTRATOR TEXTURES. BMP Textures are extremely easy to use even if you are a beginner to Adobe Illustrator. Simply File-Place the Textures over your finished artwork to use with the Transparency Panel. Use with Opacity Masks for T-Shirt Distressing. BMP Textures include 145 Cracks, 120 Grunge Distressing, 75 Paper, and 77 Paint Splatter Textures.
Downloads and Prompts live inside full course format resource guides through Teachable.
Copy the ready-made prompt - One click — no prompt-writing needed.
Paste into your AI tool - Generate the result in seconds.
Subscription Model -Updates Included - 365-day access includes every update to the pack.
DOWNLOAD BRUSHES. Many of you are jumping over from YouTube looking to download our Adobe Illustrator Brushes and Resource Folders. Digital Downloads will come through our friends at Teachable. Once you have downloaded and extracted the Folders, Brush Libraries are ready to be used in Adobe Illustrator. Start with our Resource Guides, Illustrator Tutorials, or YouTube Playlists to understand how to apply Brush Libraries in Adobe Illustrator.
DIGITAL DOWNLOADS. Many of you are jumping over from YouTube looking to download our Adobe Illustrator Brushes and Resource Folders. Digital Downloads will come through our friends at Teachable. Download our Adobe Illustrator Brush Libraries, T-Shirt Textures, and Comic Halftones. BRUSH LIBRARIES / COMIC HALFTONES / T-SHIRT TEXTURES
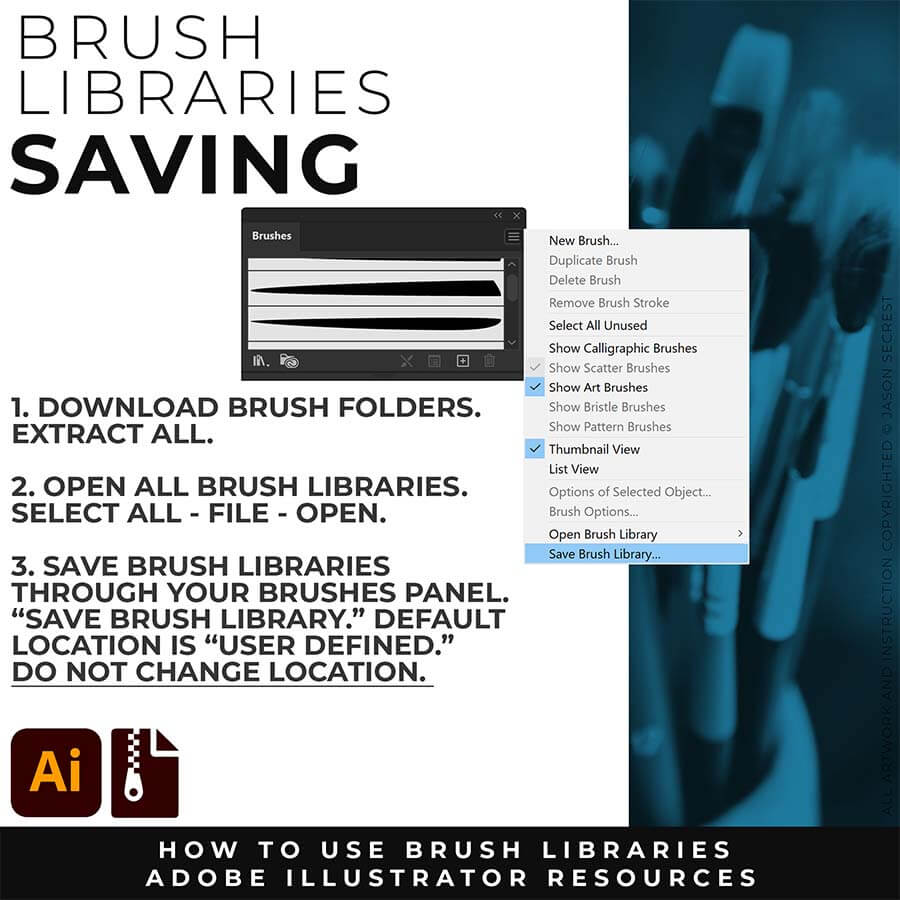
SAVE BRUSHES: Open All of the Brushes Libraries in Adobe Illustrator. (File - Open). Have your Brushes Panel Open. Under Window - Brushes. In the Brushes Menu, select "Save Brush Library." The Default Save Location is "User Defined." Repeat this step for each Brush Library.
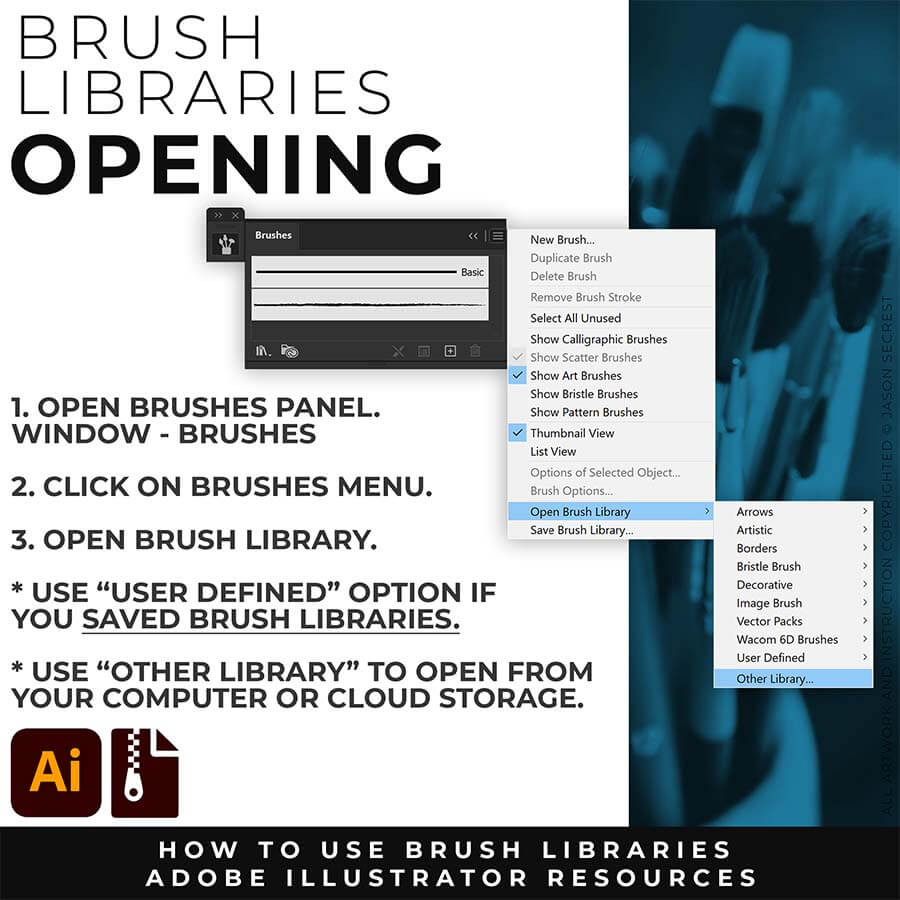
OPEN BRUSHES: Under Window - Select Brushes. In the Brushes Menu, drop down to Open Brush Library. Hover over it and select "Other Library." A Normal Open Dialogue Box will appear to select any Brush Library to use in Illustrator. Almost all Tutorials use this method.
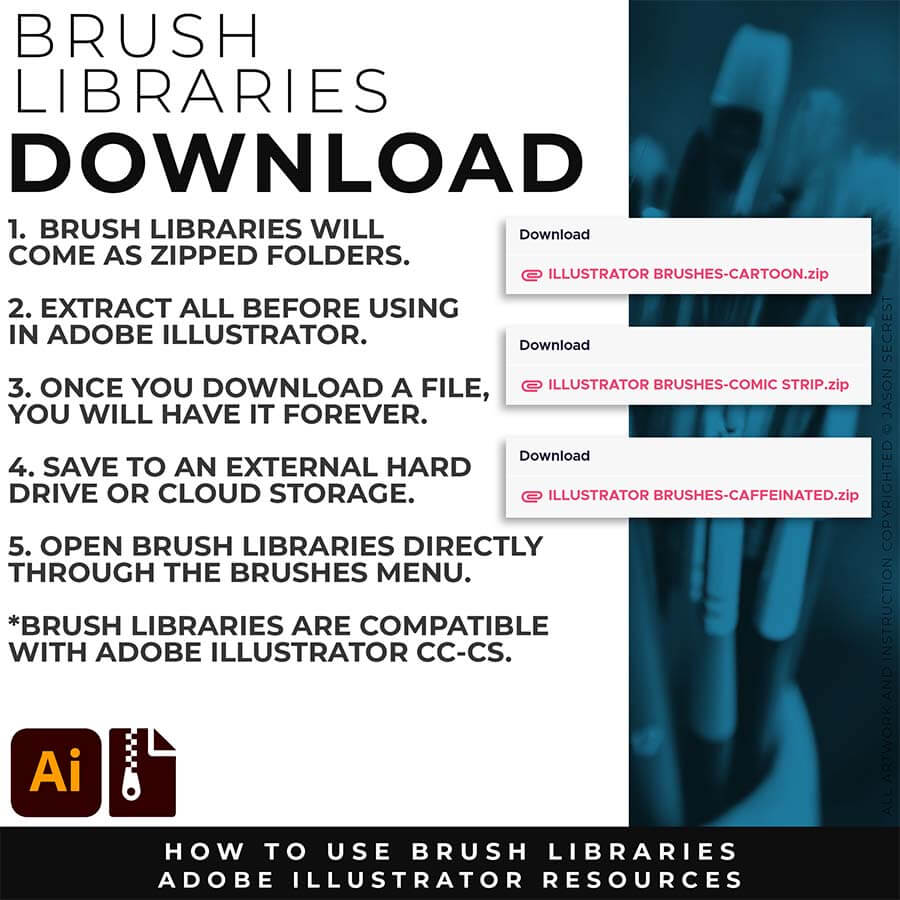
DOWNLOAD BRUSHES: Once you download a file, you will have it forever. Save all files to an external hard drive or cloud-based storage. Start with our Resource Guides to understand how to download, open, and apply Brush Libraries in Adobe Illustrator.
SAVE BRUSHES: Open All of the Brushes Libraries in Adobe Illustrator. (File - Open). Have your Brushes Panel Open. Under Window - Brushes. In the Brushes Menu, select "Save Brush Library." The Default Save Location is "User Defined." Repeat this step for each Brush Library.
OPEN BRUSHES: Under Window - Select Brushes. In the Brushes Menu, drop down to Open Brush Library. Hover over it and select "Other Library." A Normal Open Dialogue Box will appear to select any Brush Library to use in Illustrator. Almost all Tutorials use this method.
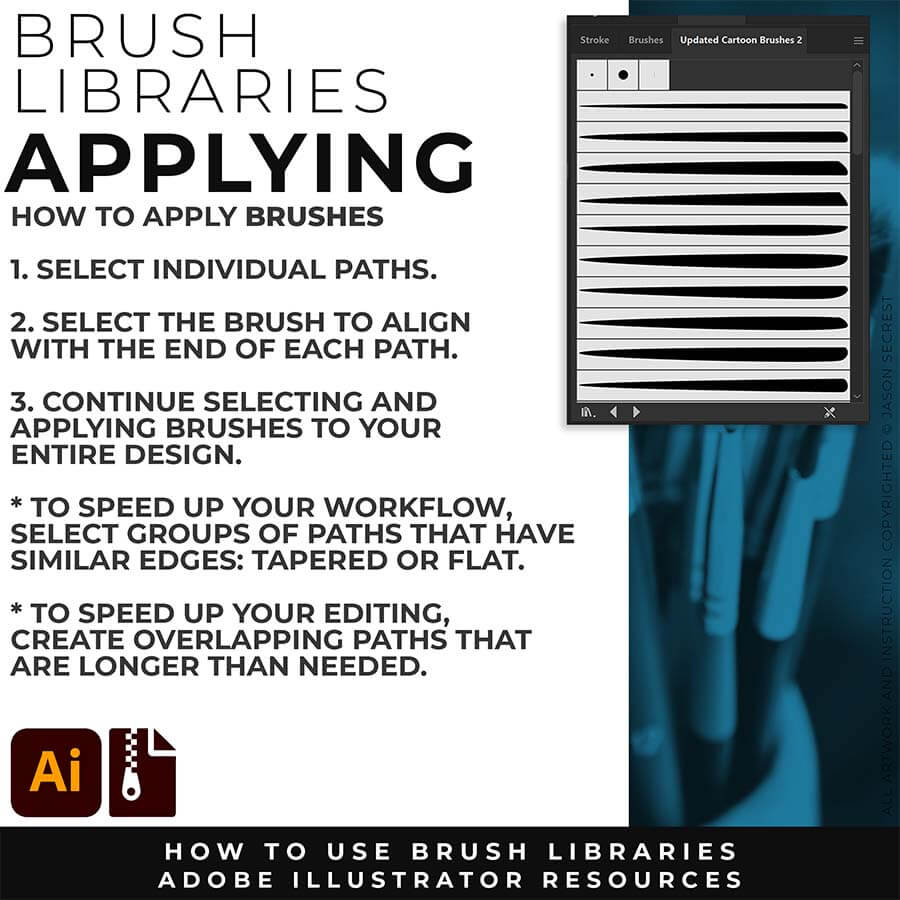
PRIMARY PROMPTING: Instead of manually aligning Building Tools to your sketch's Shapes, Lines, and Curves, let AI generate your starting point. Attach your rough sketch, copy the prompt for your style, and the AI handles the inking — clean, professional linework aligned to your original drawing, ready to bring into Illustrator for tracing and finishing.
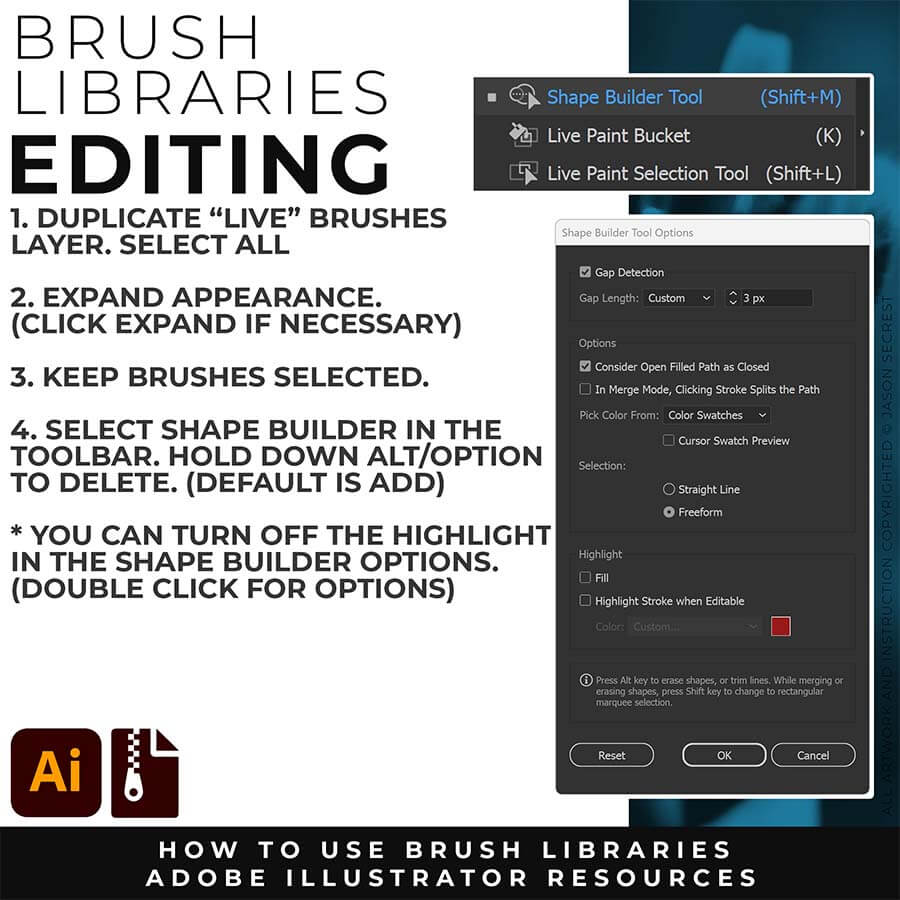
PATH SIMPLIFY: Whichever AI Prompt Pack or Concept to Vector option you used, the vector conversion likely placed more anchor points than you actually need — this is normal, not a mistake on your end. Before you move into coloring, select your paths and run Object > Path > Simplify. This reduces the anchor point count while preserving the shape of your line, using the Curve Precision and Angle Threshold sliders to control how aggressive the cleanup is.
DOWNLOAD BRUSHES: Once you download a file, you will have it forever. Save all files to an external hard drive or cloud-based storage. Start with our Resource Guides to understand how to download, open, and apply Brush Libraries in Adobe Illustrator.
SAVE BRUSHES: Open All of the Brushes Libraries in Adobe Illustrator. (File - Open). Have your Brushes Panel Open. Under Window - Brushes. In the Brushes Menu, select "Save Brush Library." The Default Save Location is "User Defined." Repeat this step for each Brush Library.
OPEN BRUSHES: Under Window - Select Brushes. In the Brushes Menu, drop down to Open Brush Library. Hover over it and select "Other Library." A Normal Open Dialogue Box will appear to select any Brush Library to use in Illustrator. Almost all Tutorials use this method.
ADOBE ILLUSTRATOR
BRUSH LIBRARIES
BRUSH LIBRARIES
ADOBE ILLUSTRATOR
DIGITAL DOWNLOADS
DIGITAL DOWNLOADS
ADOBE ILLUSTRATOR
BRUSH LIBRARIES
BRUSH LIBRARIES
ADOBE ILLUSTRATOR
BRUSH LIBRARIES
BRUSH LIBRARIES
DOWNLOAD BRUSHES
20% OFF
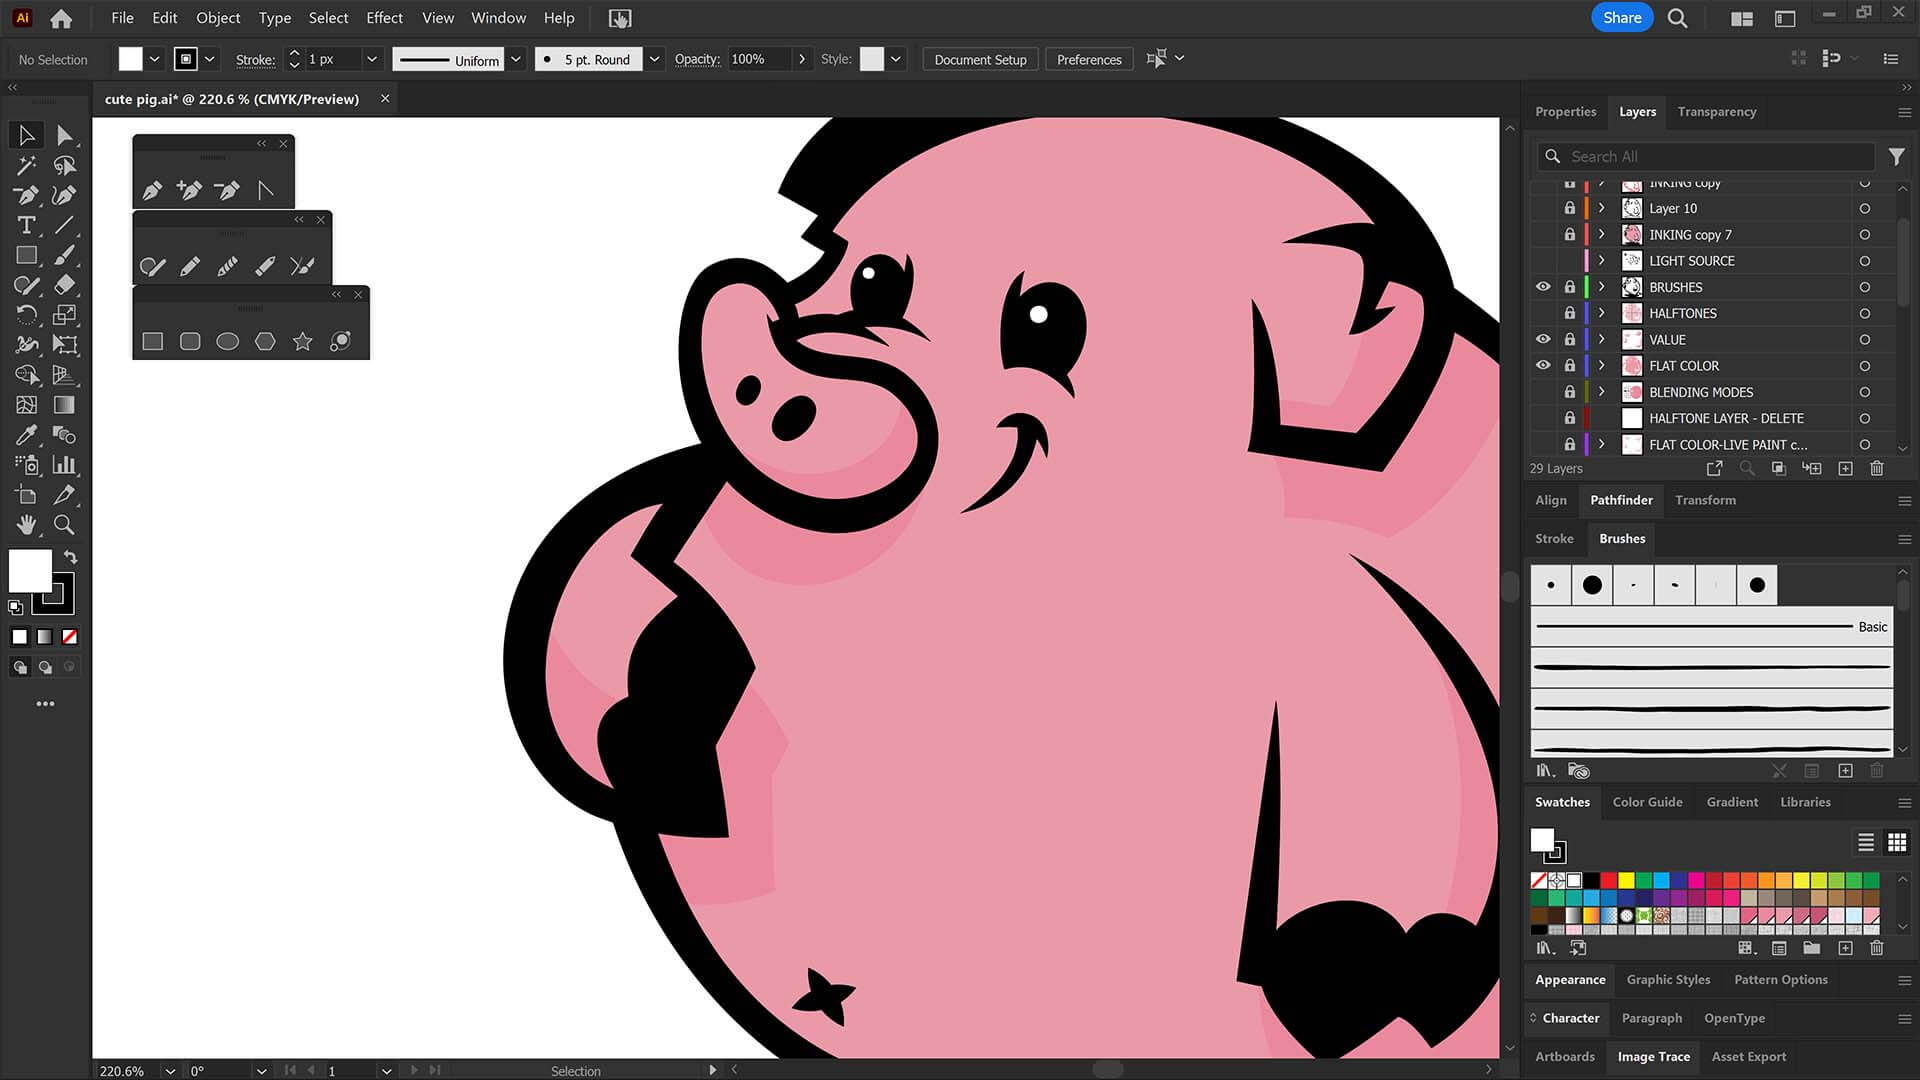
PRIMARY BUILDING: Many of you will be deciding between the Pen and Pencil Tools as your Primary Building Tool in Adobe Illustrator. A Quick Assessment of your own sketch, drawing, or traced photo to look for: Obvious Shapes (Ellipse), Corners (Anchor Point), and Curves. Resource Progression: Prep your Drawings for the Building Tools.
SELECTION TOOLS: In Adobe Illustrator you will have 3 Selection Tools to be aware of: Selection, Direct Selection Tool, and Deselect. I want you to pay attention to the Deselect (Selection Tool + click on Empty Artboard). After applying or finishing a step, build up a routine to hit Selection Tool (V) and click your artboard.
APPLYING PATHS: Find the Building Tool that works the best with your sketch or that is the easiest to use based on the materials that you have (Tablet). When applying “Paths” the easiest thing is to trace your drawing or sketch (Pencil Tool). It will give you an easy frame of reference as it relates to each stroke.
“LIVE” EDITING: I recommend the Scissor Tool to cut Paths as an easy “Live Path” Editing Tool. Please note that the Eraser Tool will be for “Expanded Editing.” Another solution is under Object - Path - Simplify. This can get rid of some of the extra Anchor Points as you are applying with the Pencil Tool.
LIVE PAINT BUCKET: As I color my artwork, notice I am using Live Paint to create my Basic Fills or Flat Color Layer. Select what you want to color. Object - Live Paint - Make. Click to dump color just like in Adobe Photoshop with the Live Paint Bucket Tool. Remember to expand and ungroup when you have completed the coloring step. BEGINNER: Understand how to apply Flat Color using Live Paint Bucket. ADVANCED: For your own artwork, duplicate your Flat Color Layer for Value and Gradient Steps. Separate your Final Line by using the Magic Wand Tool to select your Edited and Expanded Brushes Layer.
The fastest way to color vector art in Adobe Illustrator is by using the Live Paint Bucket tool (K). After completing your vector outlines, select the entire illustration and convert it into a Live Paint Group. This allows you to instantly drop flat colors into completely closed vector regions with a single click, bypassing the tedious process of manually drawing independent background shapes for every section of the character design.
Vector designs look flat when they lack a defined light source and a strong value contrast between the foreground, mid-ground, and background elements. Without clear shadows, character shapes lose their roundness. Jason Secrest resolves flat vector art by using the Knife Tool to slice crisp, graphic shadow blocks into the flat color layers, instantly creating clear dimensionality and a professional pop-art style depth.
Professional vector designers color like pros by treating coloring as a completely separate execution phase that occurs only after the vector geometry is built and locked. They establish a defined light source before placing down a single swatch, utilize custom asset libraries for consistent color distribution, and rely heavily on Global Colors and the Live Paint tool. This systematic routine ensures colors match corporate brand guidelines perfectly while maximizing output speed.
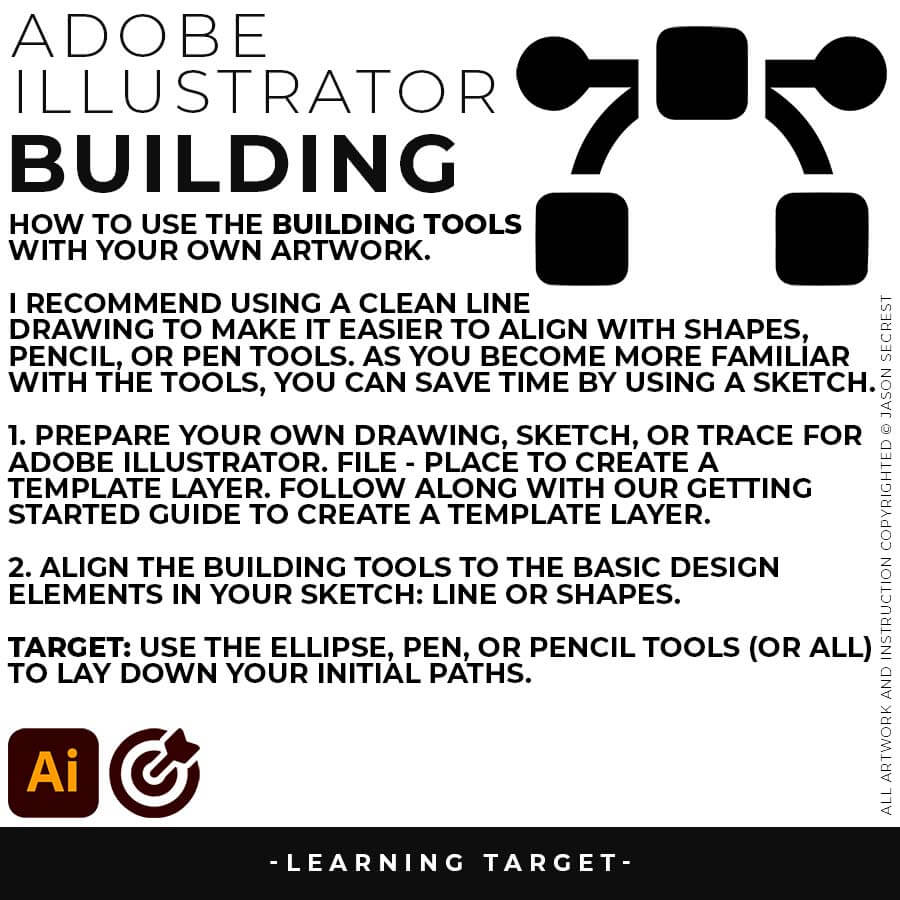
PRIMARY BUILDING: Understand and Apply the different Building Tools in Adobe Illustrator. VIEW BUILDING TUTORIALS
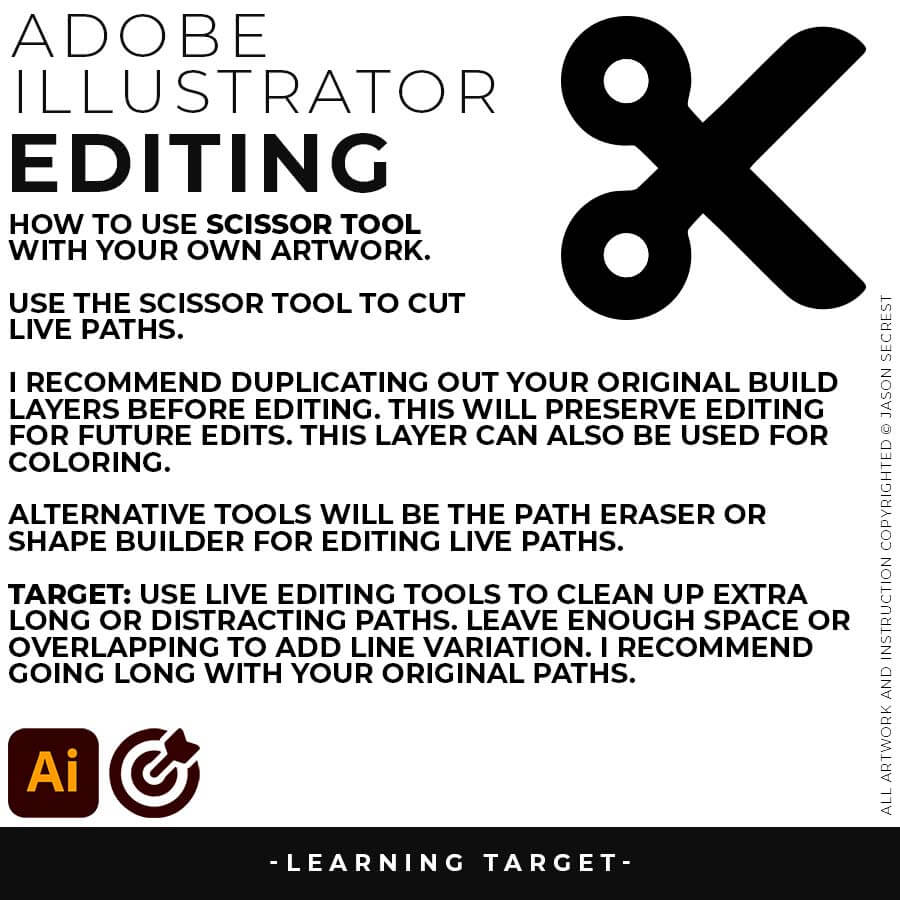
VARIATION + EDITING: Understand and Apply Live and Expanded Editing Tools in Adobe Illustrator. VIEW EDITING TUTORIALS
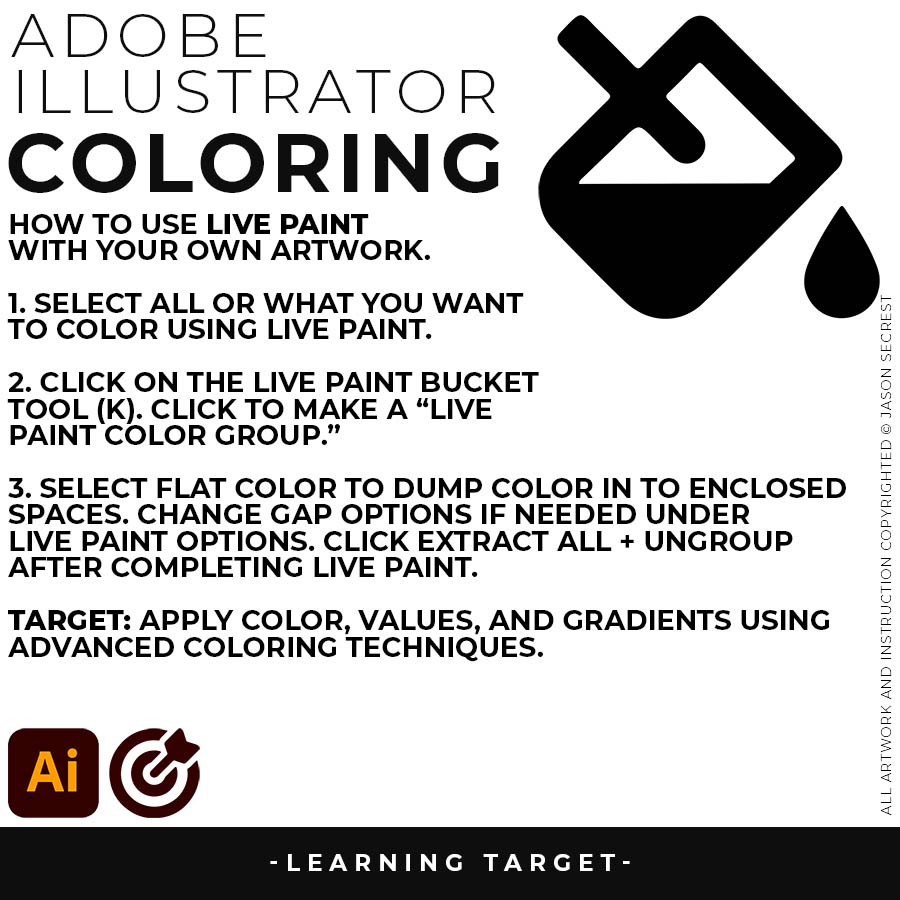
ADVANCED COLORING: Understand and Apply Live Paint and Advanced Coloring Techniques in Adobe Illustrator. VIEW COLOR TUTORIALS
(PENCIL TOOL): Many of you are looking to use your Tablet with Adobe Illustrator. I am going to recommend breaking down your current tablet workflow into multiple steps. I do see a lot of mistakes when people try to combine too many steps all at once with their new tablets.
(ELLIPSE TOOL): A good place to start if you are new to Adobe Illustrator is our Beginner Guide (Shapes). We will be going through Building with Shapes, Align Panel, Pathfinder, and Basic Color Fills. There are Beginner Guides for the Pen Tool and Tablet if you are new to the website or Adobe Illustrator.
(PEN TOOL): If you are frustrated with the Pen Tool, a simple tip is to break down the process into 2 Steps. The first step is to just apply Anchor Points to the start-curve-end of a line or path. The second step is to adjust the Curves with the Anchor Point Tool or Smooth Curve Button in the Control Panel.
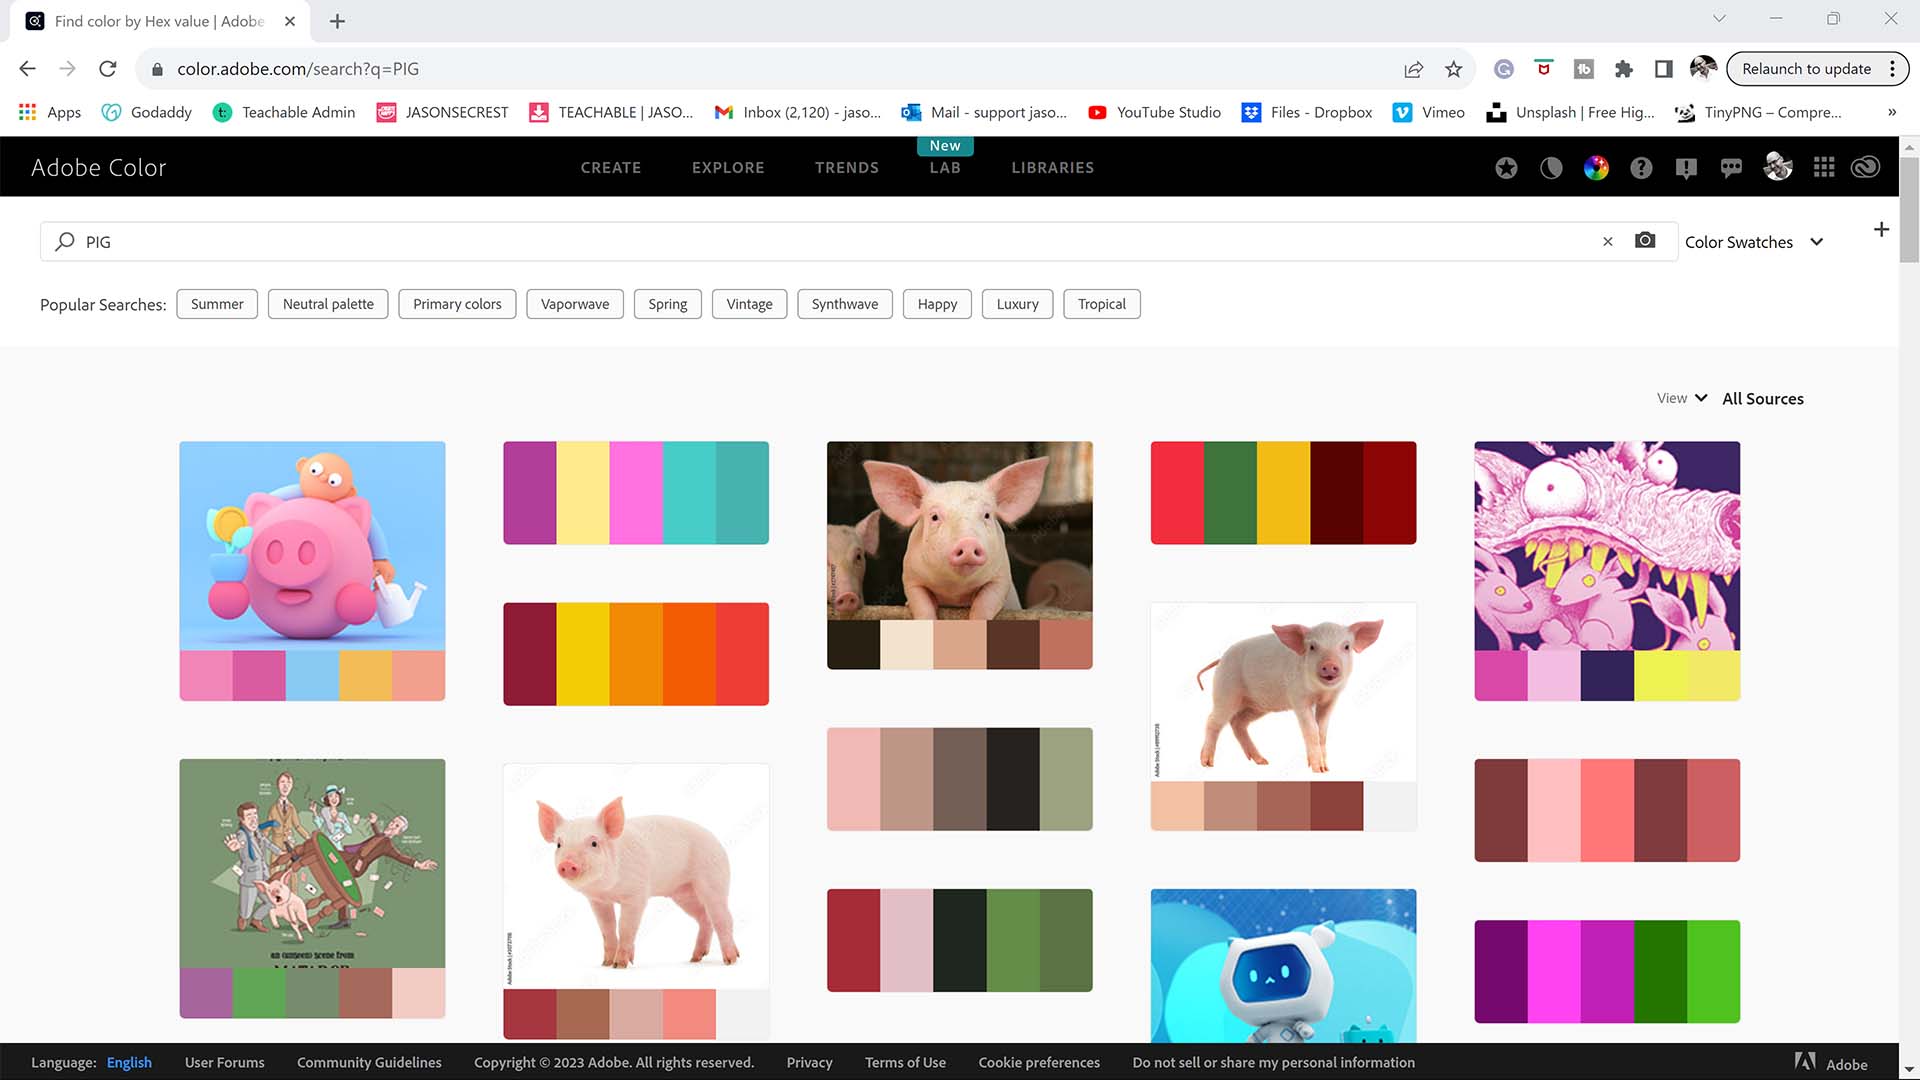
COLOR SWATCHES: Use Color Swatches from your Library or save free swatches from Adobe Color as an .ASE File. Open Swatch Libraries from the “Other Library” Option. Most Color Themes will use Hues as the Base Color. We will be using Live Paint to create our Basic Fills or Flat Color Layer. LEARNING TARGET (3): Apply Color, Values, and Gradients using Advanced Coloring Techniques.
ADOBE COLOR: Adobe Color has a beautiful website that is full of Free Color Swatches and Themes. I recommend starting by typing in the Subject Matter using the Explore Tab. You can also use the Extract Theme feature on Adobe Color or Canva to create a Color Theme based on your own Photo Reference. Add the Color Themes to your Library (CC) or download them as ASE files.
PRIMARY BUILDING: Understand and Apply the different Building Tools in Adobe Illustrator. VIEW BUILDING TUTORIALS
VARIATION + EDITING: Understand and Apply Live and Expanded Editing Tools in Adobe Illustrator. VIEW EDITING TUTORIALS
ADVANCED COLORING: Understand and Apply Live Paint and Advanced Coloring Techniques in Adobe Illustrator. VIEW COLOR TUTORIALS
(PENCIL TOOL): Many of you are looking to use your Tablet with Adobe Illustrator. I am going to recommend breaking down your current tablet workflow into multiple steps. I do see a lot of mistakes when people try to combine too many steps all at once with their new tablets.
(ELLIPSE TOOL): A good place to start if you are new to Adobe Illustrator is our Beginner Guide (Shapes). We will be going through Building with Shapes, Align Panel, Pathfinder, and Basic Color Fills. There are Beginner Guides for the Pen Tool and Tablet if you are new to the website or Adobe Illustrator.
(PEN TOOL): If you are frustrated with the Pen Tool, a simple tip is to break down the process into 2 Steps. The first step is to just apply Anchor Points to the start-curve-end of a line or path. The second step is to adjust the Curves with the Anchor Point Tool or Smooth Curve Button in the Control Panel.
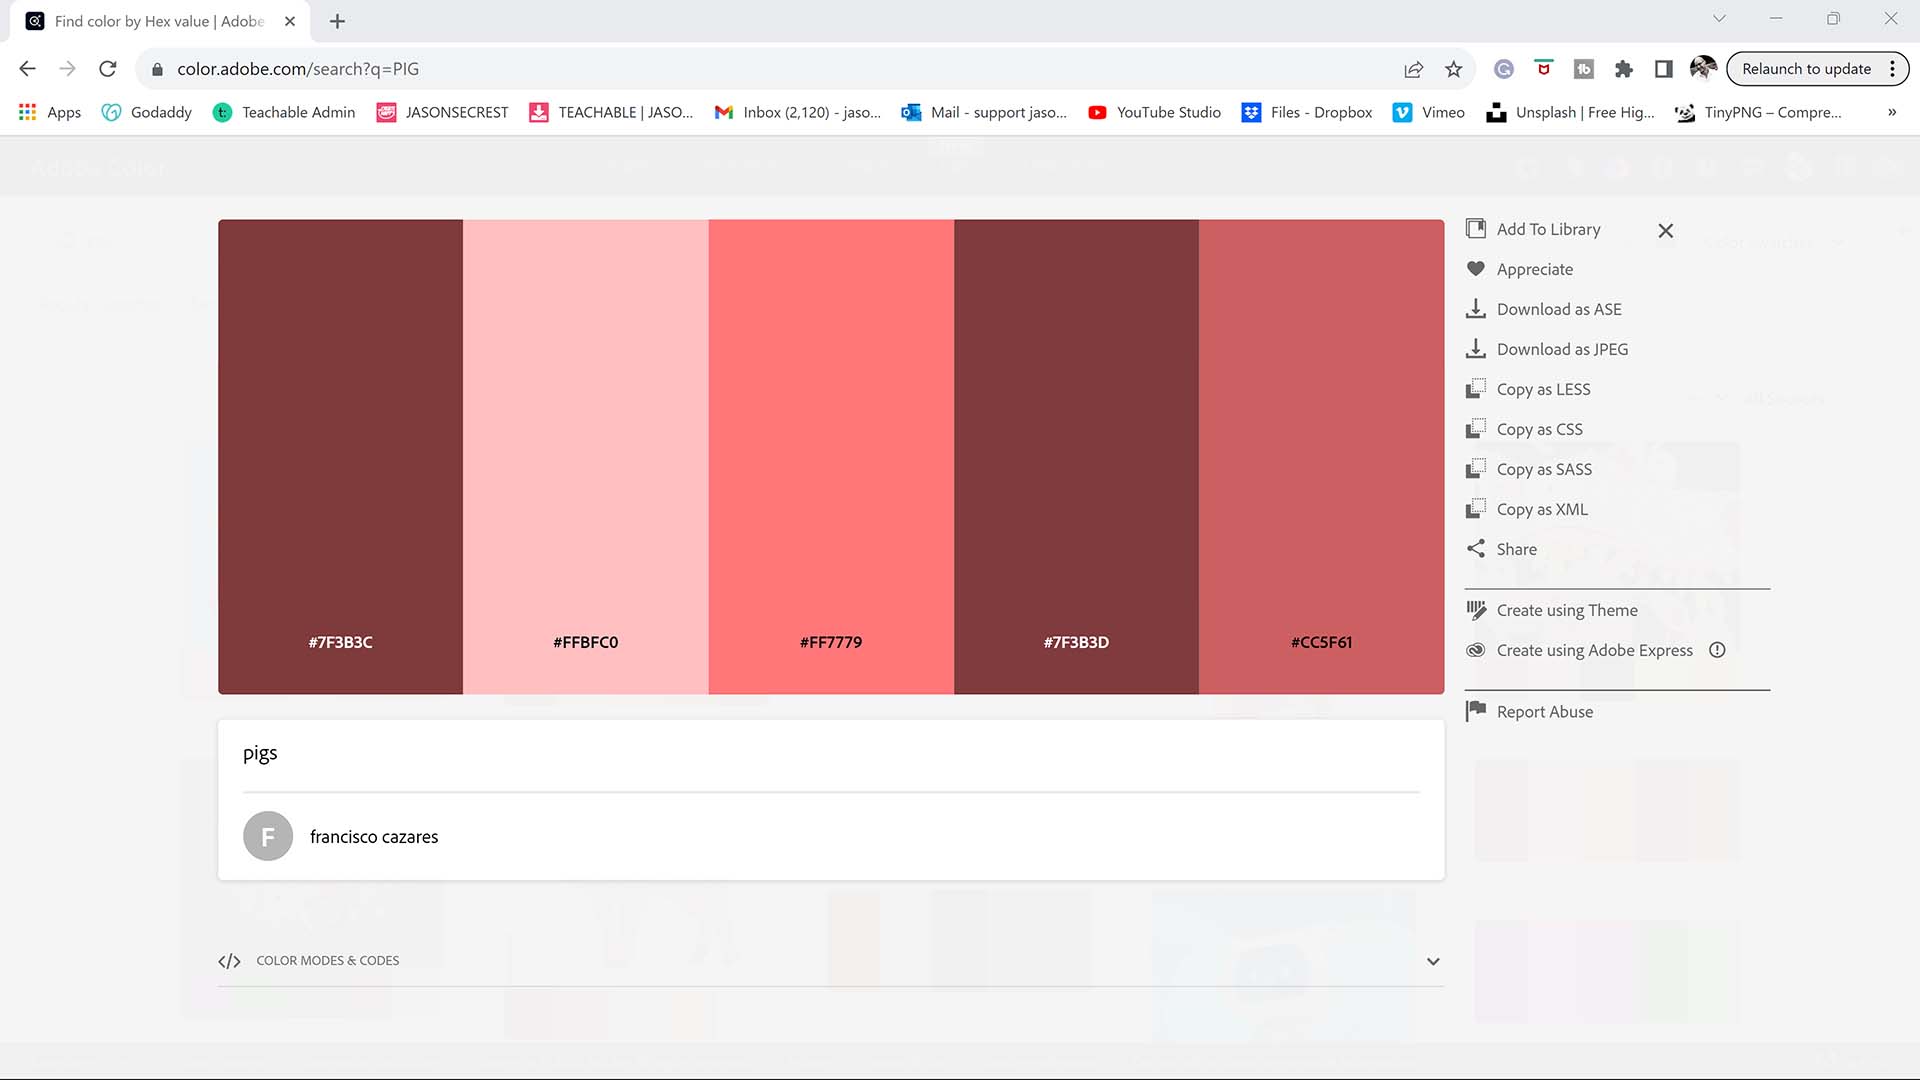
SAVING + OPENING: If you have a CC Account, simply click Add to Library from Adobe Color. If you don't have a CC Account, download Color Swatches from Adobe Color as an ASE File. Open Swatch Libraries from the “Other Library” Option. If you added to your Library (CC). Open from the Library Panel. LEARNING TARGET (1): Save or Download Free Color Swatches for your own artwork and designs. LEARNING TARGET (2): Open through the Swatches Panel or Library.
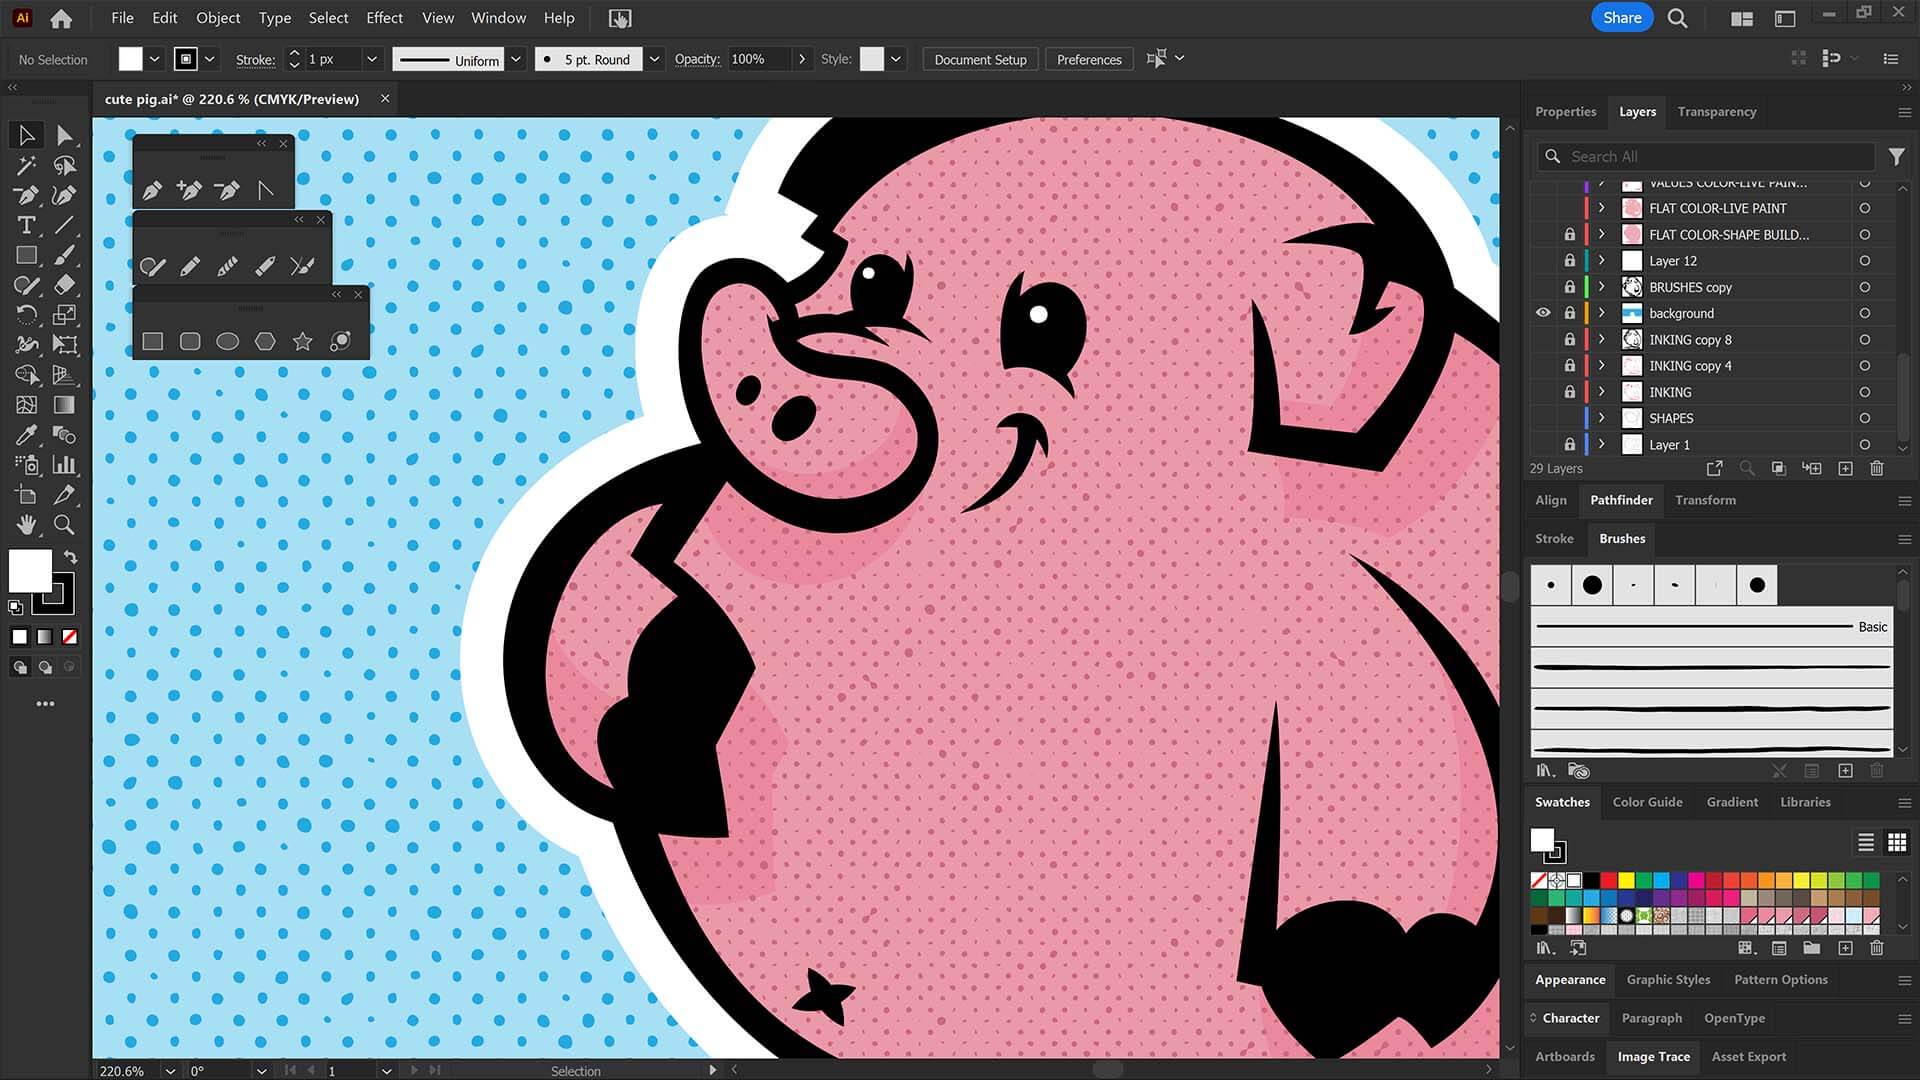
COLOR SWATCHES: Use Color Swatches from your Library or save free swatches from Adobe Color as an .ASE File. Open Swatch Libraries from the “Other Library” Option. Most Color Themes will use Hues as the Base Color. We will be using Live Paint to create our Basic Fills or Flat Color Layer. LEARNING TARGET (3): Apply Color, Values, and Gradients using Advanced Coloring Techniques.
RESOURCE GUIDES: Digital Downloads will come as Zipped Folders. Once you have downloaded and extracted the Resource Folders, they are ready to be used in Adobe Illustrator. Start with our Resource Guides and Illustrator Tutorials to learn how to Apply Brush Libraries, Comic Halftones, and T-Shirt Textures. BRUSHES GUIDE / HALFTONES GUIDE / TEXTURES GUIDE
PRIMARY BUILDING: Understand and Apply the different Building Tools in Adobe Illustrator. VIEW BUILDING TUTORIALS
VARIATION + EDITING: Understand and Apply Live and Expanded Editing Tools in Adobe Illustrator. VIEW EDITING TUTORIALS
ADVANCED COLORING: Understand and Apply Live Paint and Advanced Coloring Techniques in Adobe Illustrator. VIEW COLOR TUTORIALS
(PENCIL TOOL): Many of you are looking to use your Tablet with Adobe Illustrator. I am going to recommend breaking down your current tablet workflow into multiple steps. I do see a lot of mistakes when people try to combine too many steps all at once with their new tablets.
(ELLIPSE TOOL): A good place to start if you are new to Adobe Illustrator is our Beginner Guide (Shapes). We will be going through Building with Shapes, Align Panel, Pathfinder, and Basic Color Fills. There are Beginner Guides for the Pen Tool and Tablet if you are new to the website or Adobe Illustrator.
(PEN TOOL): If you are frustrated with the Pen Tool, a simple tip is to break down the process into 2 Steps. The first step is to just apply Anchor Points to the start-curve-end of a line or path. The second step is to adjust the Curves with the Anchor Point Tool or Smooth Curve Button in the Control Panel.
COLOR SWATCHES: Use Color Swatches from your Library or save free swatches from Adobe Color as an .ASE File. Open Swatch Libraries from the “Other Library” Option. Most Color Themes will use Hues as the Base Color. We will be using Live Paint to create our Basic Fills or Flat Color Layer. LEARNING TARGET (3): Apply Color, Values, and Gradients using Advanced Coloring Techniques.
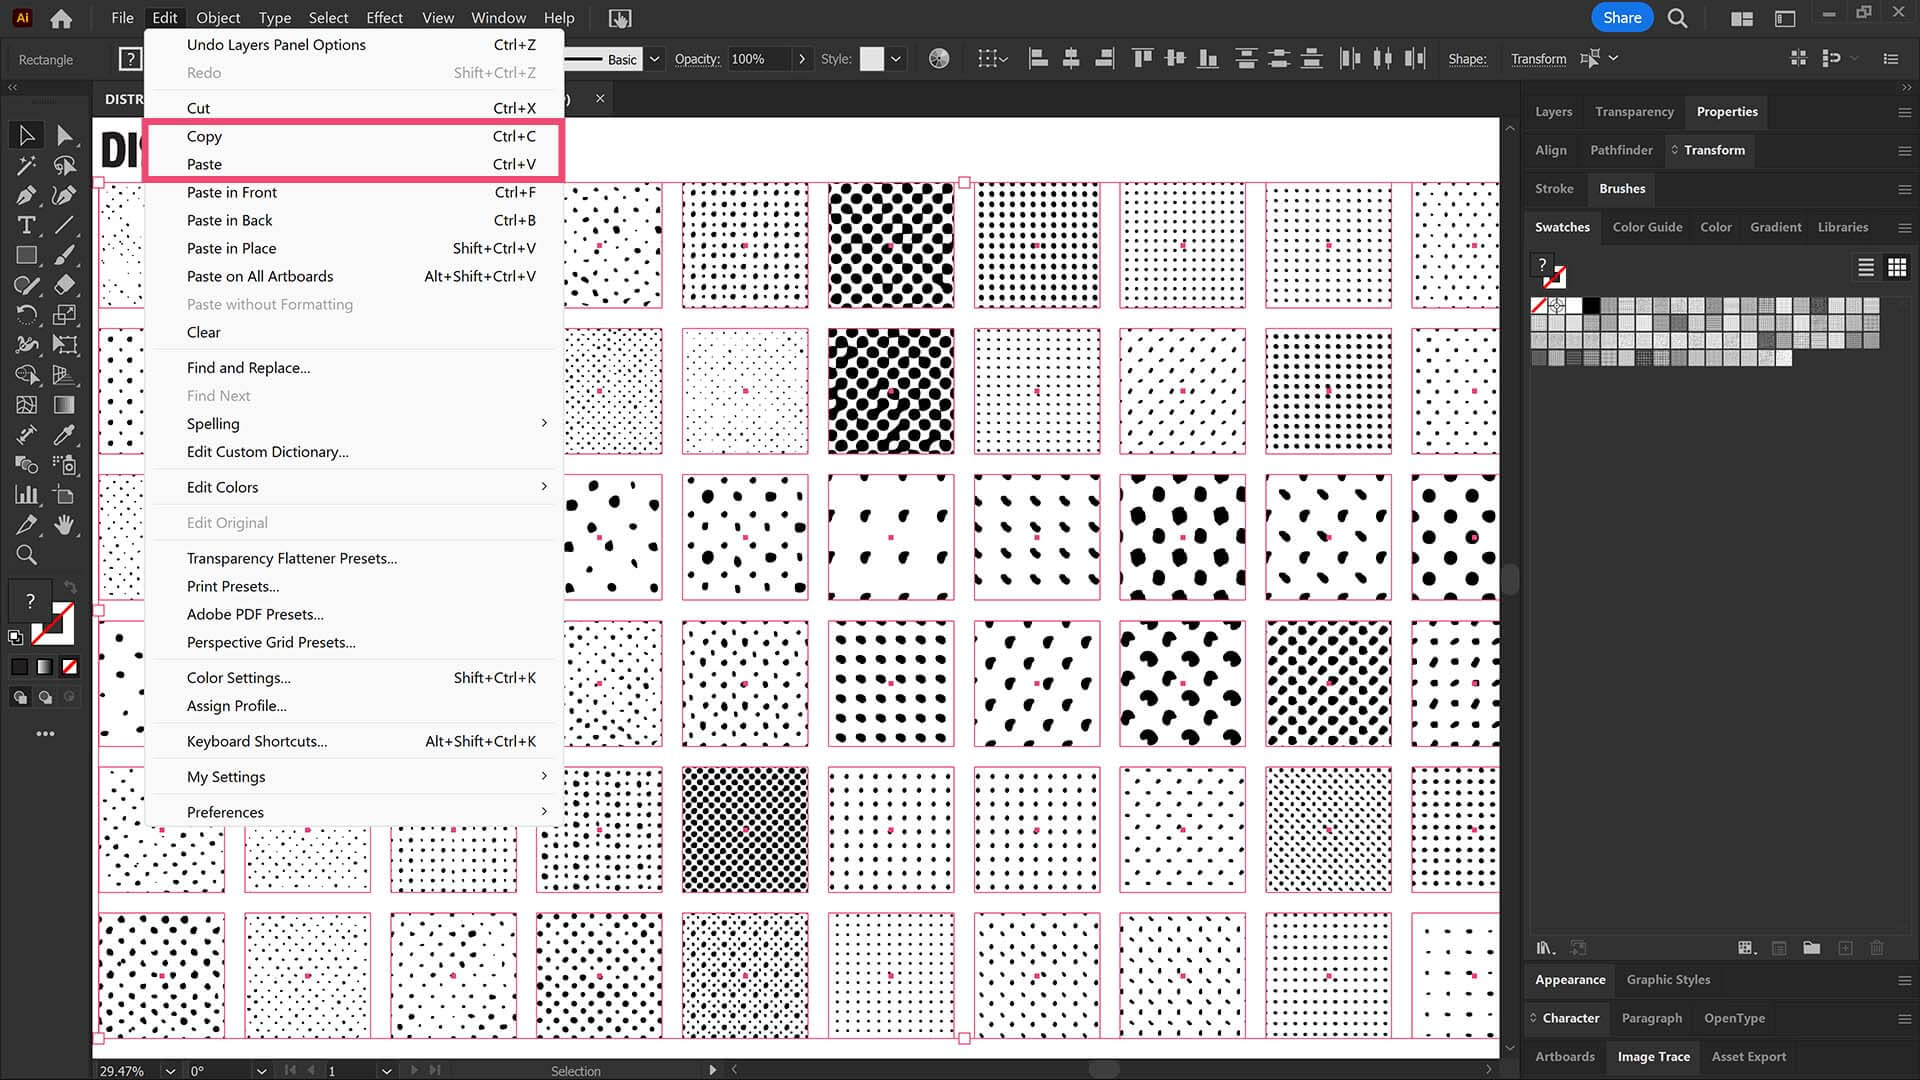
COPY-PASTE: The goal of this step is to get the Halftones into your design so they populate into your Swatches. All you have to do is Copy and Paste them over into the Artboard you are currently working on. The Comic Halftones will automatically populate into the Swatches Panel for use.
PRIMARY BUILDING: Understand and Apply the different Building Tools in Adobe Illustrator. VIEW BUILDING TUTORIALS
VARIATION + EDITING: Understand and Apply Live and Expanded Editing Tools in Adobe Illustrator. VIEW EDITING TUTORIALS
ADVANCED COLORING: Understand and Apply Live Paint and Advanced Coloring Techniques in Adobe Illustrator. VIEW COLOR TUTORIALS
(PENCIL TOOL): Many of you are looking to use your Tablet with Adobe Illustrator. I am going to recommend breaking down your current tablet workflow into multiple steps. I do see a lot of mistakes when people try to combine too many steps all at once with their new tablets.
(ELLIPSE TOOL): A good place to start if you are new to Adobe Illustrator is our Beginner Guide (Shapes). We will be going through Building with Shapes, Align Panel, Pathfinder, and Basic Color Fills. There are Beginner Guides for the Pen Tool and Tablet if you are new to the website or Adobe Illustrator.
(PEN TOOL): If you are frustrated with the Pen Tool, a simple tip is to break down the process into 2 Steps. The first step is to just apply Anchor Points to the start-curve-end of a line or path. The second step is to adjust the Curves with the Anchor Point Tool or Smooth Curve Button in the Control Panel.
COLOR SWATCHES: Use Color Swatches from your Library or save free swatches from Adobe Color as an .ASE File. Open Swatch Libraries from the “Other Library” Option. Most Color Themes will use Hues as the Base Color. We will be using Live Paint to create our Basic Fills or Flat Color Layer. LEARNING TARGET (3): Apply Color, Values, and Gradients using Advanced Coloring Techniques.
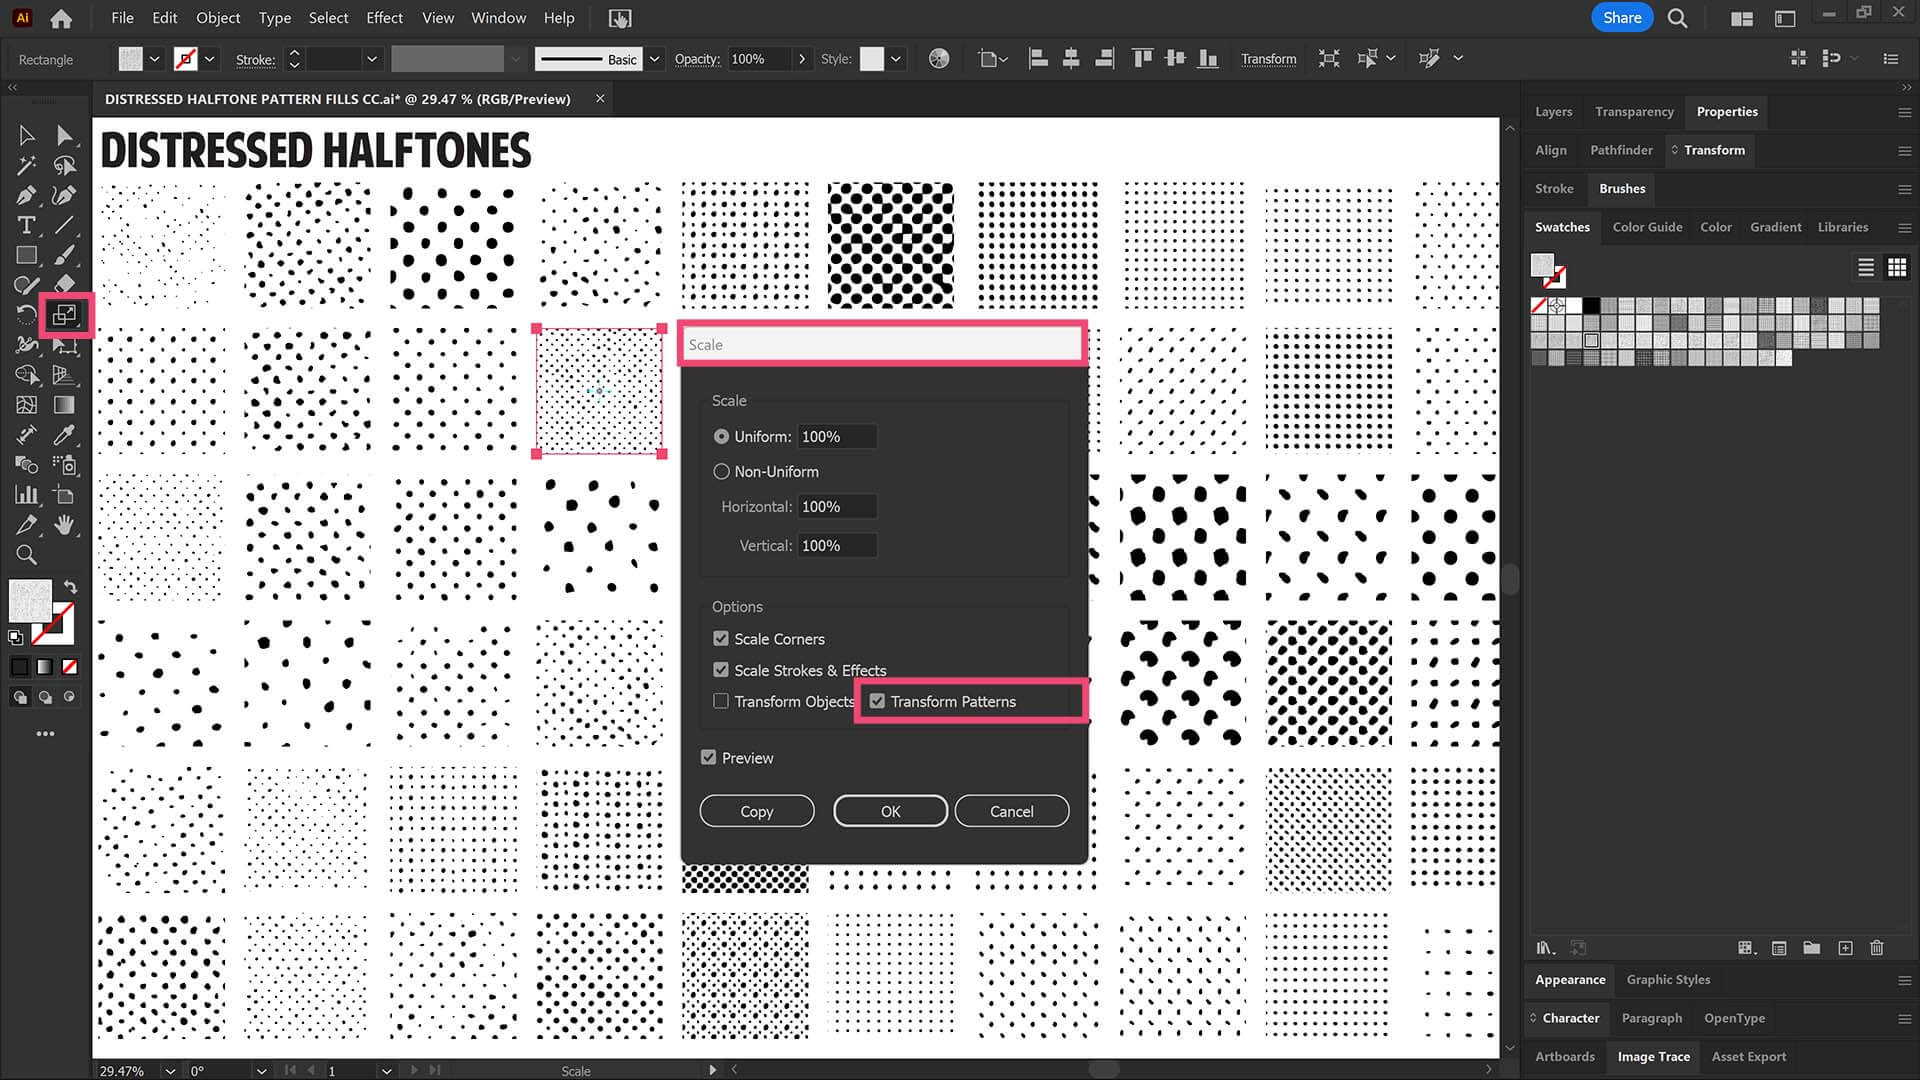
RESIZING HALFTONES: Draw out a rectangle and select a Halftone Pattern Fill from the Swatches Panel. With the Shape Selected, double click on the Scale Tool. Check Transform Patterns Only and adjust the Scale up or down under Uniform %.
PRIMARY BUILDING: Understand and Apply the different Building Tools in Adobe Illustrator. VIEW BUILDING TUTORIALS
VARIATION + EDITING: Understand and Apply Live and Expanded Editing Tools in Adobe Illustrator. VIEW EDITING TUTORIALS
ADVANCED COLORING: Understand and Apply Live Paint and Advanced Coloring Techniques in Adobe Illustrator. VIEW COLOR TUTORIALS
(PENCIL TOOL): Many of you are looking to use your Tablet with Adobe Illustrator. I am going to recommend breaking down your current tablet workflow into multiple steps. I do see a lot of mistakes when people try to combine too many steps all at once with their new tablets.
(ELLIPSE TOOL): A good place to start if you are new to Adobe Illustrator is our Beginner Guide (Shapes). We will be going through Building with Shapes, Align Panel, Pathfinder, and Basic Color Fills. There are Beginner Guides for the Pen Tool and Tablet if you are new to the website or Adobe Illustrator.
(PEN TOOL): If you are frustrated with the Pen Tool, a simple tip is to break down the process into 2 Steps. The first step is to just apply Anchor Points to the start-curve-end of a line or path. The second step is to adjust the Curves with the Anchor Point Tool or Smooth Curve Button in the Control Panel.
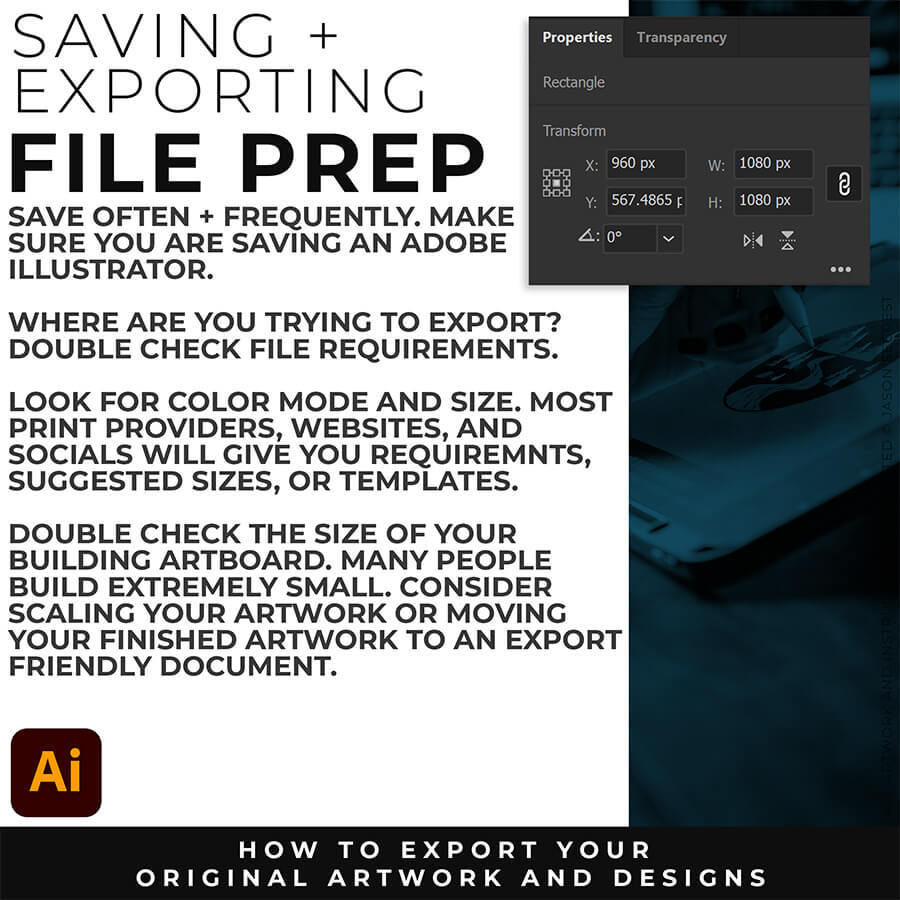
FILE PREP: An exported PNG looks blurry when the document is saved at a low resolution or when the anti-aliasing drops processing frames. To fix blurry PNG exports, verify that your export resolution is set to 300 PPI. Additionally, change the anti-aliasing option from "Type Optimized" to Art Optimized. This instructs Adobe Illustrator to prioritize smooth line work and vector curves rather than prioritizing text rendering.
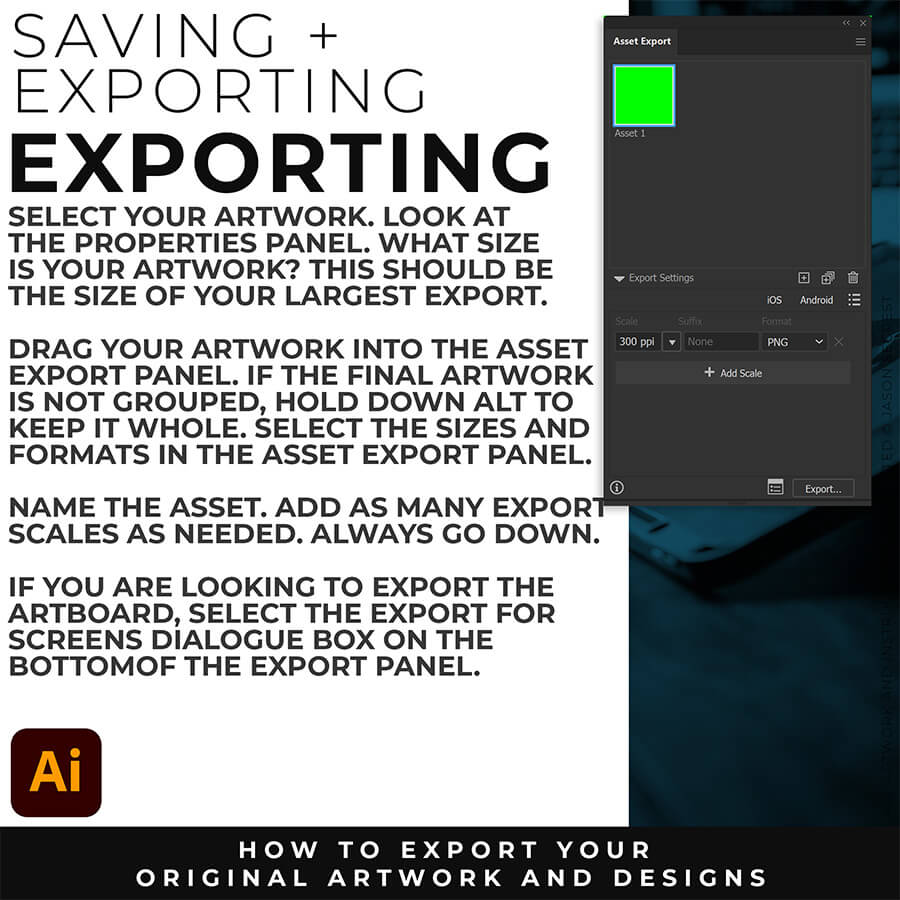
EXPORTING: The best export settings for a high-quality PNG are found by navigating to File > Export > Export for Screens. Set the format to PNG, choose a scale multiplier of 2x or 300 ppi for high-resolution displays, and ensure the anti-aliasing setting is explicitly set to Art Optimized (Supersampling). This combination guarantees that crisp vector outlines remain perfectly smooth when converted into a raster image file.
The best export settings for a high-quality PNG are found by navigating to File > Export > Export for Screens. Set the format to PNG, choose a scale multiplier of 2x or 300 ppi for high-resolution displays, and ensure the anti-aliasing setting is explicitly set to Art Optimized (Supersampling). This combination guarantees that crisp vector outlines remain perfectly smooth when converted into a raster image file.
To export high-quality images, always use the Export for Screens dashboard rather than the legacy "Save for Web" function. In the export panel, scale up the resolution from the standard web default of 72 PPI to 300 PPI. This increases the total pixel dimensions of the output file, ensuring the final graphic remains sharp on ultra-high-definition displays and mobile devices.
To export a transparent background, use the File > Export > Export for Screens menu and select PNG as your target file format. Click the advanced options gear icon next to the format dropdown and verify that the background color setting is configured to Transparent instead of White or Black. This guarantees the background grid is omitted from the saved asset file.
To compress file sizes cleanly, select your vector paths and apply the Simplify tool (Object > Path > Simplify) to remove redundant anchor points without altering the illustration's silhouette. Furthermore, open your Swatches, Graphic Styles, and Brushes panels, select Select All Unused, and delete them. Cleaning out these unused database assets dramatically shrinks the internal file overhead.
To execute a bulk file export, select File > Export > Export for Screens. In the left column of the pop-up menu, click the All Artboards checkbox to see a visual thumbnail layout of every artboard in the document. On the right-hand panel, specify your target scaling options and destination folder, then click Export Artboard to process and save all files simultaneously.
I appreciate your videos. I have been an illustrator user for years and have my own ways of doing things. It's great to see other ways of using tools and learning tricks I didn't know were available! It's also good to see you doing the same thing as me in other instances, confirming I'm on the right track!Andy Zenz
Awesome tutorial! I don't think I've picked up something so easily from someone who knows what they are doing. I managed to draw my first vector art and it was a joy! Great work keep it up!blitz145
Thank you loads! Compared to other tutorials, yours are just really well-explained and easy-to-follow. Can totally see that you've got a passion for what you're doing and that's just wonderful! 🙂 Keep it up, you're doing an amazing job. Yulia Kachurova
Love your video thanks so much. you blow Lynda.com out of the water!!!!Steve Yensel
Brilliant video. So much great info packed in here. I'm just getting started drawing cartoons with my Wacom tablet, and this was a huge help. Thumbs up and thanks!Dorian Staten
Wow Thanks Jason...was really struggling with making images with basic shapes. Your tutorial is helping me out!!Kishor Rajani
thanks a lot you are really one of my favorites, I like the steps you give us, and I'm so thankful for that effort you do for helping us :)Wessam Lotfi
Keep up the good work Jason. I’ve been doing Lynda.com tutorials for a few months now and I got more out of your videos than what I’ve received at Lynda. Keep it up and Thank You!!bobby jacobs • 1 year ago
These tutorials are amazing. Just started using illustrator and really glad I found your channel. The only videos that explain everything step by stepAida Stan
You are definitely one of the best teachers I've found dealing with start to finish creative process. Great work!!!Jasen Fisher
Thank you so much man, I loved the way you explain this, I spent days looking for a good tutorial vid, thanks a lot, gonna keep watching your videos!!!Karel Marccenaro
Awesome tutorial! I don't think I've picked up something so easily from someone who knows what they are doing. I managed to draw my first vector art and it was a joy! Great work keep it up!blitz145
Thank you loads! Compared to other tutorials, yours are just really well-explained and easy-to-follow. Can totally see that you've got a passion for what you're doing and that's just wonderful! 🙂 Keep it up, you're doing an amazing job. Yulia Kachurova
Love your video thanks so much. you blow Lynda.com out of the water!!!!Steve Yensel
Brilliant video. So much great info packed in here. I'm just getting started drawing cartoons with my Wacom tablet, and this was a huge help. Thumbs up and thanks!Dorian Staten
Keep up the good work Jason. I’ve been doing Lynda.com tutorials for a few months now and I got more out of your videos than what I’ve received at Lynda. Keep it up and Thank You!!bobby jacobs • 1 year ago
These tutorials are amazing. Just started using illustrator and really glad I found your channel. The only videos that explain everything step by stepAida Stan
You are definitely one of the best teachers I've found dealing with start to finish creative process. Great work!!!Jasen Fisher