Beginner Adobe Illustrator Tutorial using Shapes
Adobe Illustrator Tutorial for Beginners
In this Adobe Illustrator Tutorial for Beginners, we will be using shapes to practice building using the shape tools and the pathfinder panel. Shapes are a great way of building your characters especially as you gain experience with blend, warp, shape builder, and pathfinder to create unique shapes. Shapes are an easy and effective way of building in Illustrator. Use the align panel to align to selection and the artboard to make symmetrical designs. This tutorial will focus on Building Tools, Editing Options, and Basic Coloring Techniques.
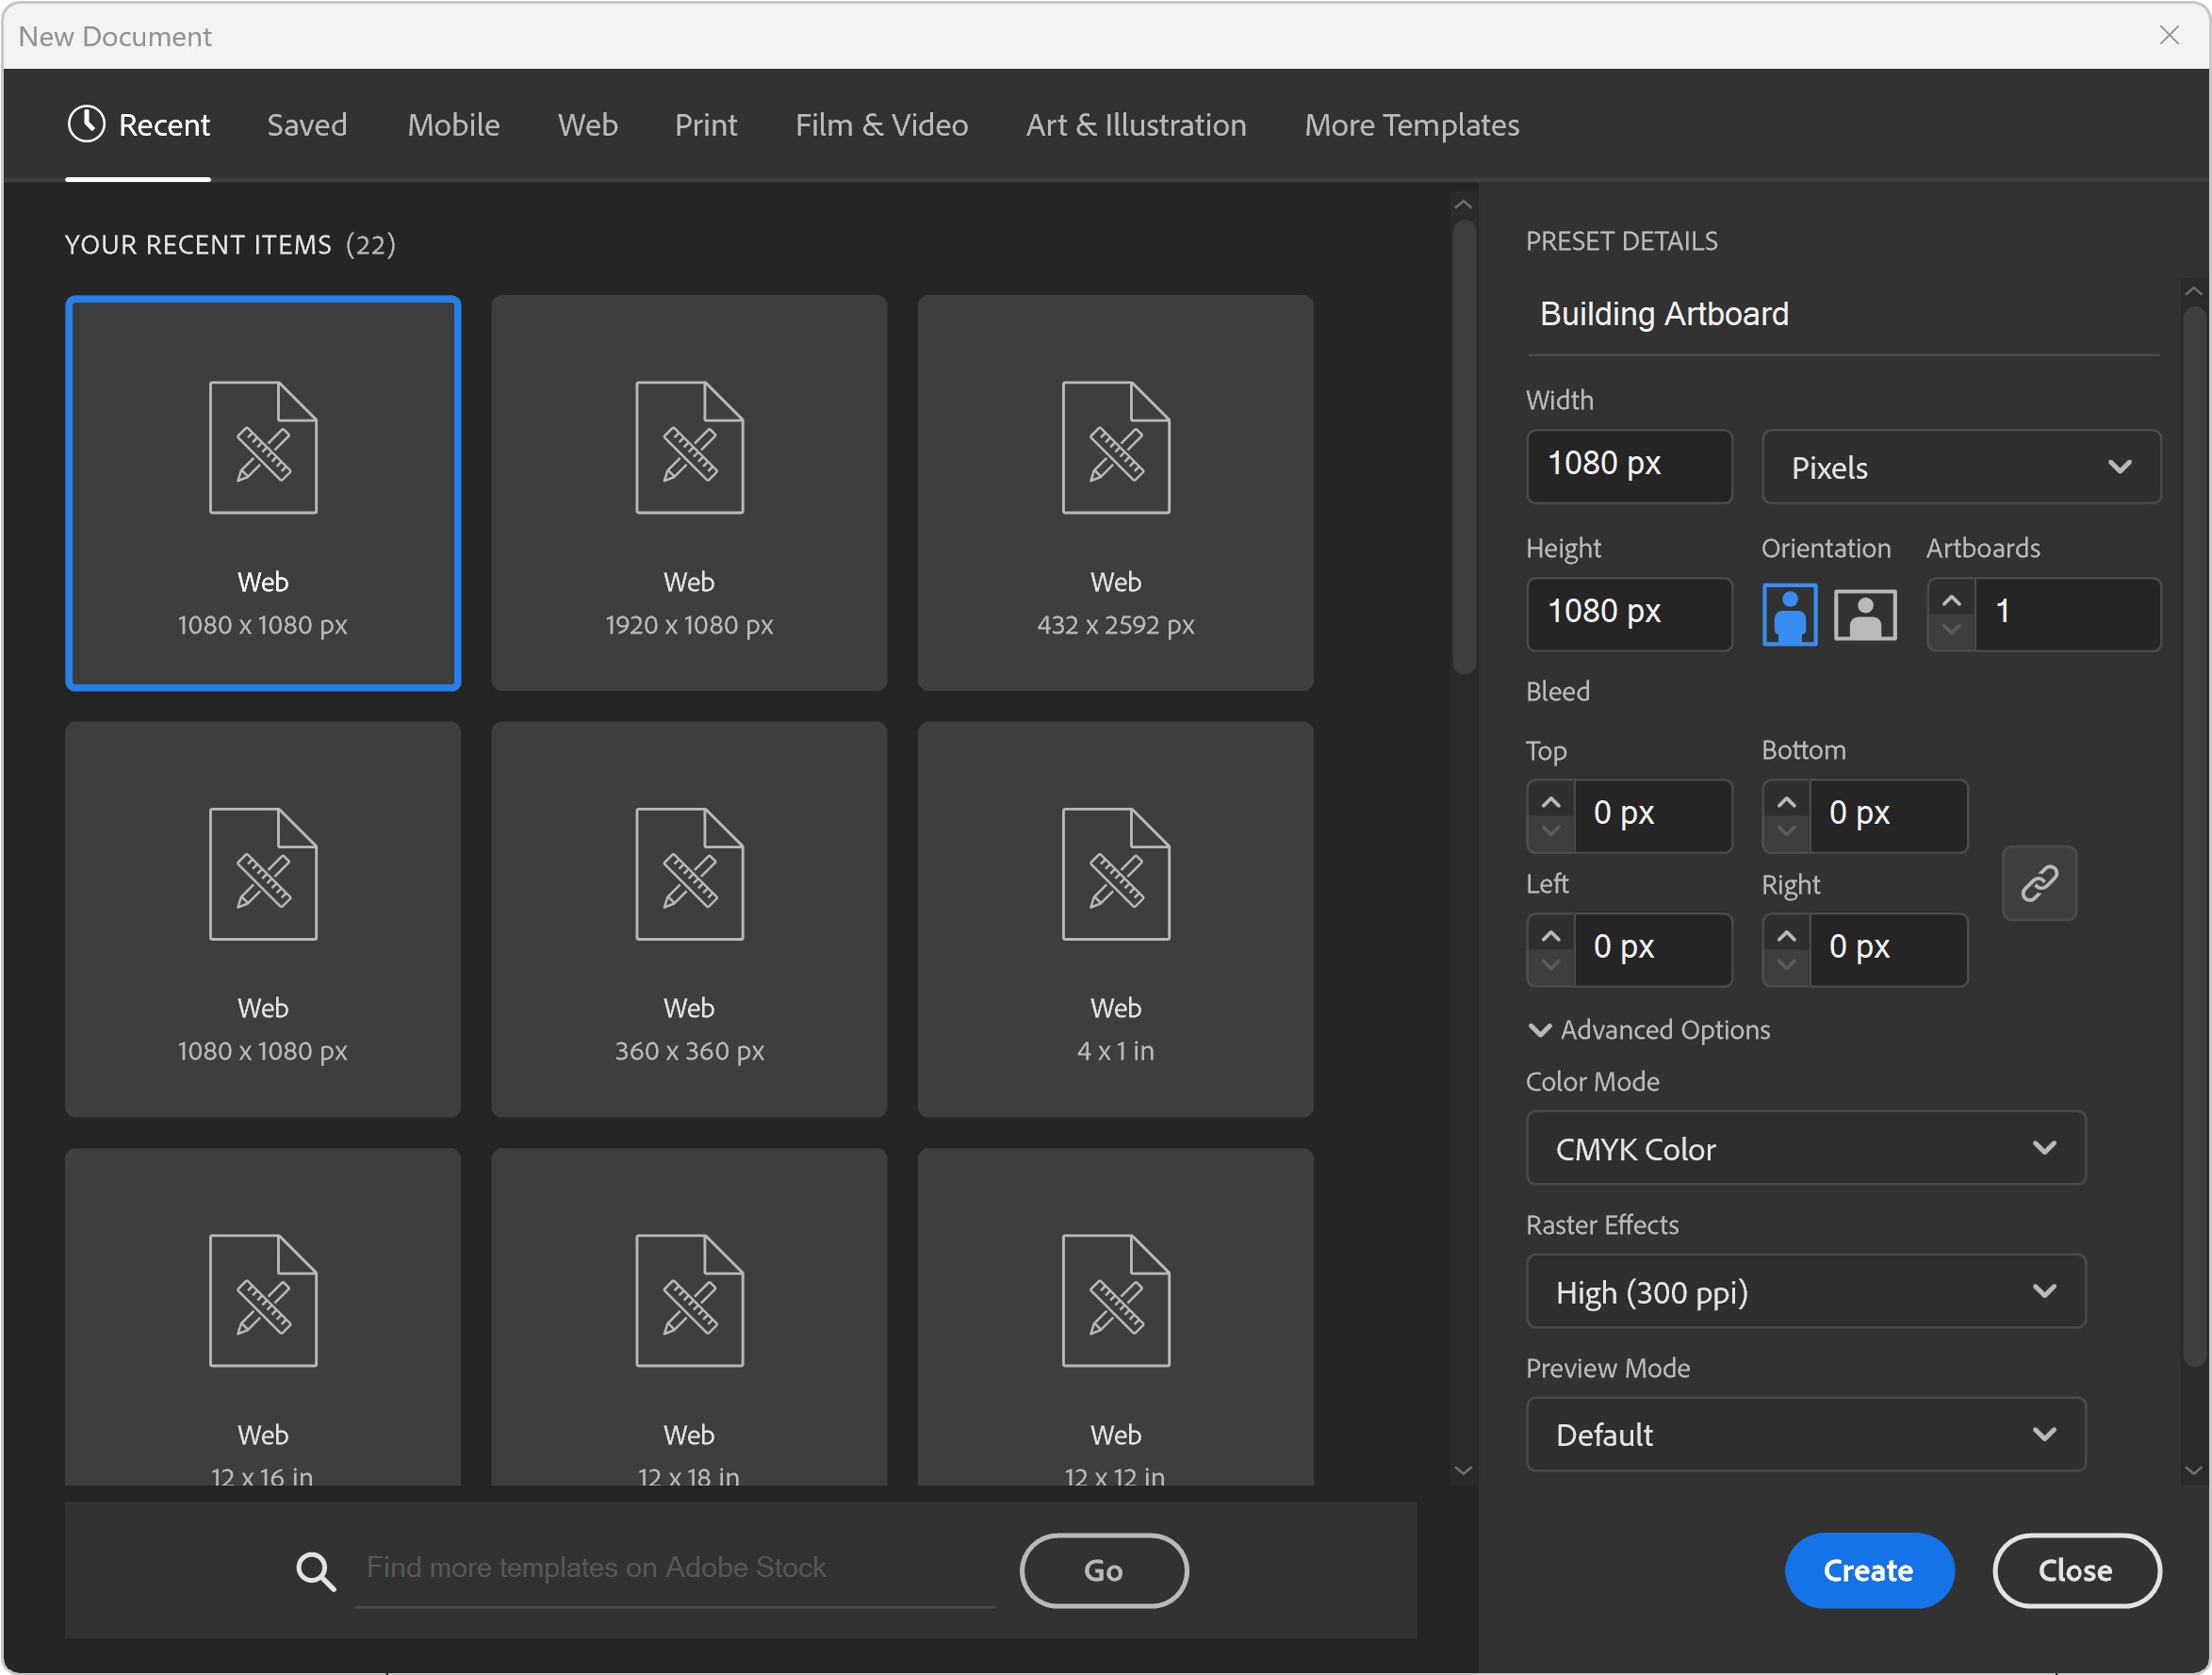
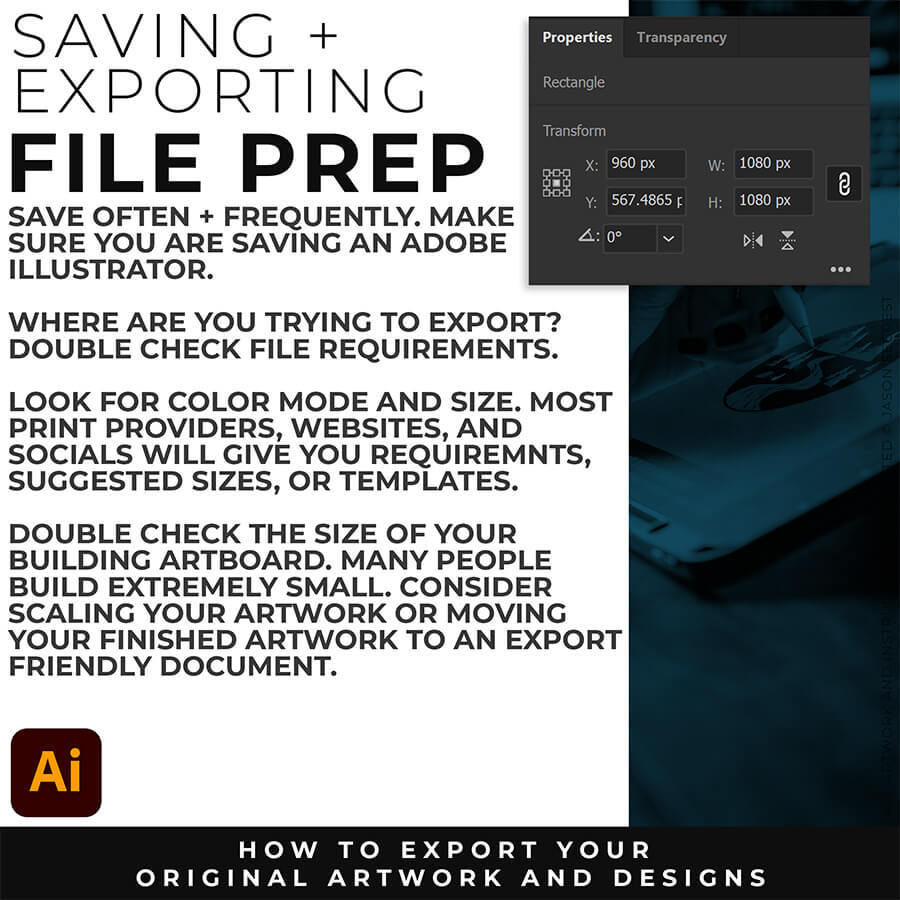
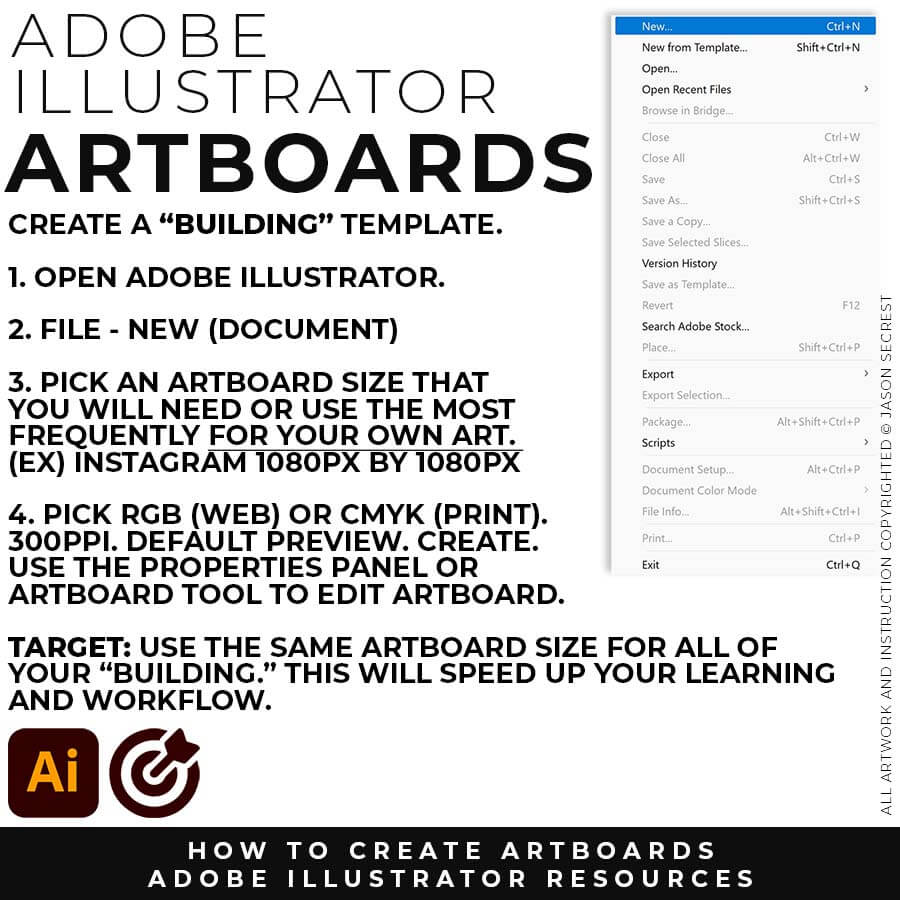
"BUILDING" ARTBOARD: I will recommend a (1080px by 1080px, 300PPI, RGB) as your Initial Artboard Size. The Initial Artboard Size can be changed at any point without ruining your own artwork. Use the Properties Panel to Scale Artwork and Artboards. LEARNING TARGET (1): Create a "Building Template" that includes Artboard Size, Resource Type, and Template Layers. LEARNING TARGET (2): Pick a "Building" Artboard Size you can use for your own Artwork and Social Media Postings.
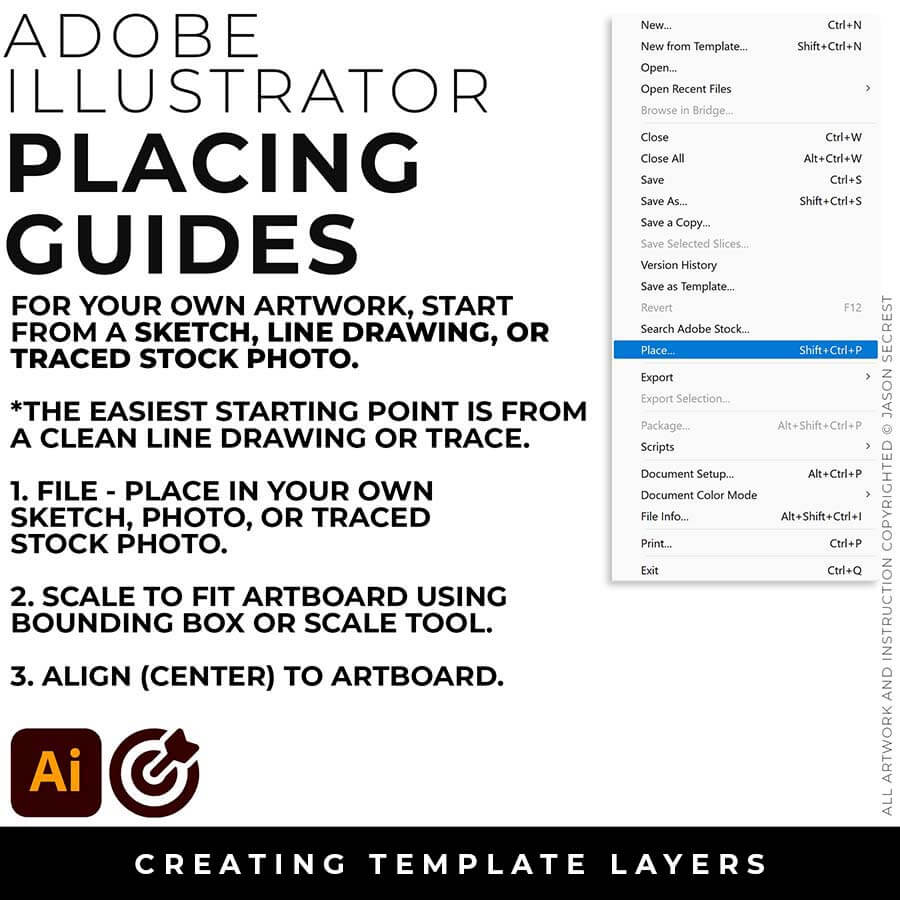
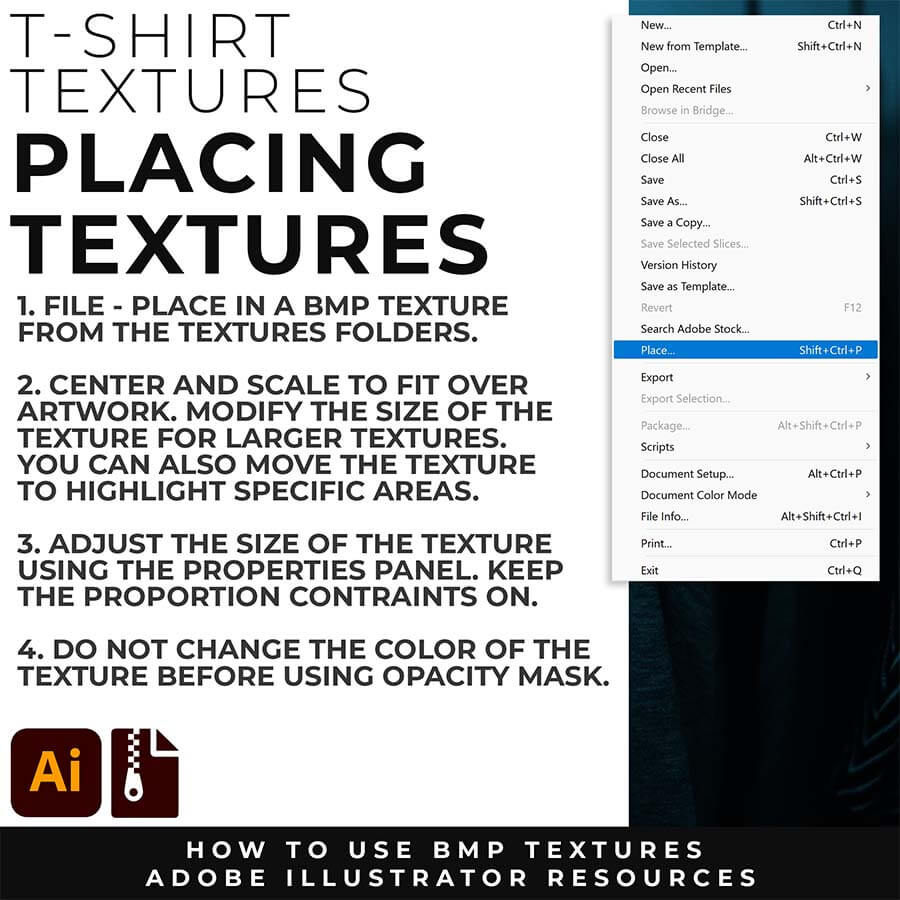
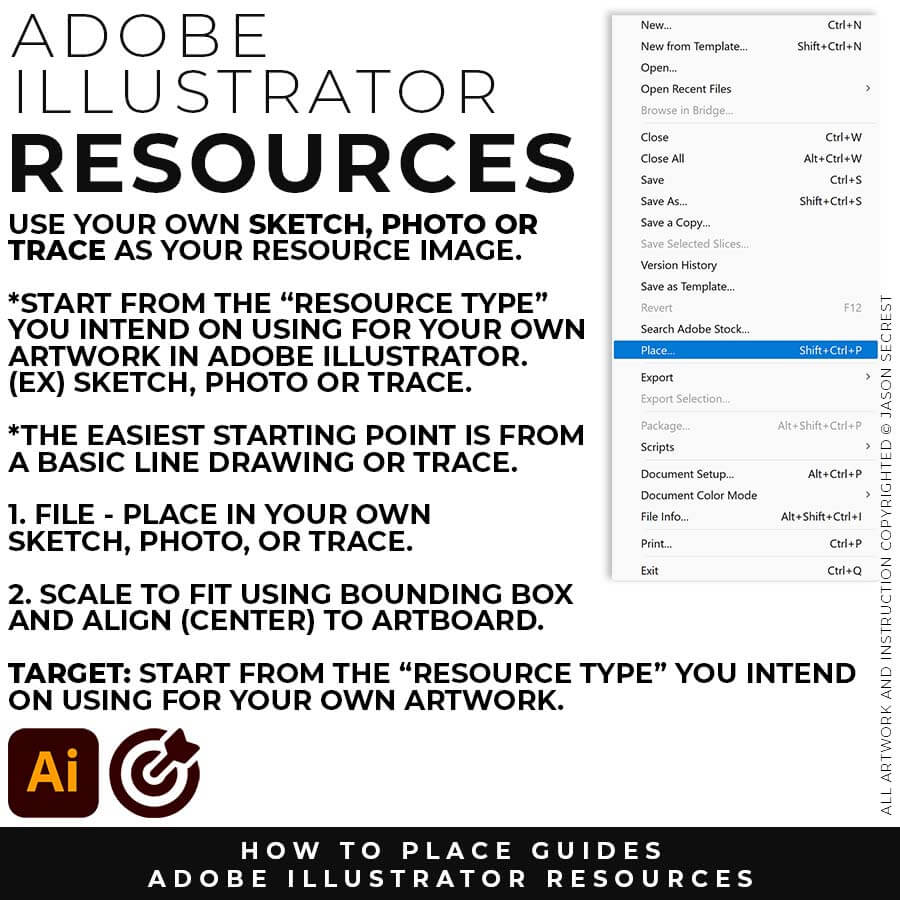
FILE - PLACE: File -Place in your own Drawing, Sketch, or Traced Stock Photo. I recommend starting from a Clean Line Drawing or a simple Traced Stock Photo for your artwork and designs.
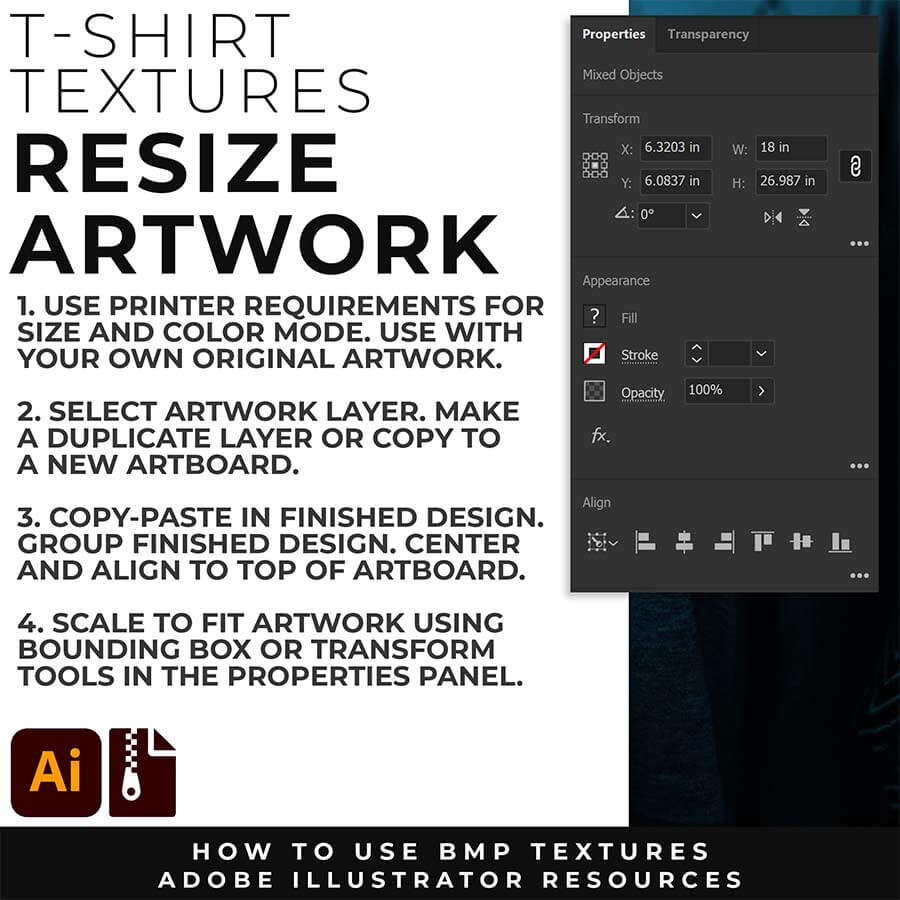
SCALE TO FIT: You can modify the size of the artwork using the Bounding Box or Scale Tool. Scale to Fit Artbaord. Align the your Artwork to the center of the Artbaord using the Align Panel.
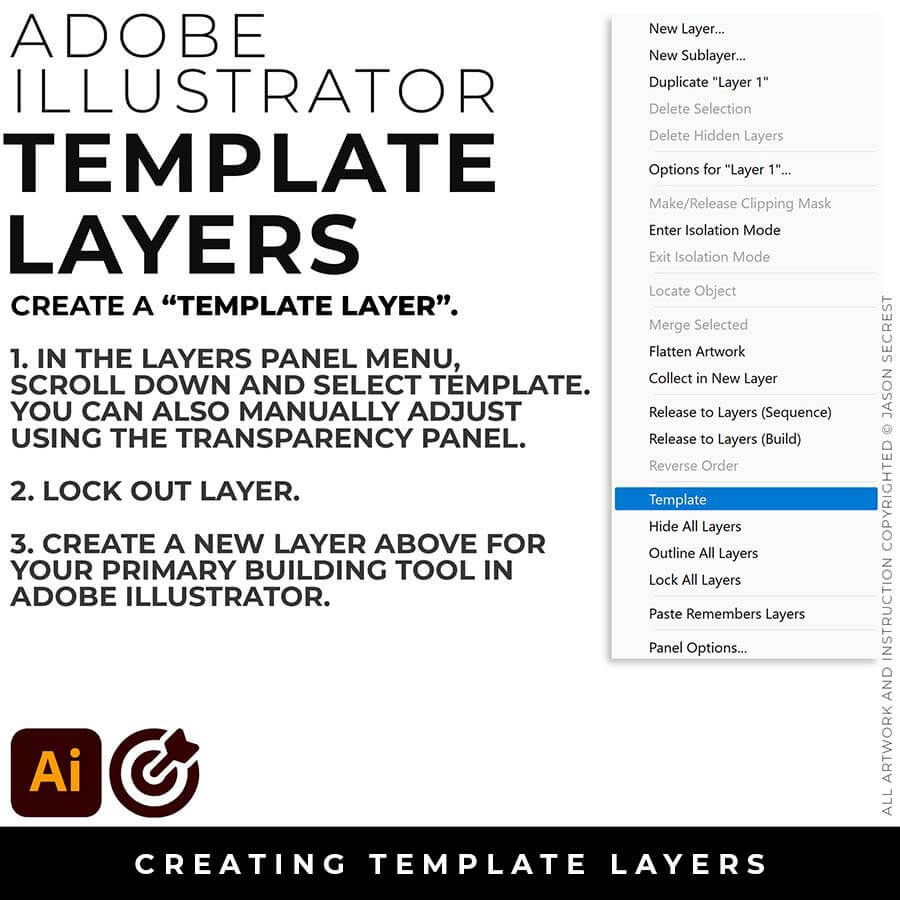
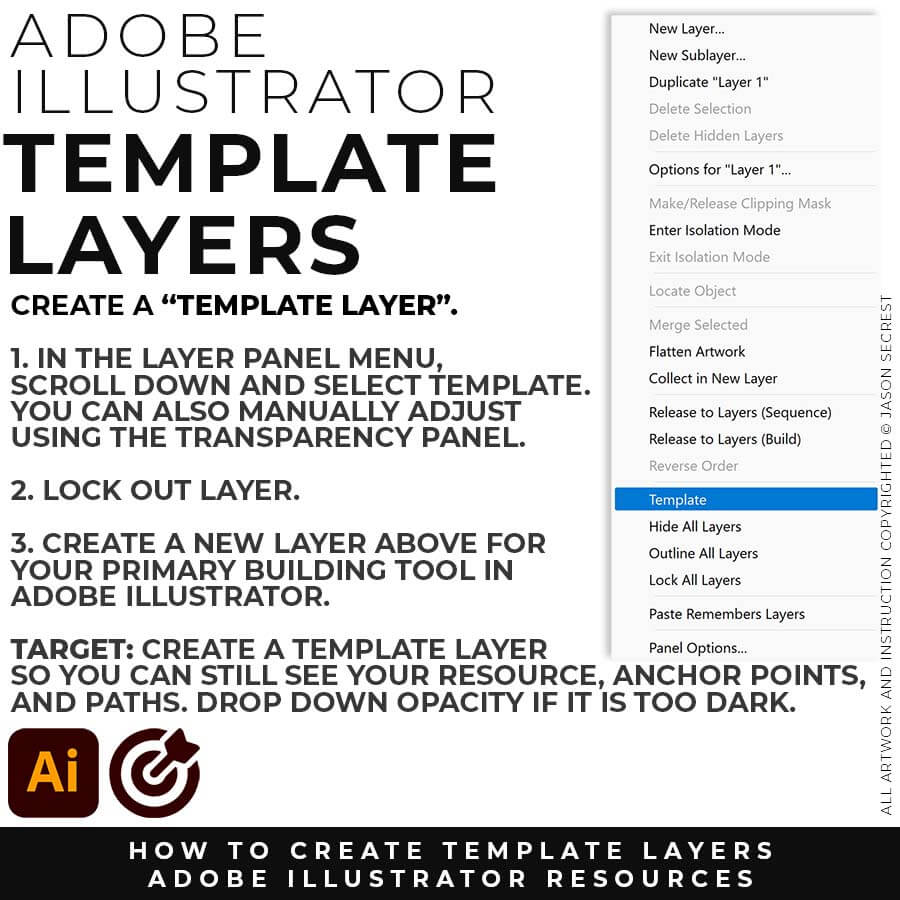
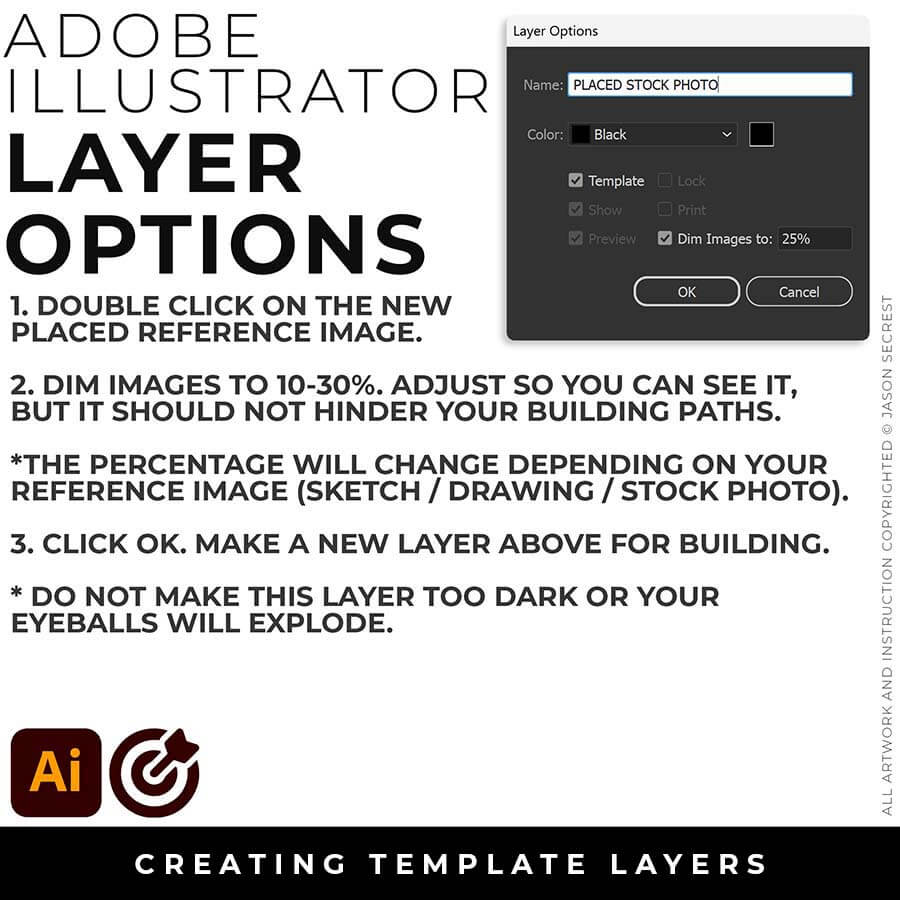
TEMPLATE LAYER: In the Layers Panel, drop down in the menu for Template (50%) or double click on the layer for properties (Dim 10-30%). Lock Layer. Create a New Layer above for Building.
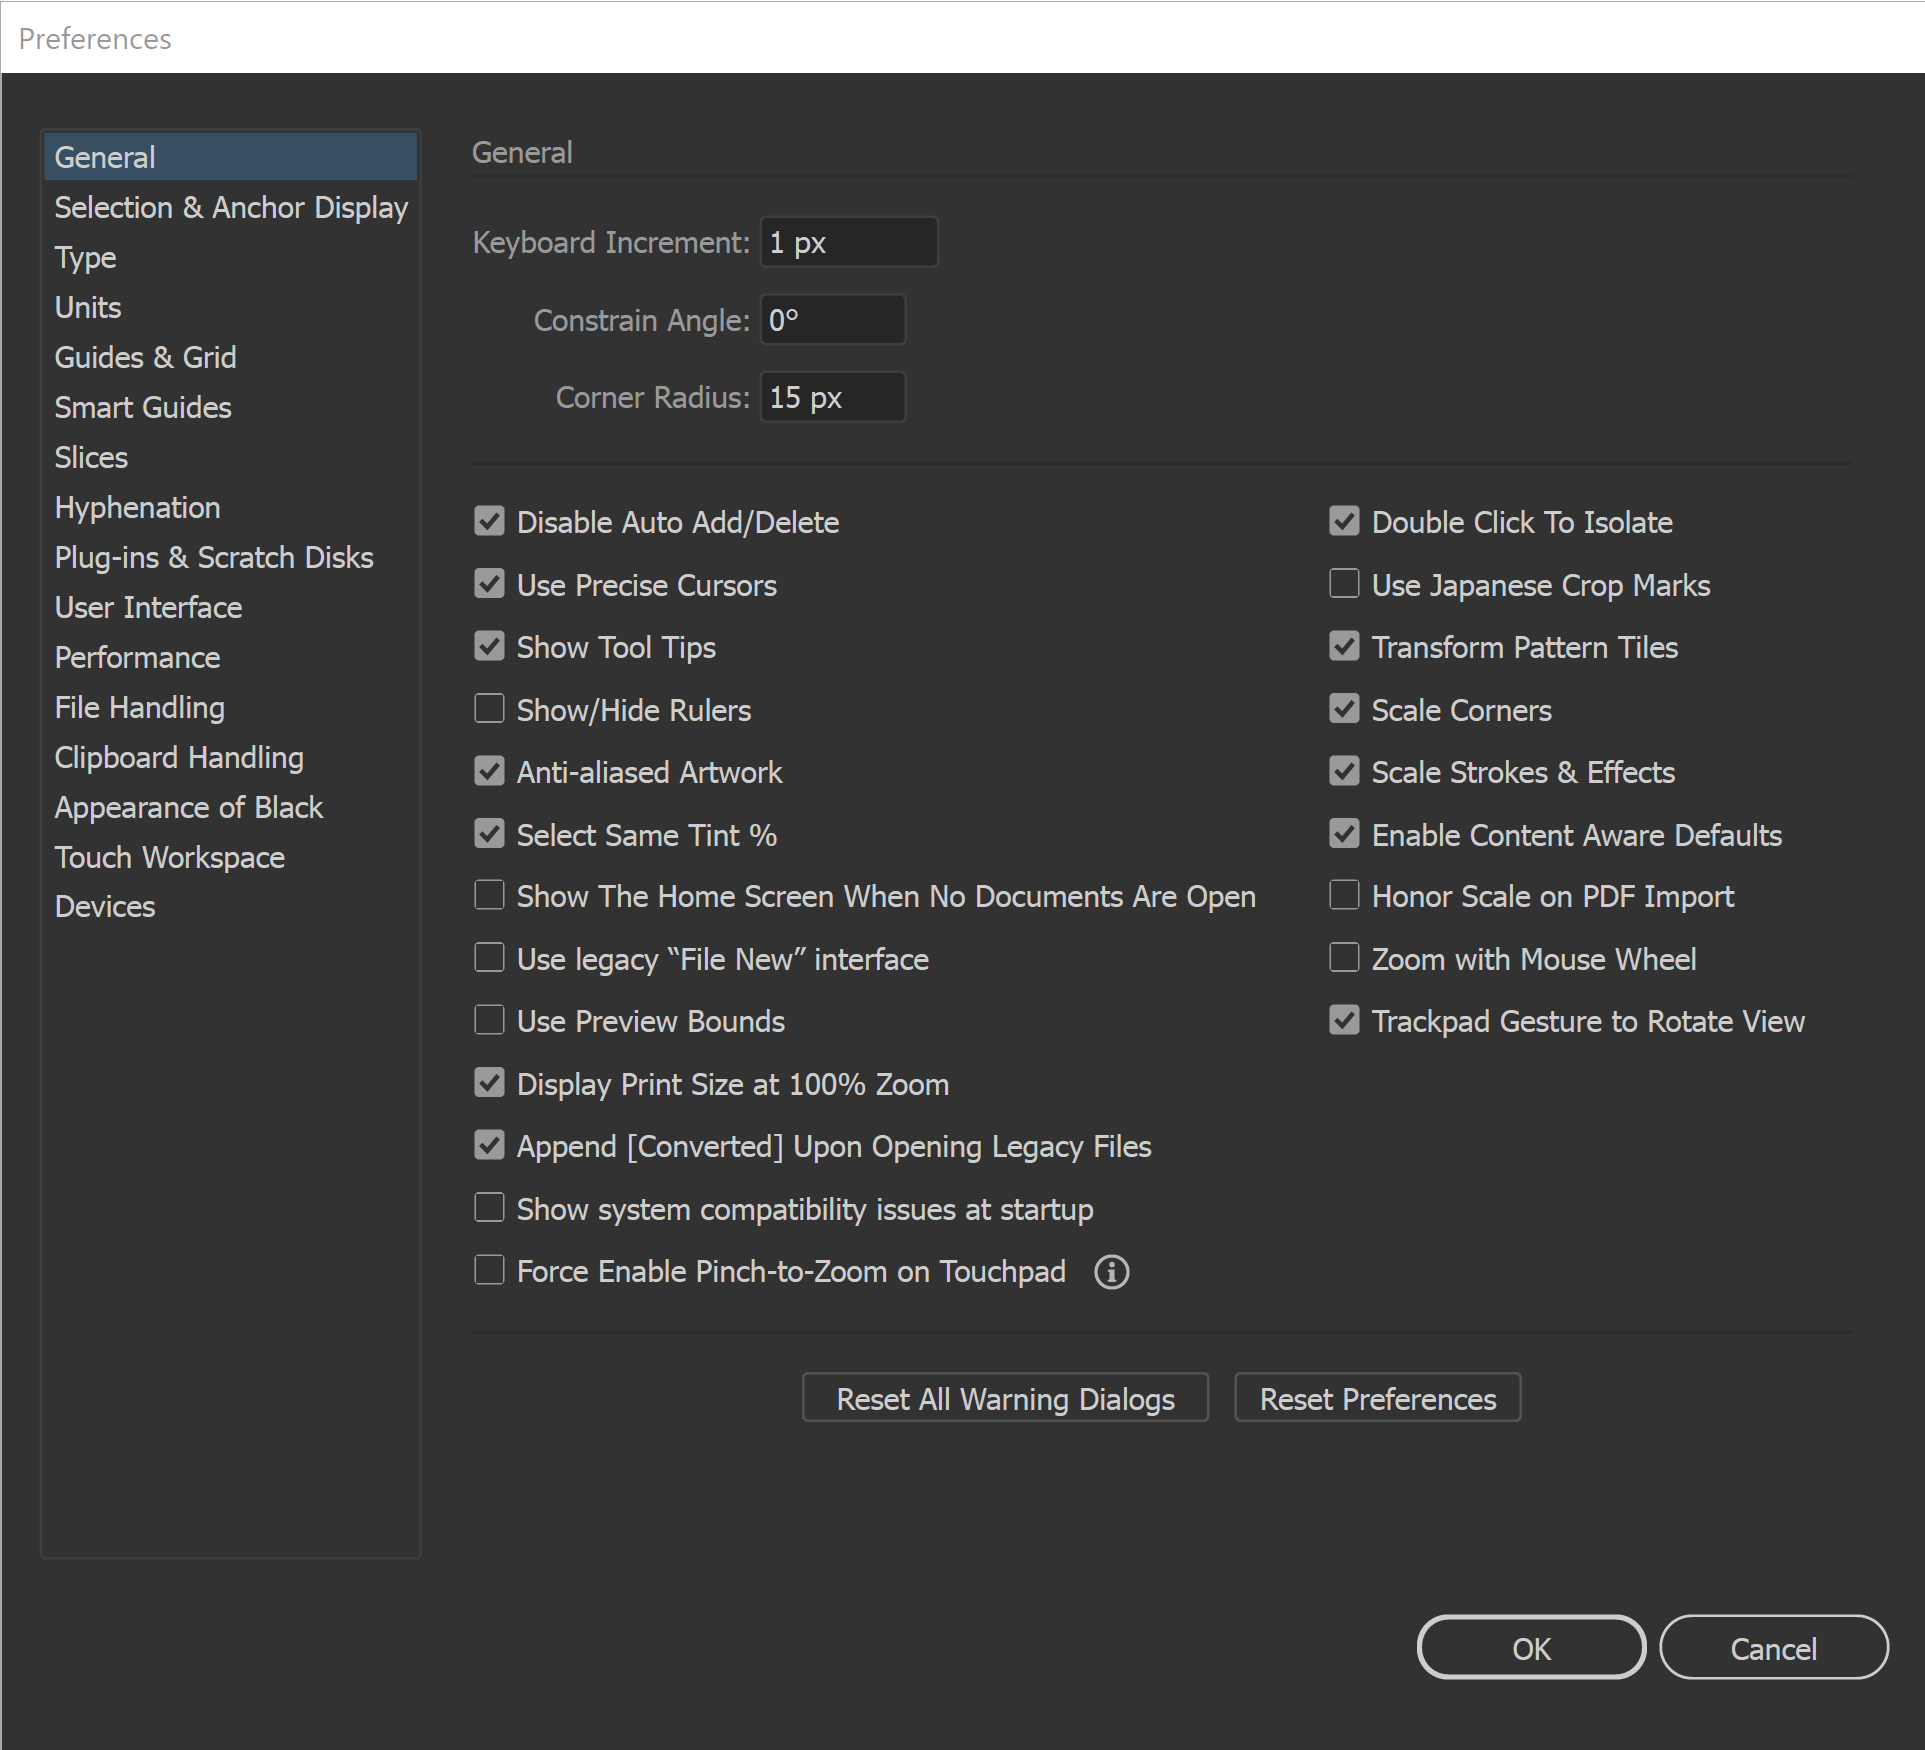
GENERAL PREFERENCES: All of our initial preferences are designed to gain more control over what you are clicking on. The more you can zoom in and see your anchors and handles the better. You can adjust the size of your Anchors and Handles under Selection and Anchor Display. Under your General Settings, make sure that Disable Auto Add/Delete is Selected.
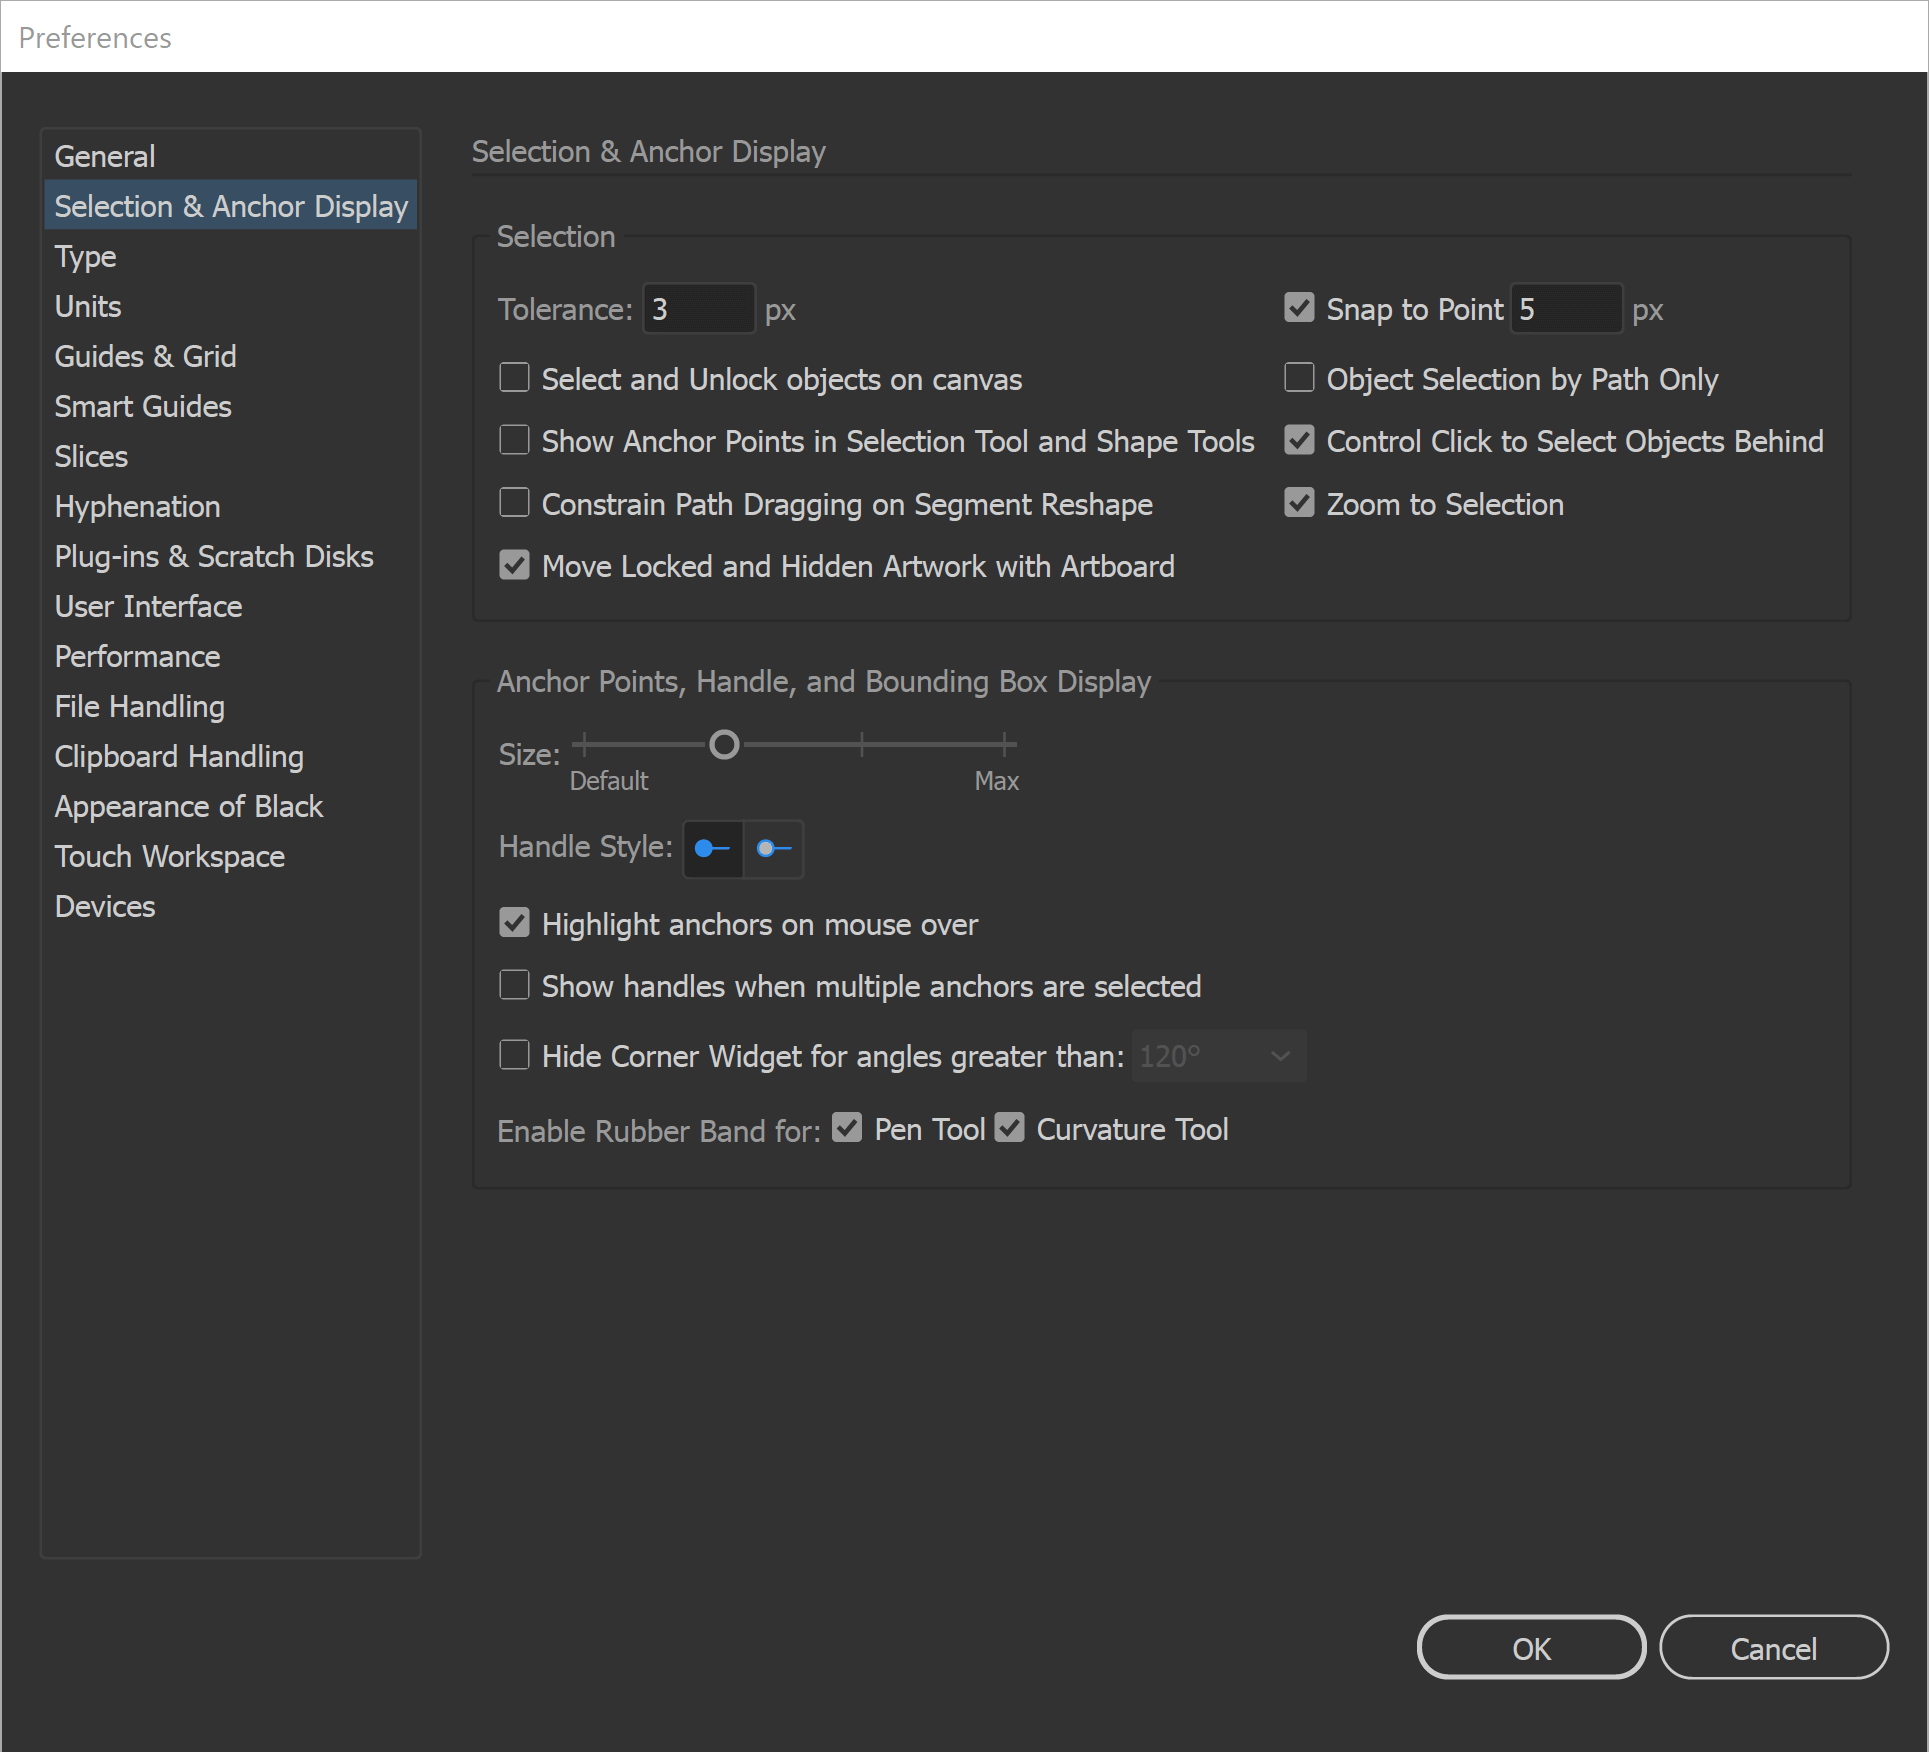
SELECTION TOOLS: The Direct Selection Tool can grab and adjust the Anchors, Handles, and Paths. It is worth having your Smart Guides Path Labels Turned On so you know what the tool is selecting before dragging. The Selection Tool will move and select objects. I like using the Bounding Box for my Transform Tools, Turn On under View. I recommend this for Quick Scaling.
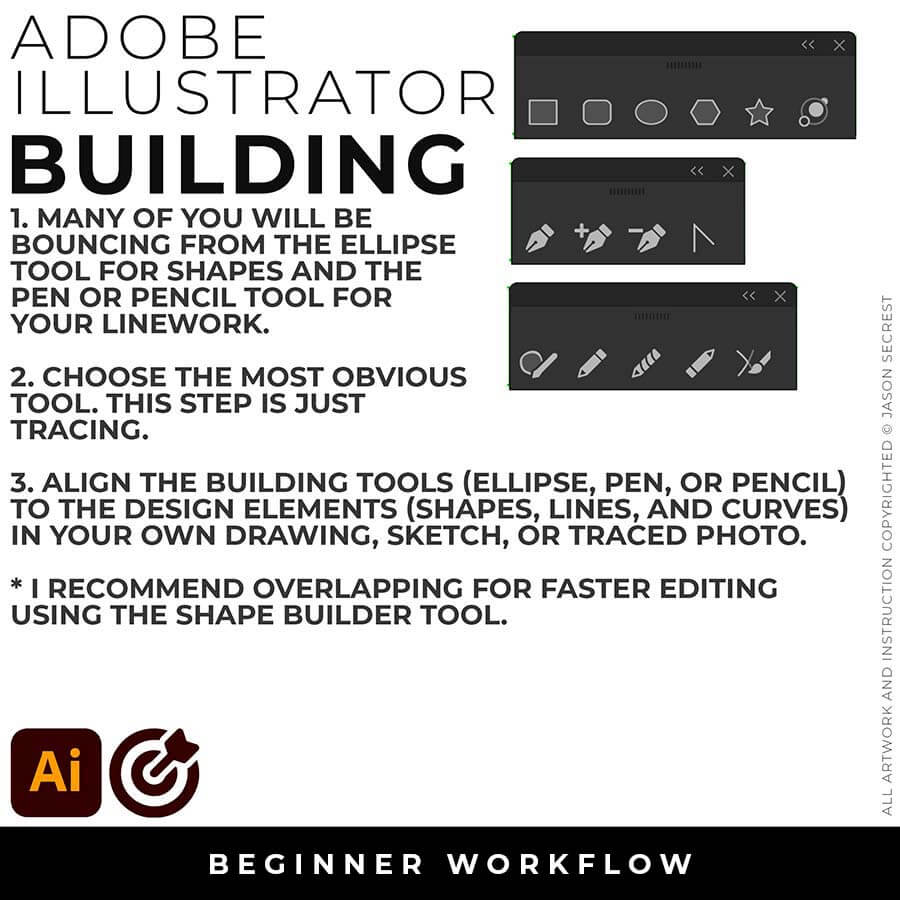
PRIMARY BUILDING: I will use Shapes, Pencil, and Pen Tools in Adobe Illustrator as my Primary Building Tools. Notice I have simplified my drawings and sketches to make this step feel like tracing.
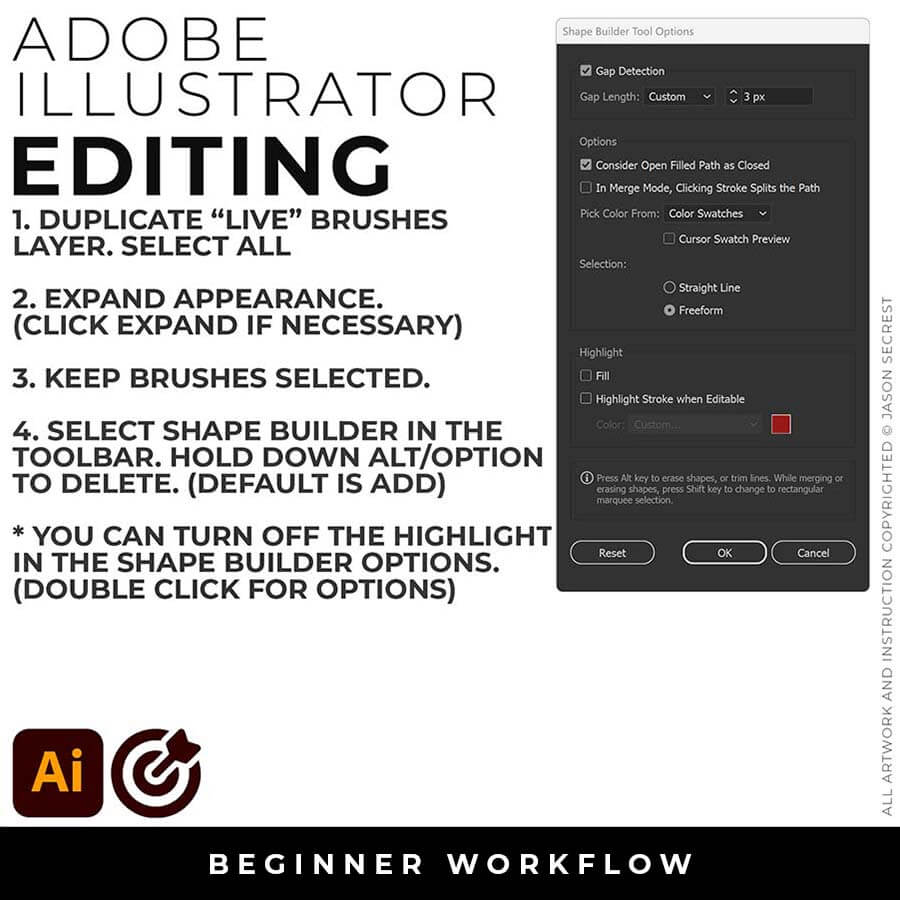
VARIATION + EDITING: I will apply Brush Libraries for my Line Variation. Notice I am using Expanded Editing Tools to clean up my Paths before moving on to the Coloring Step.
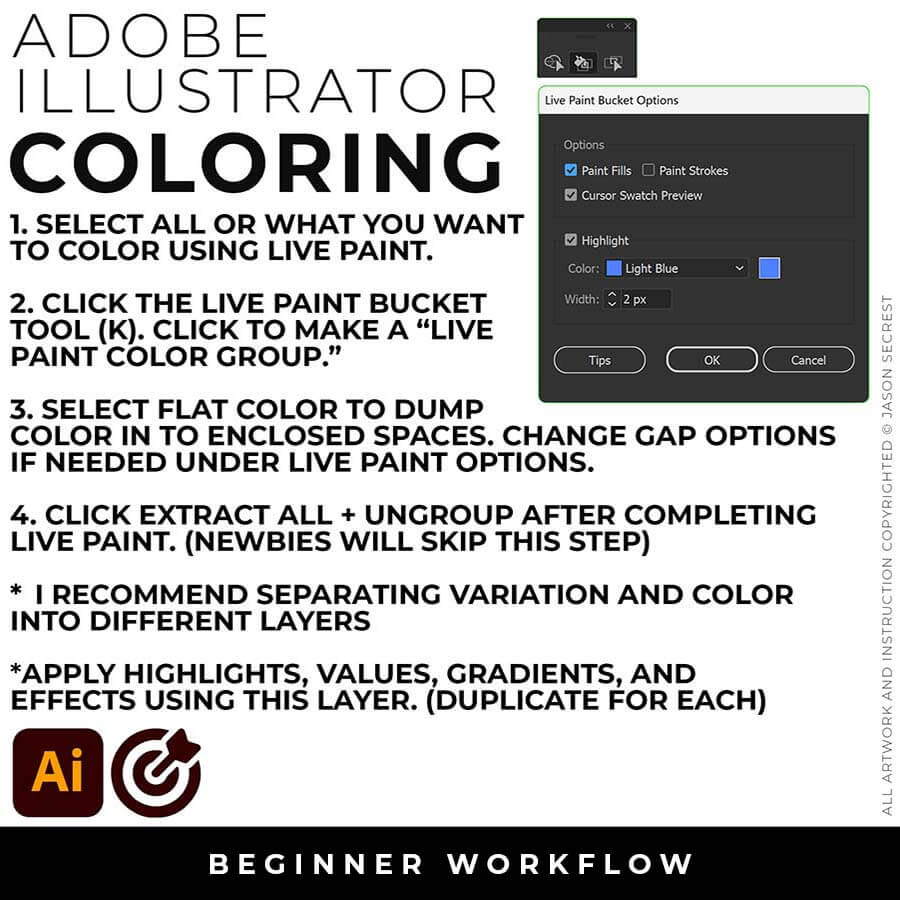
ADVANCED COLORING: I will use Live Paint and the Live Paint Bucket to create my Basic Fills. Notice I have duplicated out the Flat Color Layer for Highlights, Shadows, Gradients, and Effects.
Align to Selection
Always think what you are aligning to and then do a double check of your settings. We will typically align objects (to selection) and then group them to maintain.
Thought Process
Most of you will actually choose the correct Align Button without any trouble, the issue is not checking if it is Aligning to artboard or selection. It will crash into the middle of the artboard so it is pretty obvious when Align to Artboard is Selected.
Align to Artboard
If you are building in the center of an artboard this is extremely helpful or it can be frustrating. The main trick is to Group Objects and then Align them to Artboard. Again, they will crash into the middle to let you know they are not grouped.
Group Objects
Easiest way to think about grouping is when you have two objects aligned on opposite sites of the center line. These will be the objects that will crash into the center when Aligning to Artboard.
Pathfinder Minus Front
1. Have 2 overlapping shapes selected. One shape will be in the front and this is the cut away shape. (I colored this one garbage green since it will be trashed after we click minus front). (Use fills only)
Shape Builder (alt/option) Delete
2. Have 2 overlapping shapes selected and click the Shape Builder tool. Hold down alt/option and click on areas you wish to be deleted. Wait for the shape to grey out. (Use fills only)
Pathfinder Unite
3. Have 2 or more overlapping shapes selected and click on the pathfinder unite button. The 2 shapes will merge together. (Use fills only)
Shape Builder- Combine Shapes
4. Have 2 or more shapes selected and then click on the shape builder tool. Click, Hold and drag across the shapes you wish to combine. Do NOT hold down alt/option.
Opening Color Swatches
Open the Swatch Window. On the bottom left hand corner you will see the Open Swatch Libraries icon. At the bottom of the drop-down menu you will see Open Other Library. Go to our resource folder in the Color Palettes folder to Open ASE files. The ASE files have been created to make your life easier while going through the Challenge Series. Once you open the Library- click on the folder icon next to the swatches to move them from the library to the swatches.
Coloring with Fills
One of the easiest and fastest ways of filling in your color is through using Fills. The main thing to look for is enclosed shaped. We have done nothing but build with Shapes so coloring is super easy. Keep this in mind as you are going through the other tutorials where we don't have any shapes.
Gradient Panel
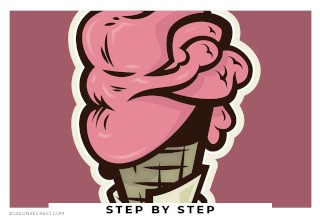
Select each color using the Magic Wand Tool (Adjust to Tolerance 5) each color. Add on a Radial Gradient to the frosting layers (3). Use the lightest and Darkest Color Swatch from the color set of 3. Adjust the slider to control where the values hit. Troubleshooting: Double check your fill is in front and not your stroke.
Gradient Tool
You can use the Gradient Tool to gain some control over where the gradient hits on your shapes. The tool will control the same features that are in the panel. I use the tool when I don't want to guess and check angle degrees or aspect ratio percentages.